Critical Analysis

CRITICAL REVIEW/ Final Major Project

Student Name: Alisha Salthill Pathway: Fashion and textiles 

FMP Title: Traits 

To be handed in alongside your FMP hand-in

1.Briefly describe the context of your project and how you used a range of critical perspectives and approaches to initiate your idea.

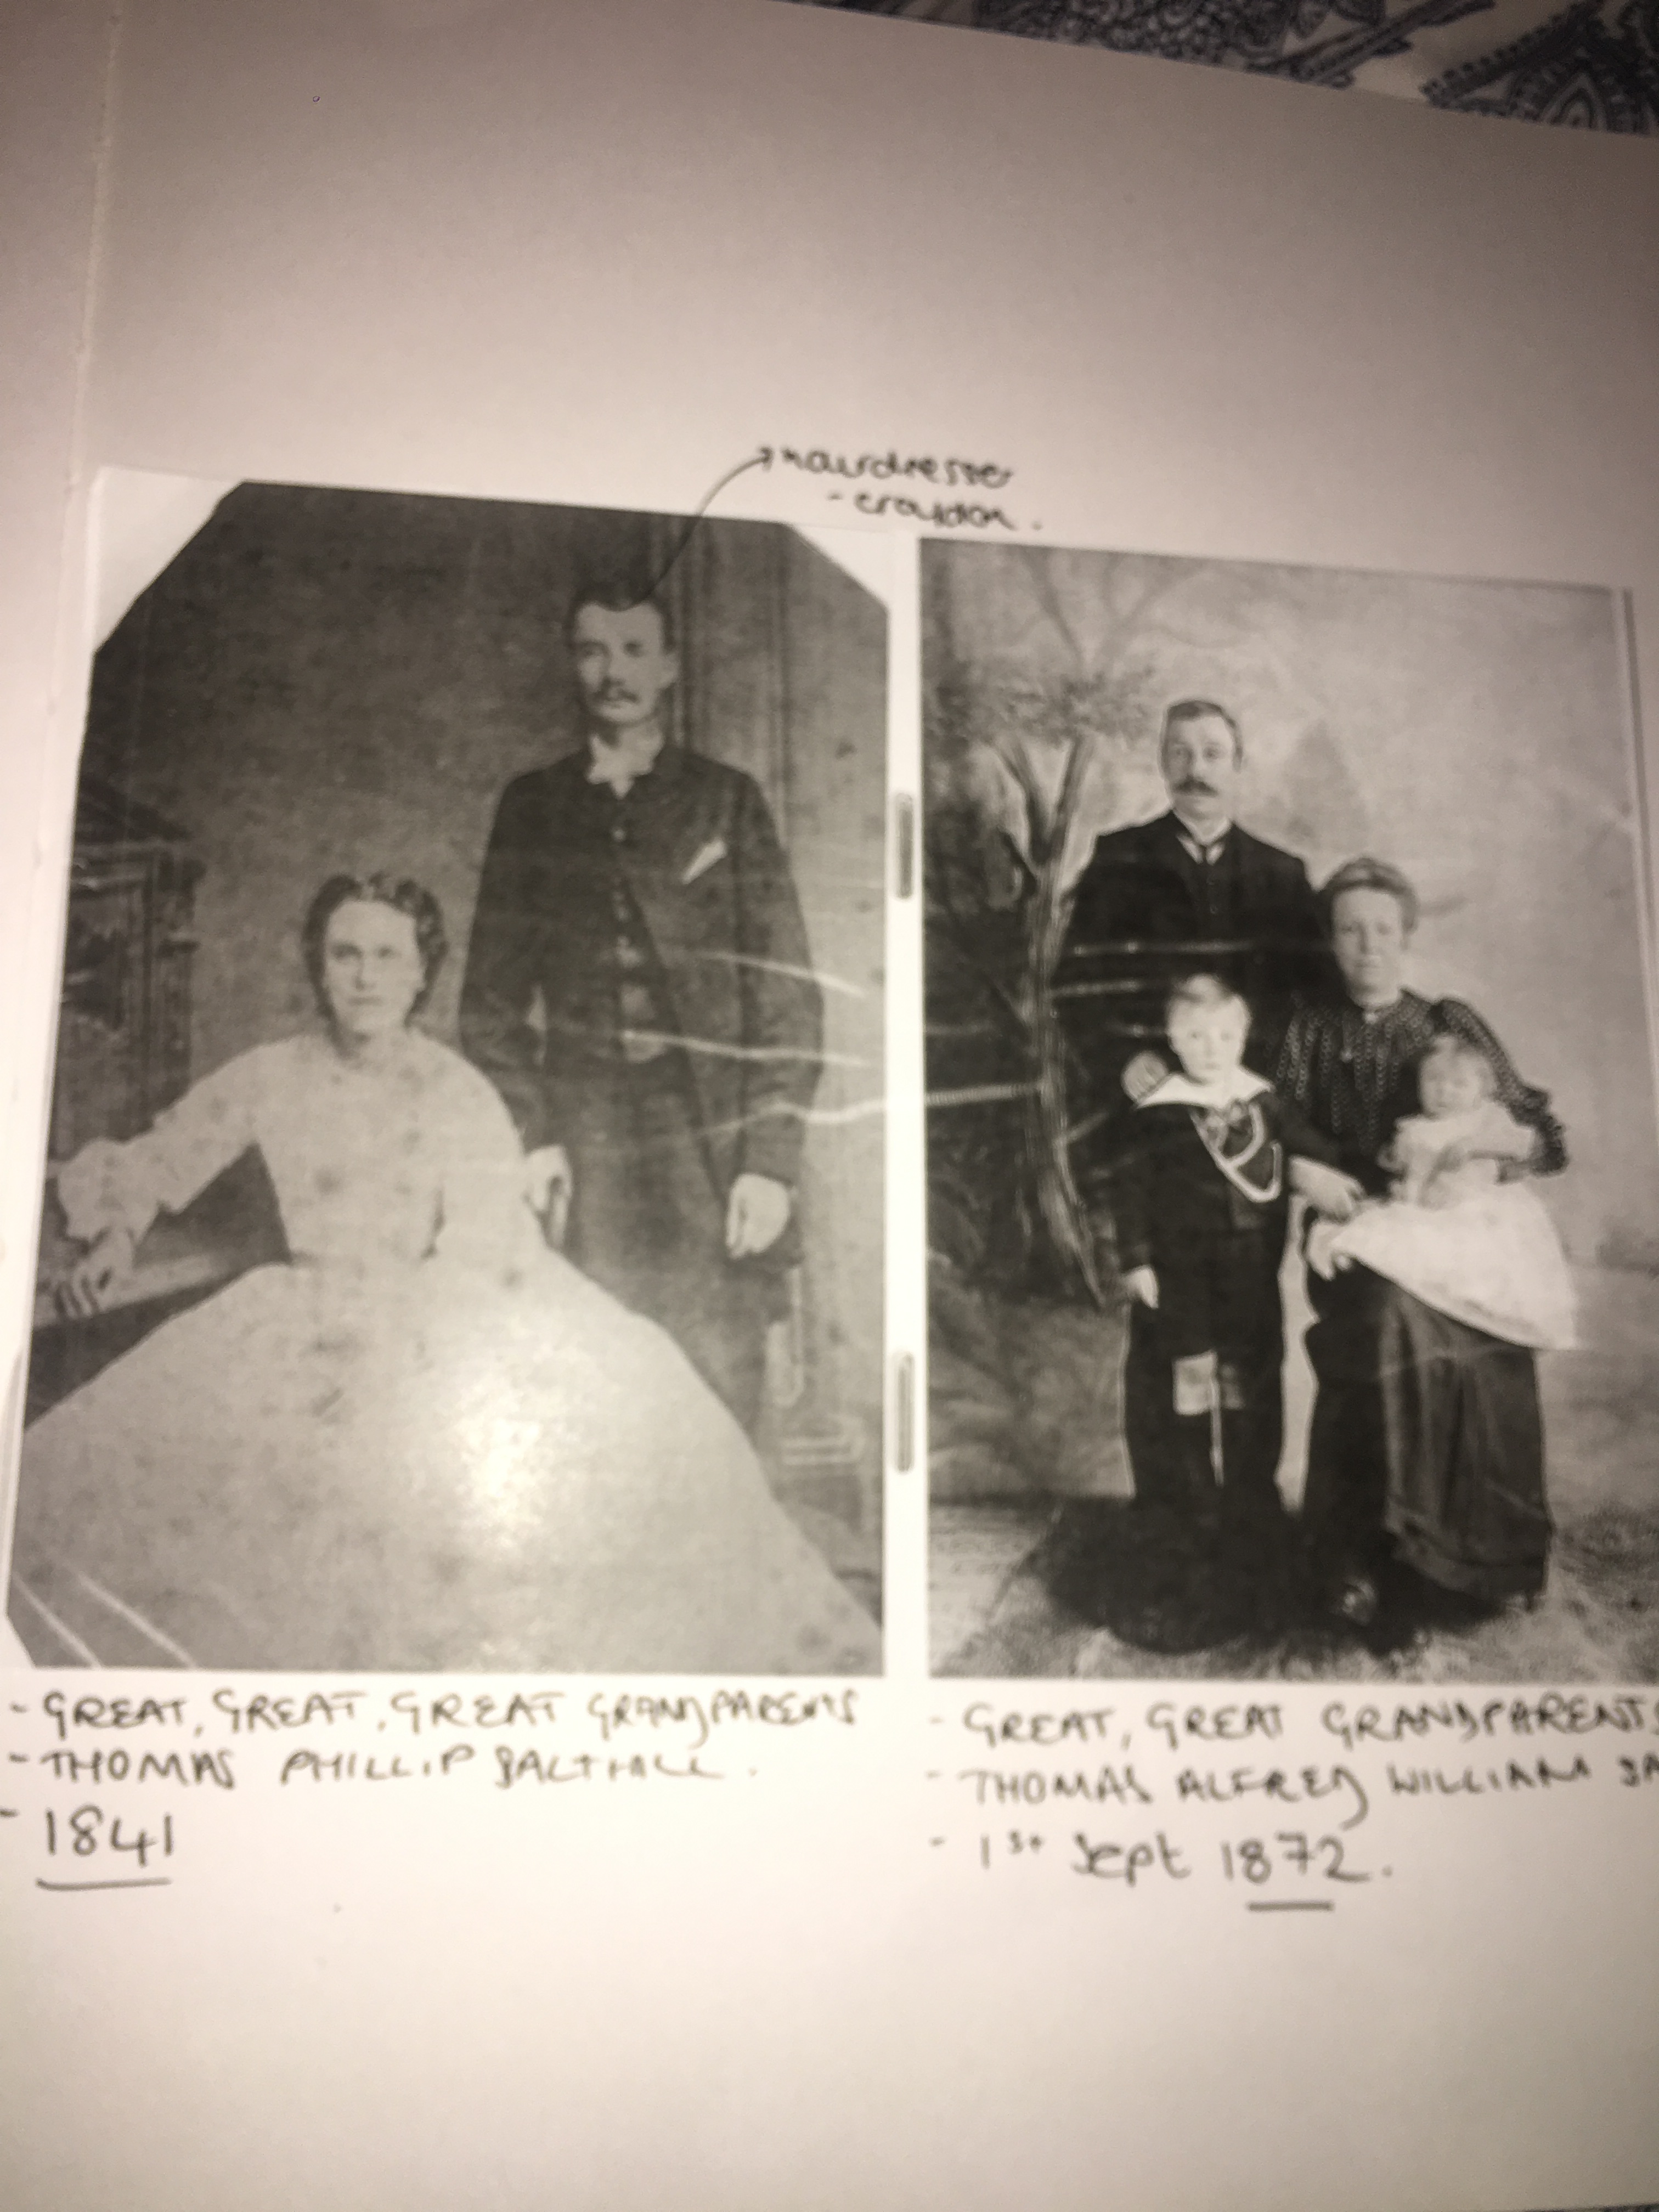
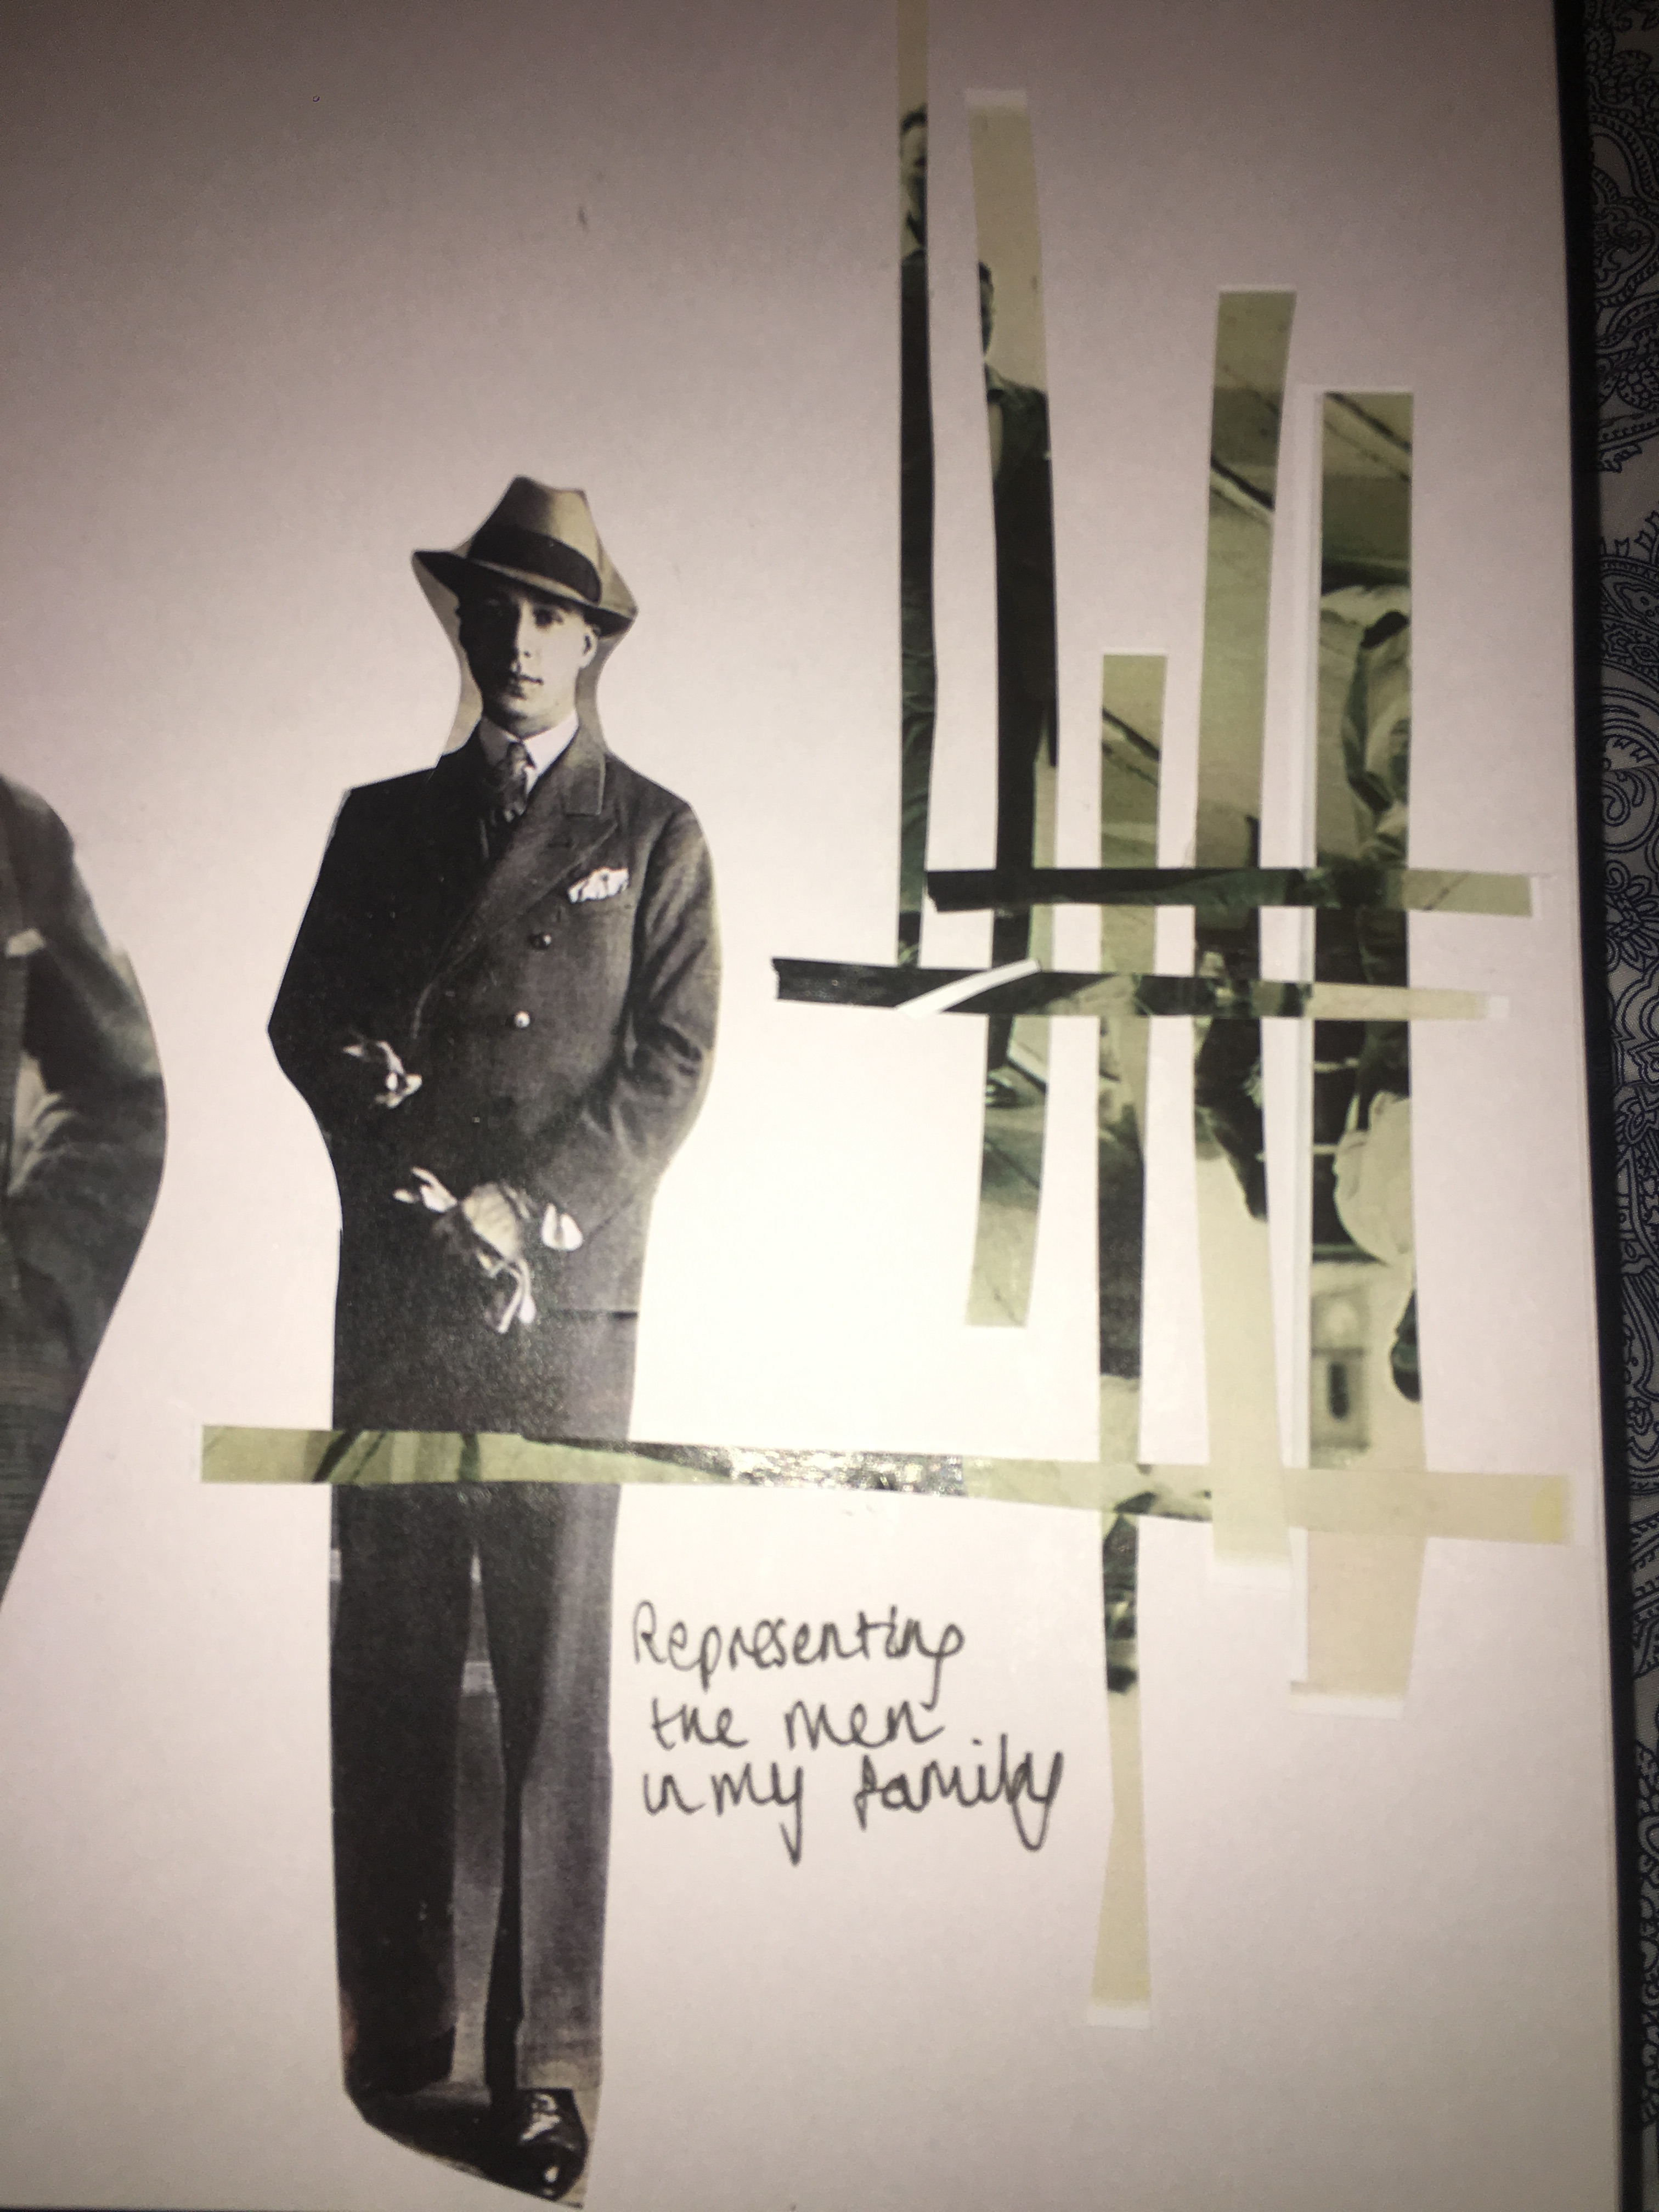
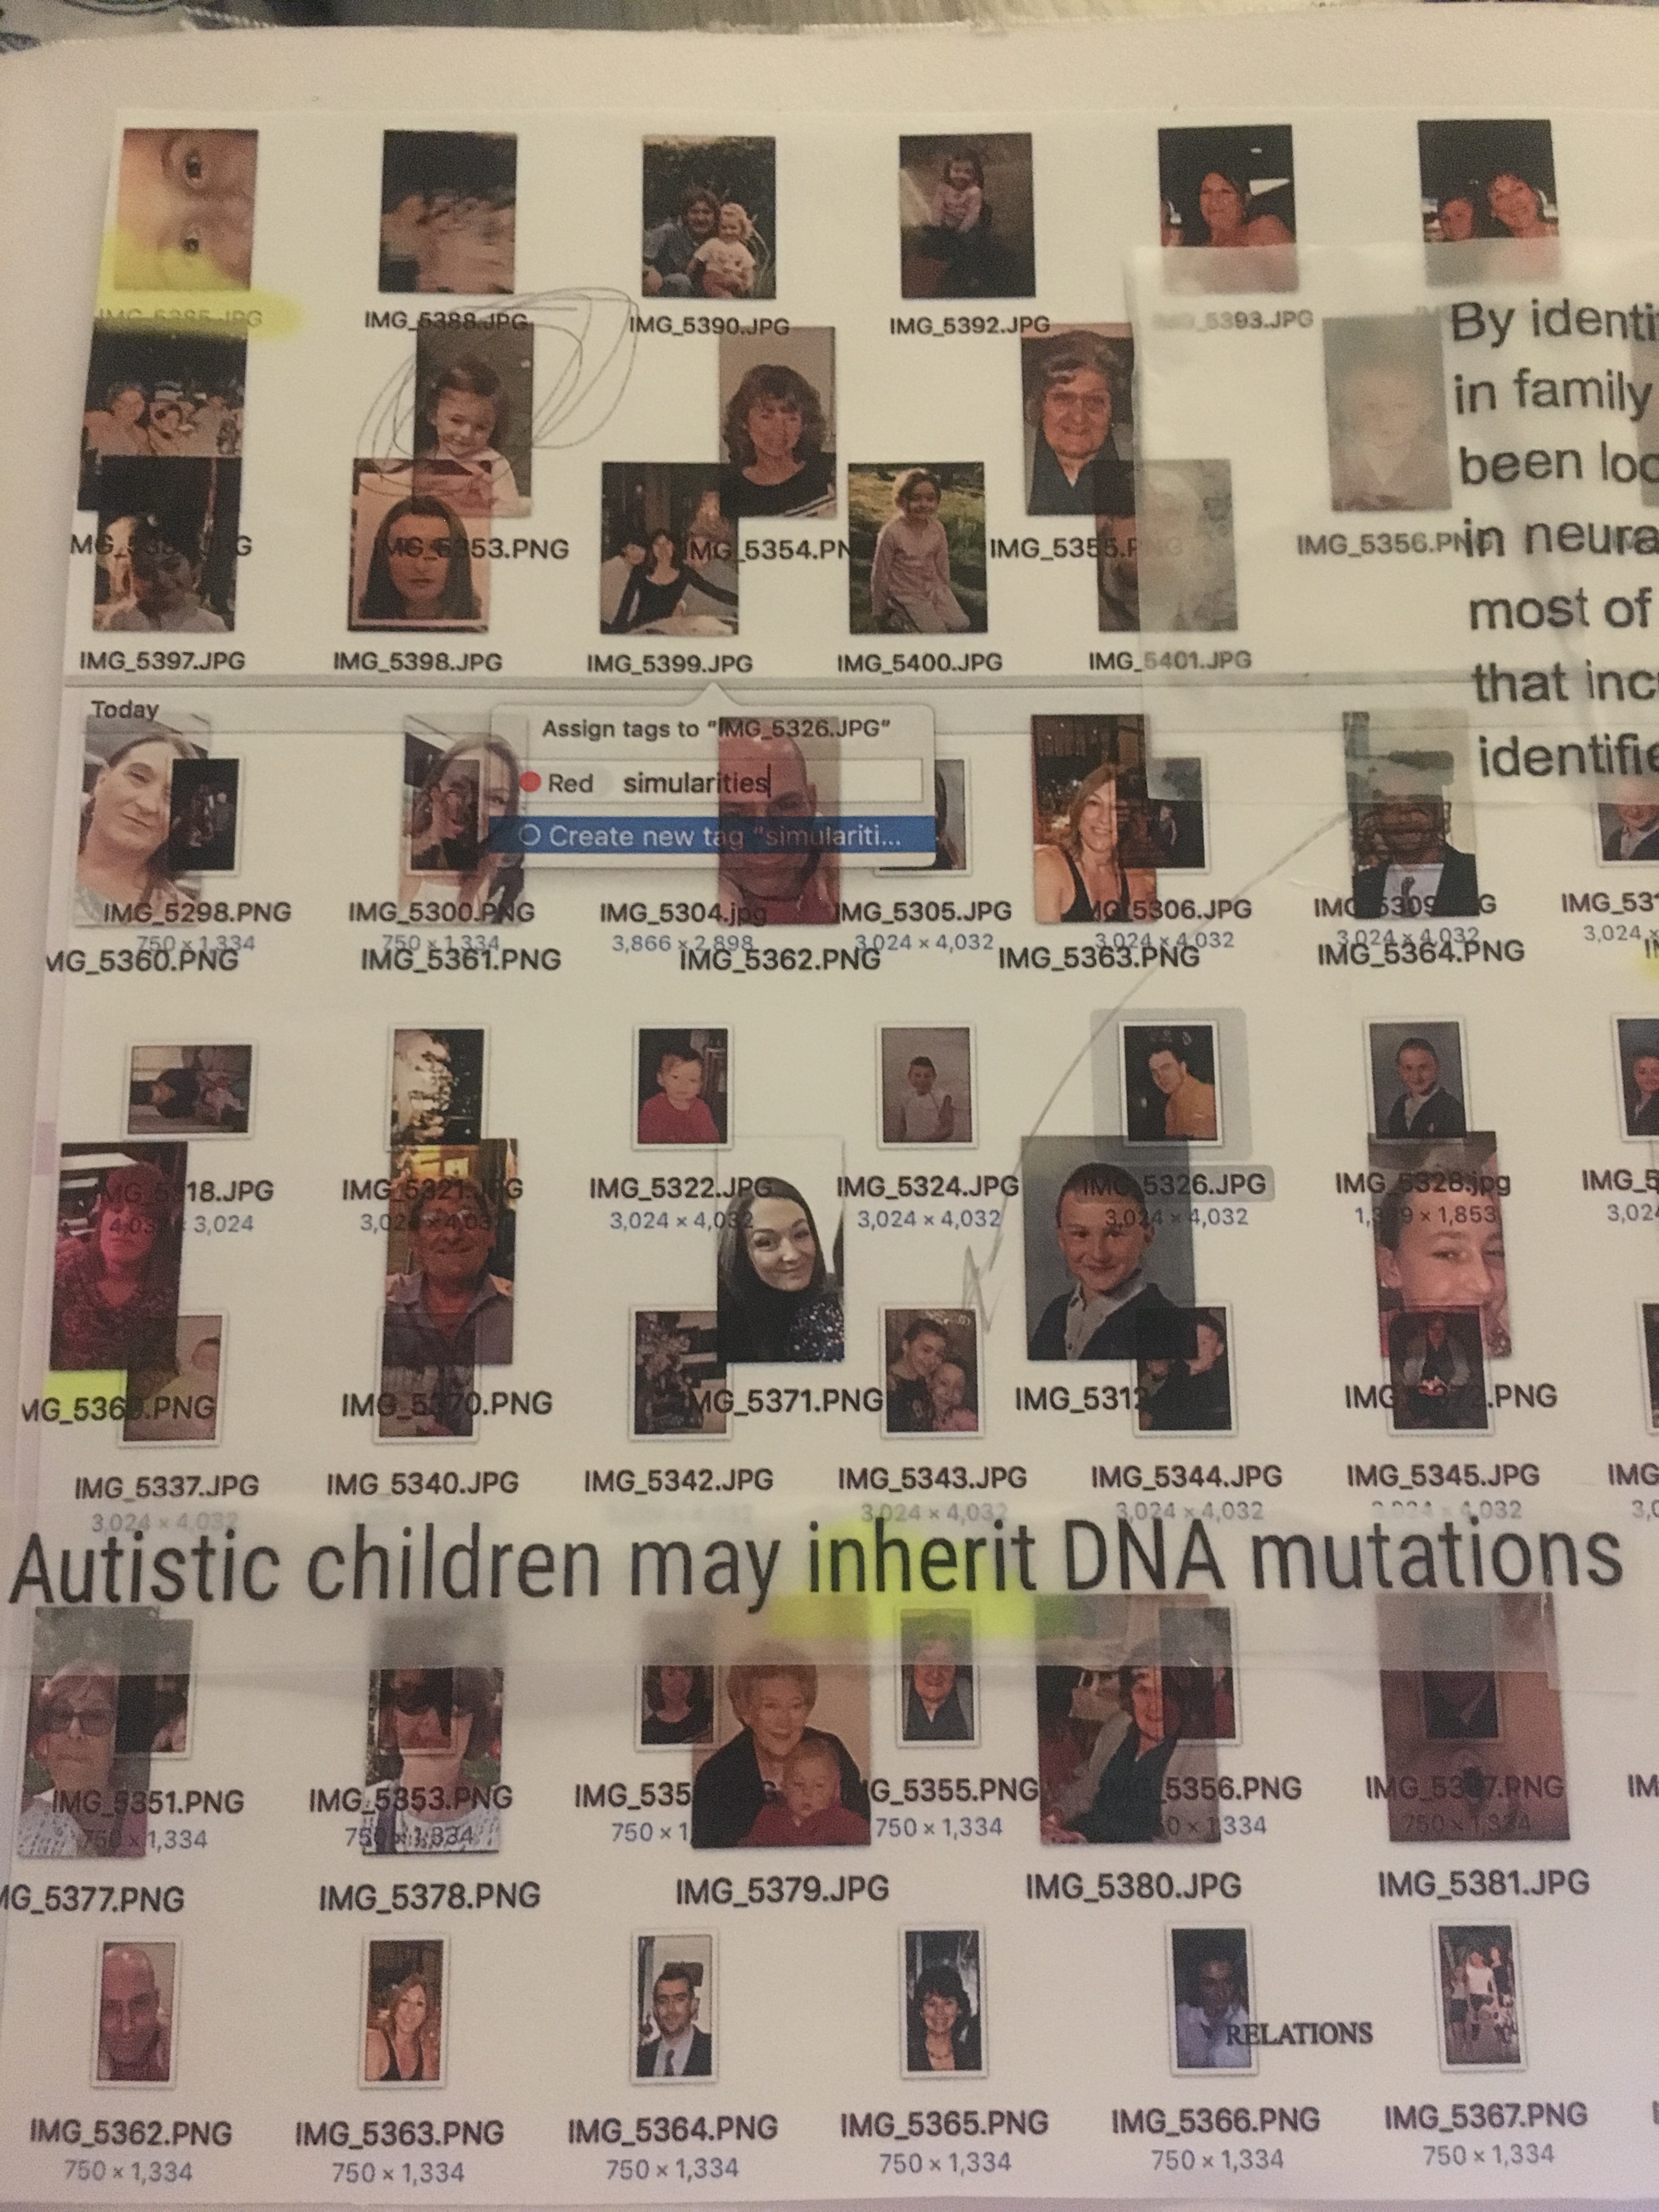
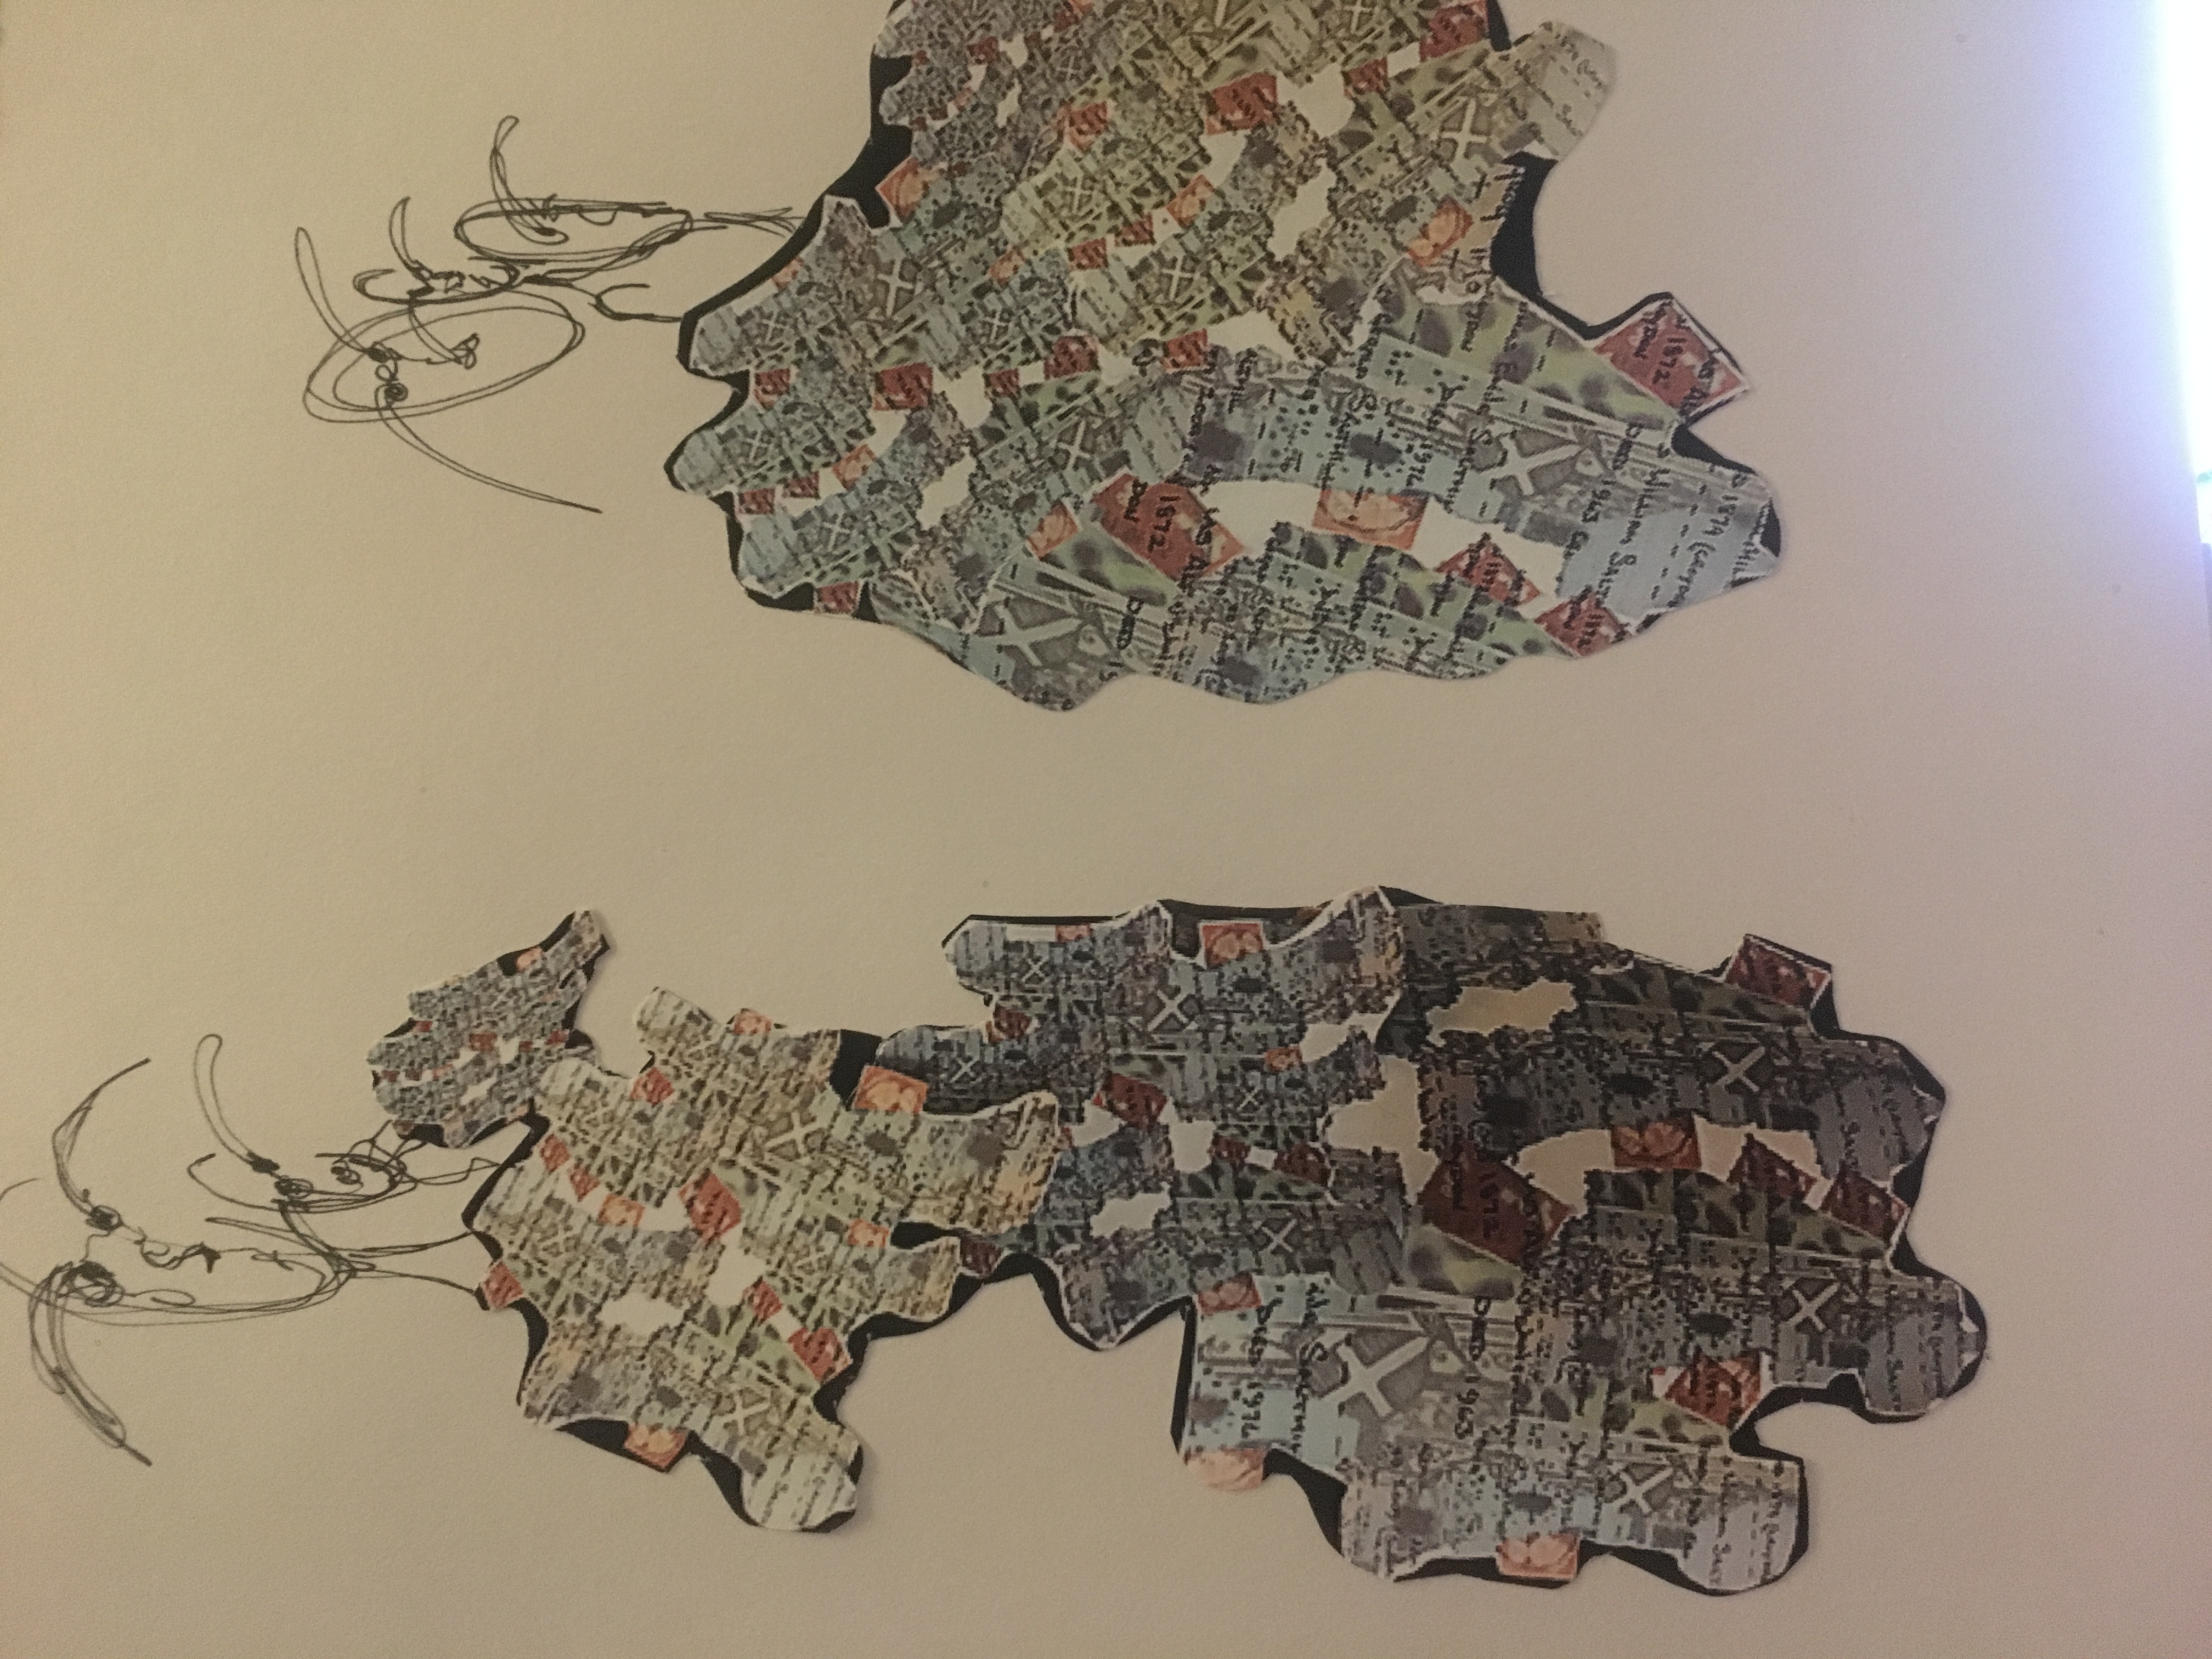
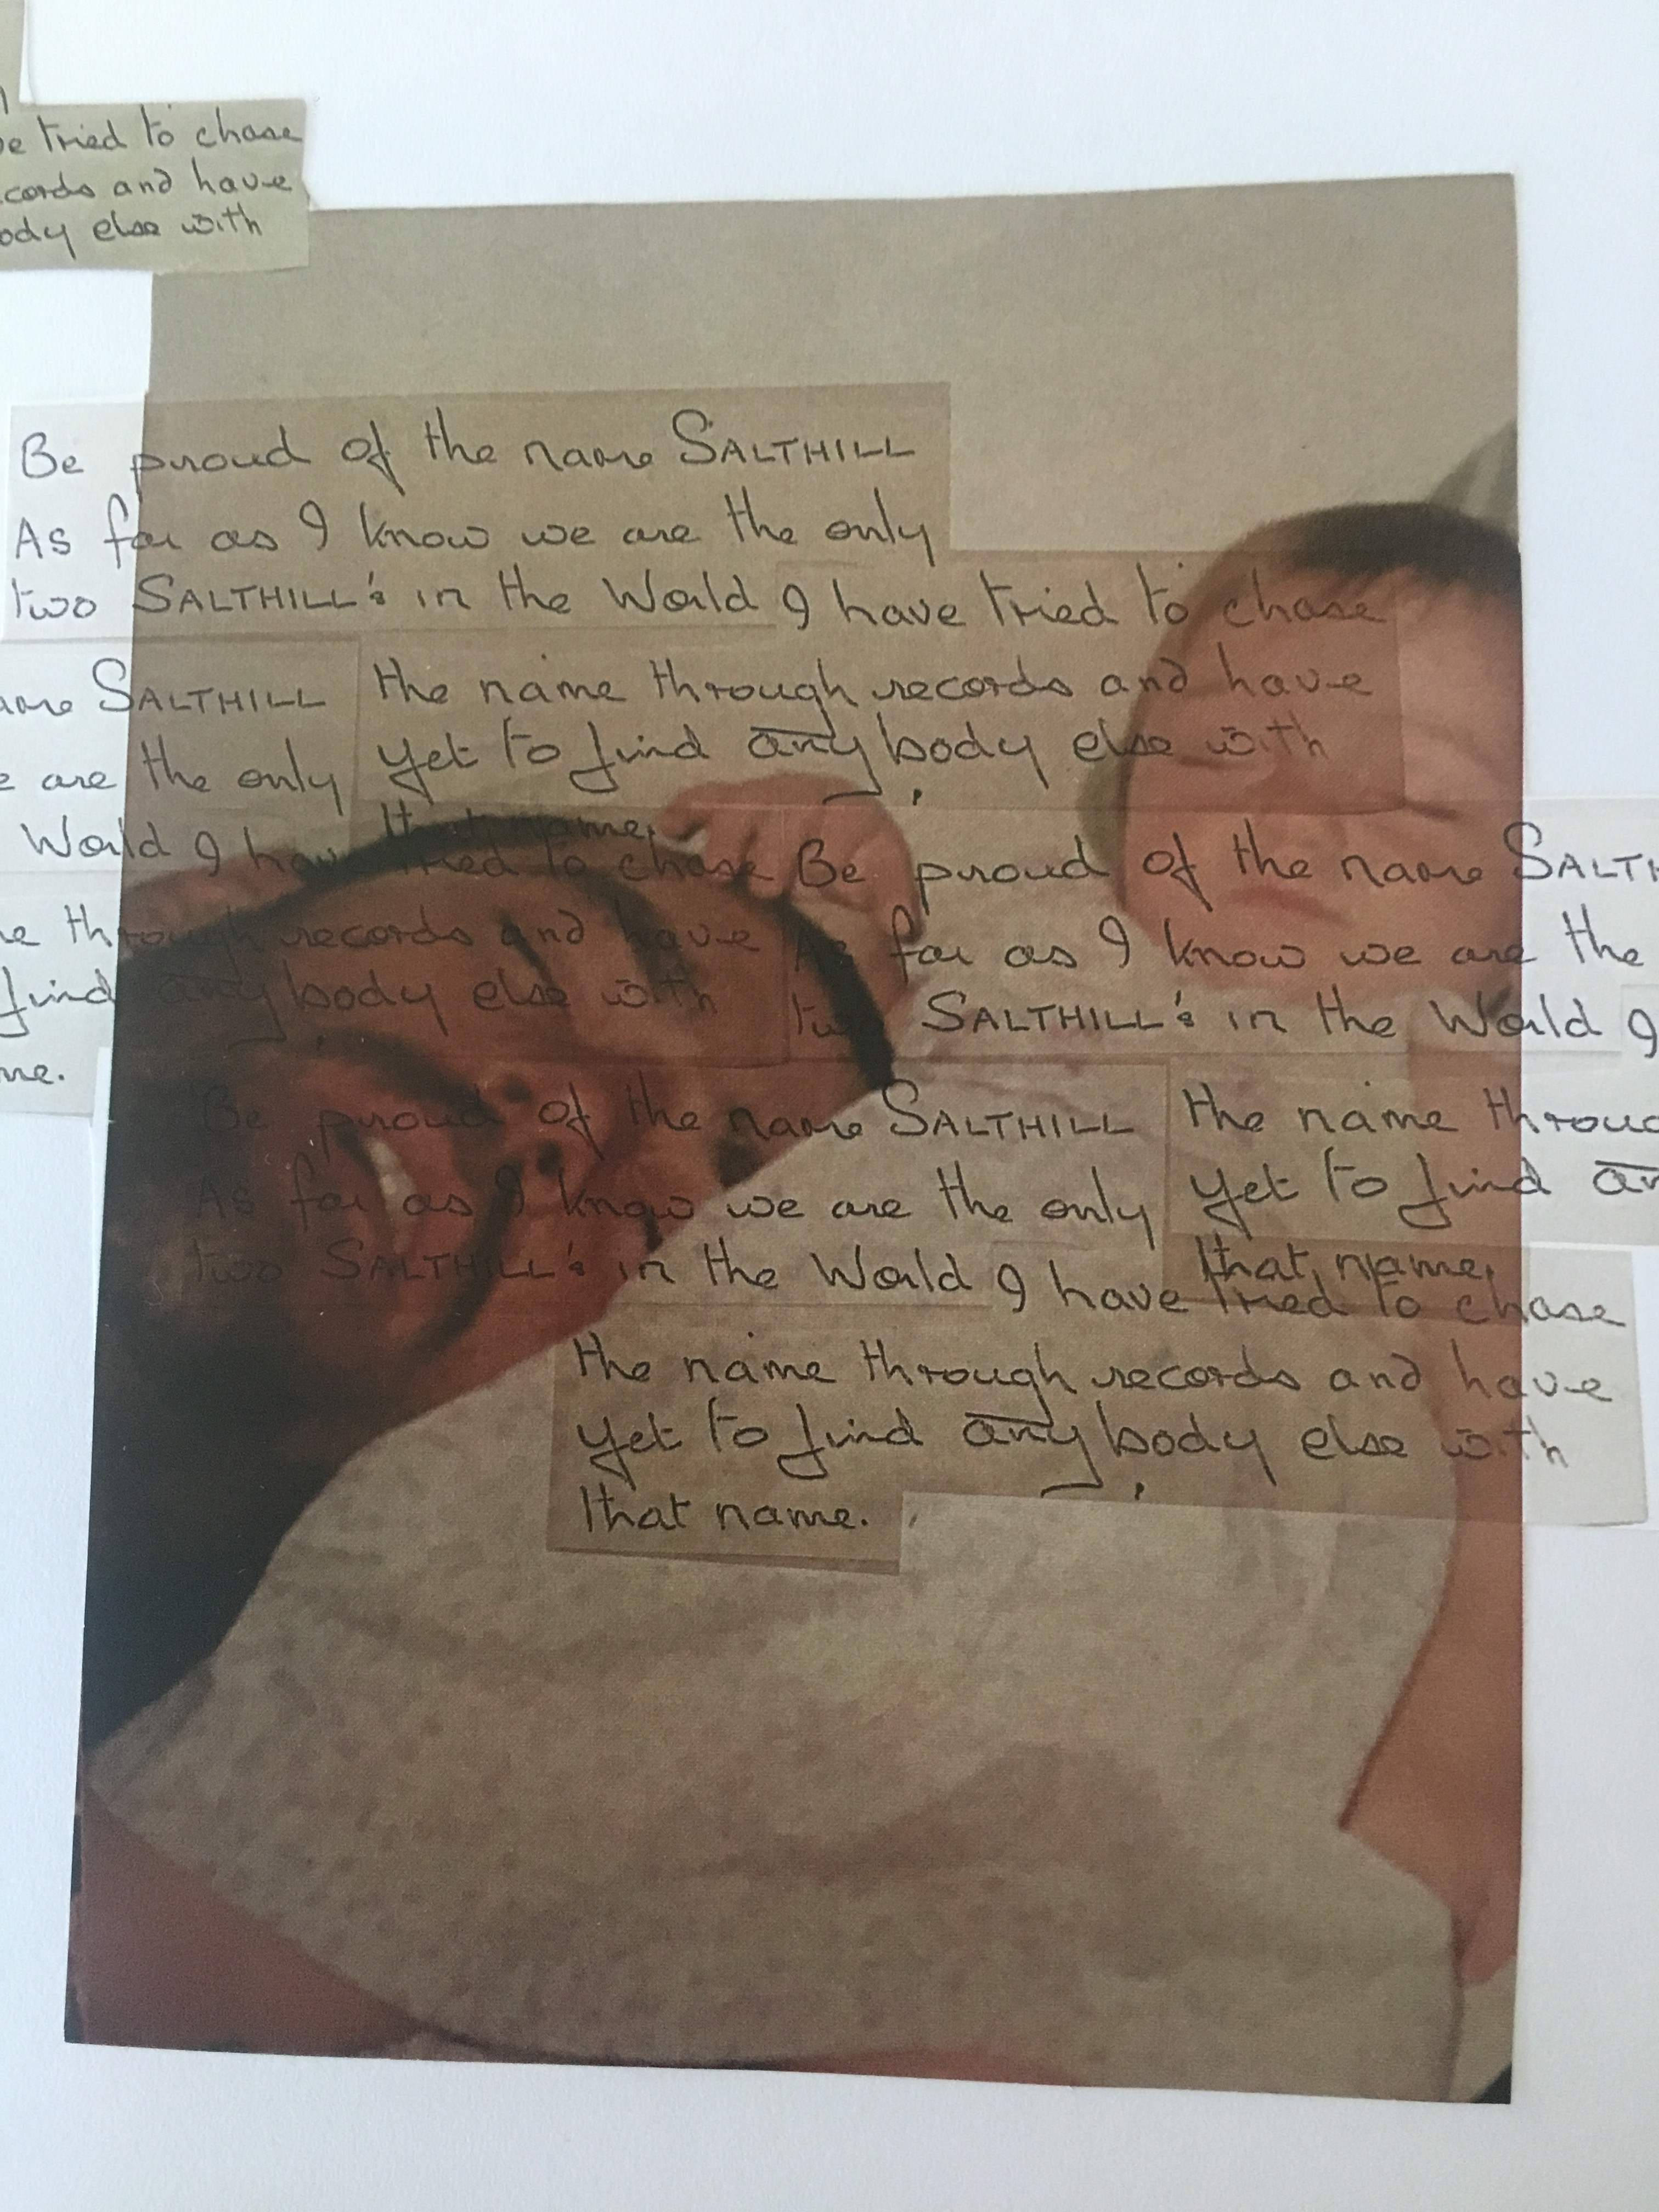
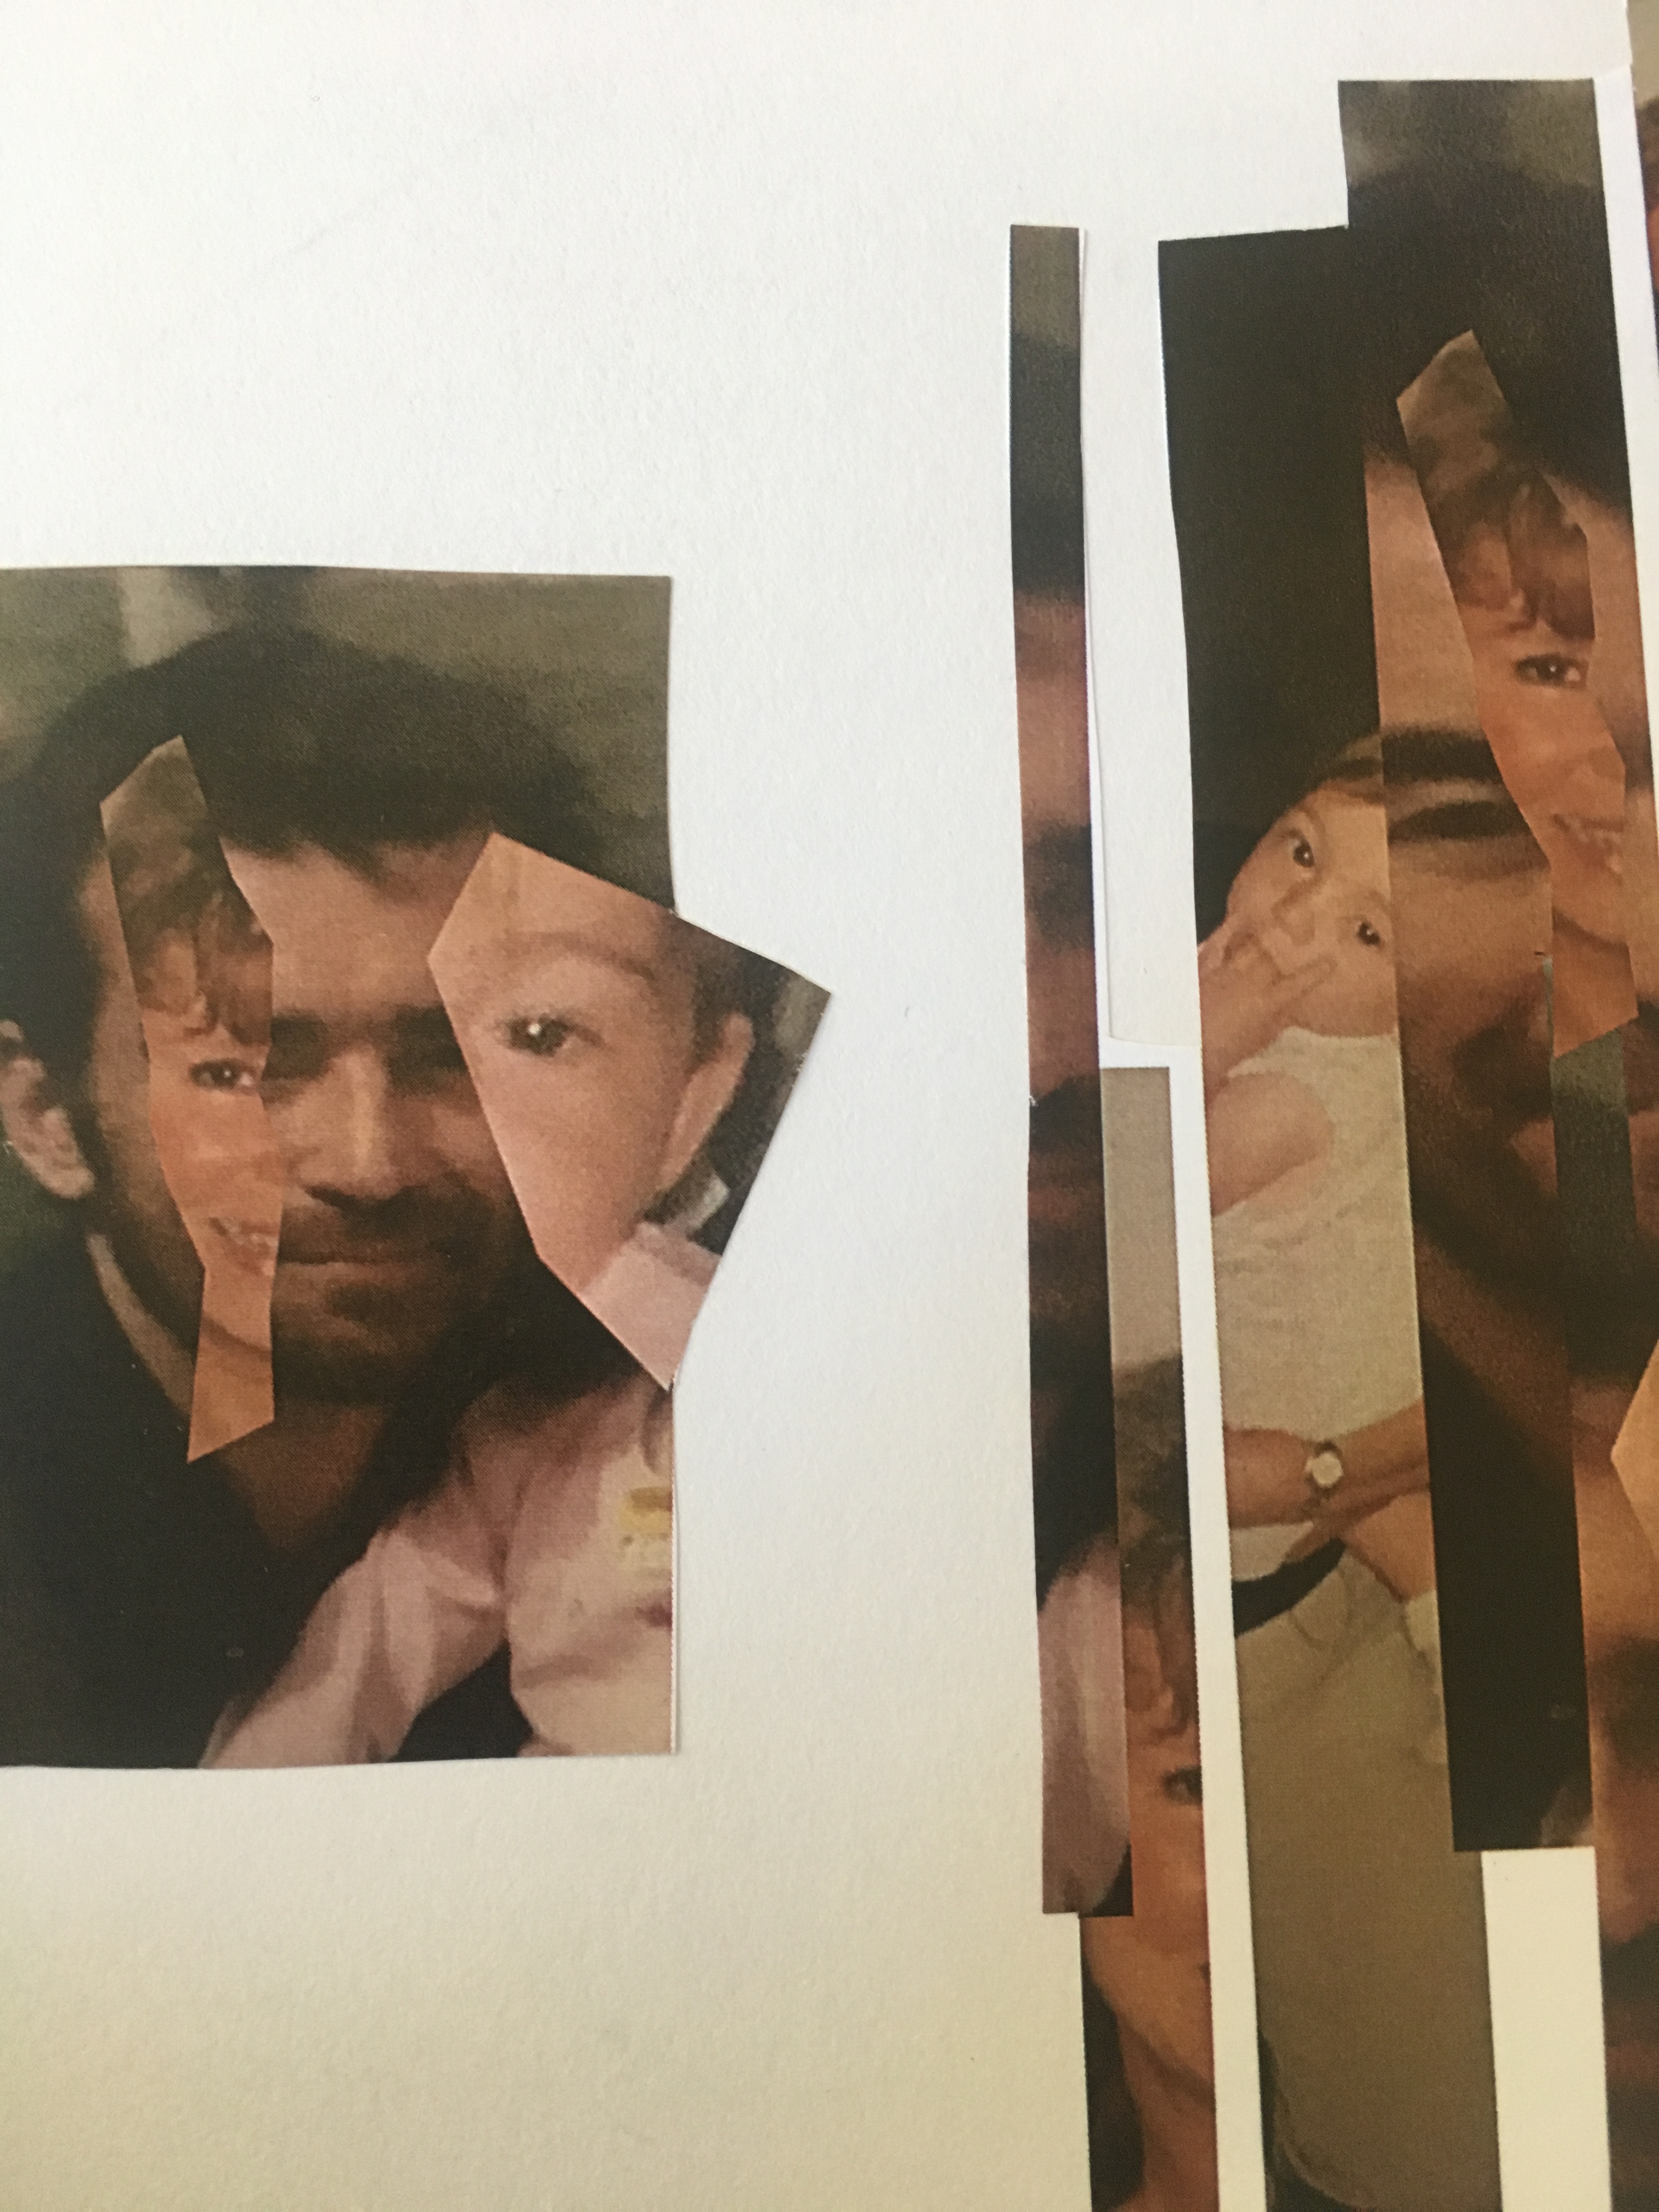
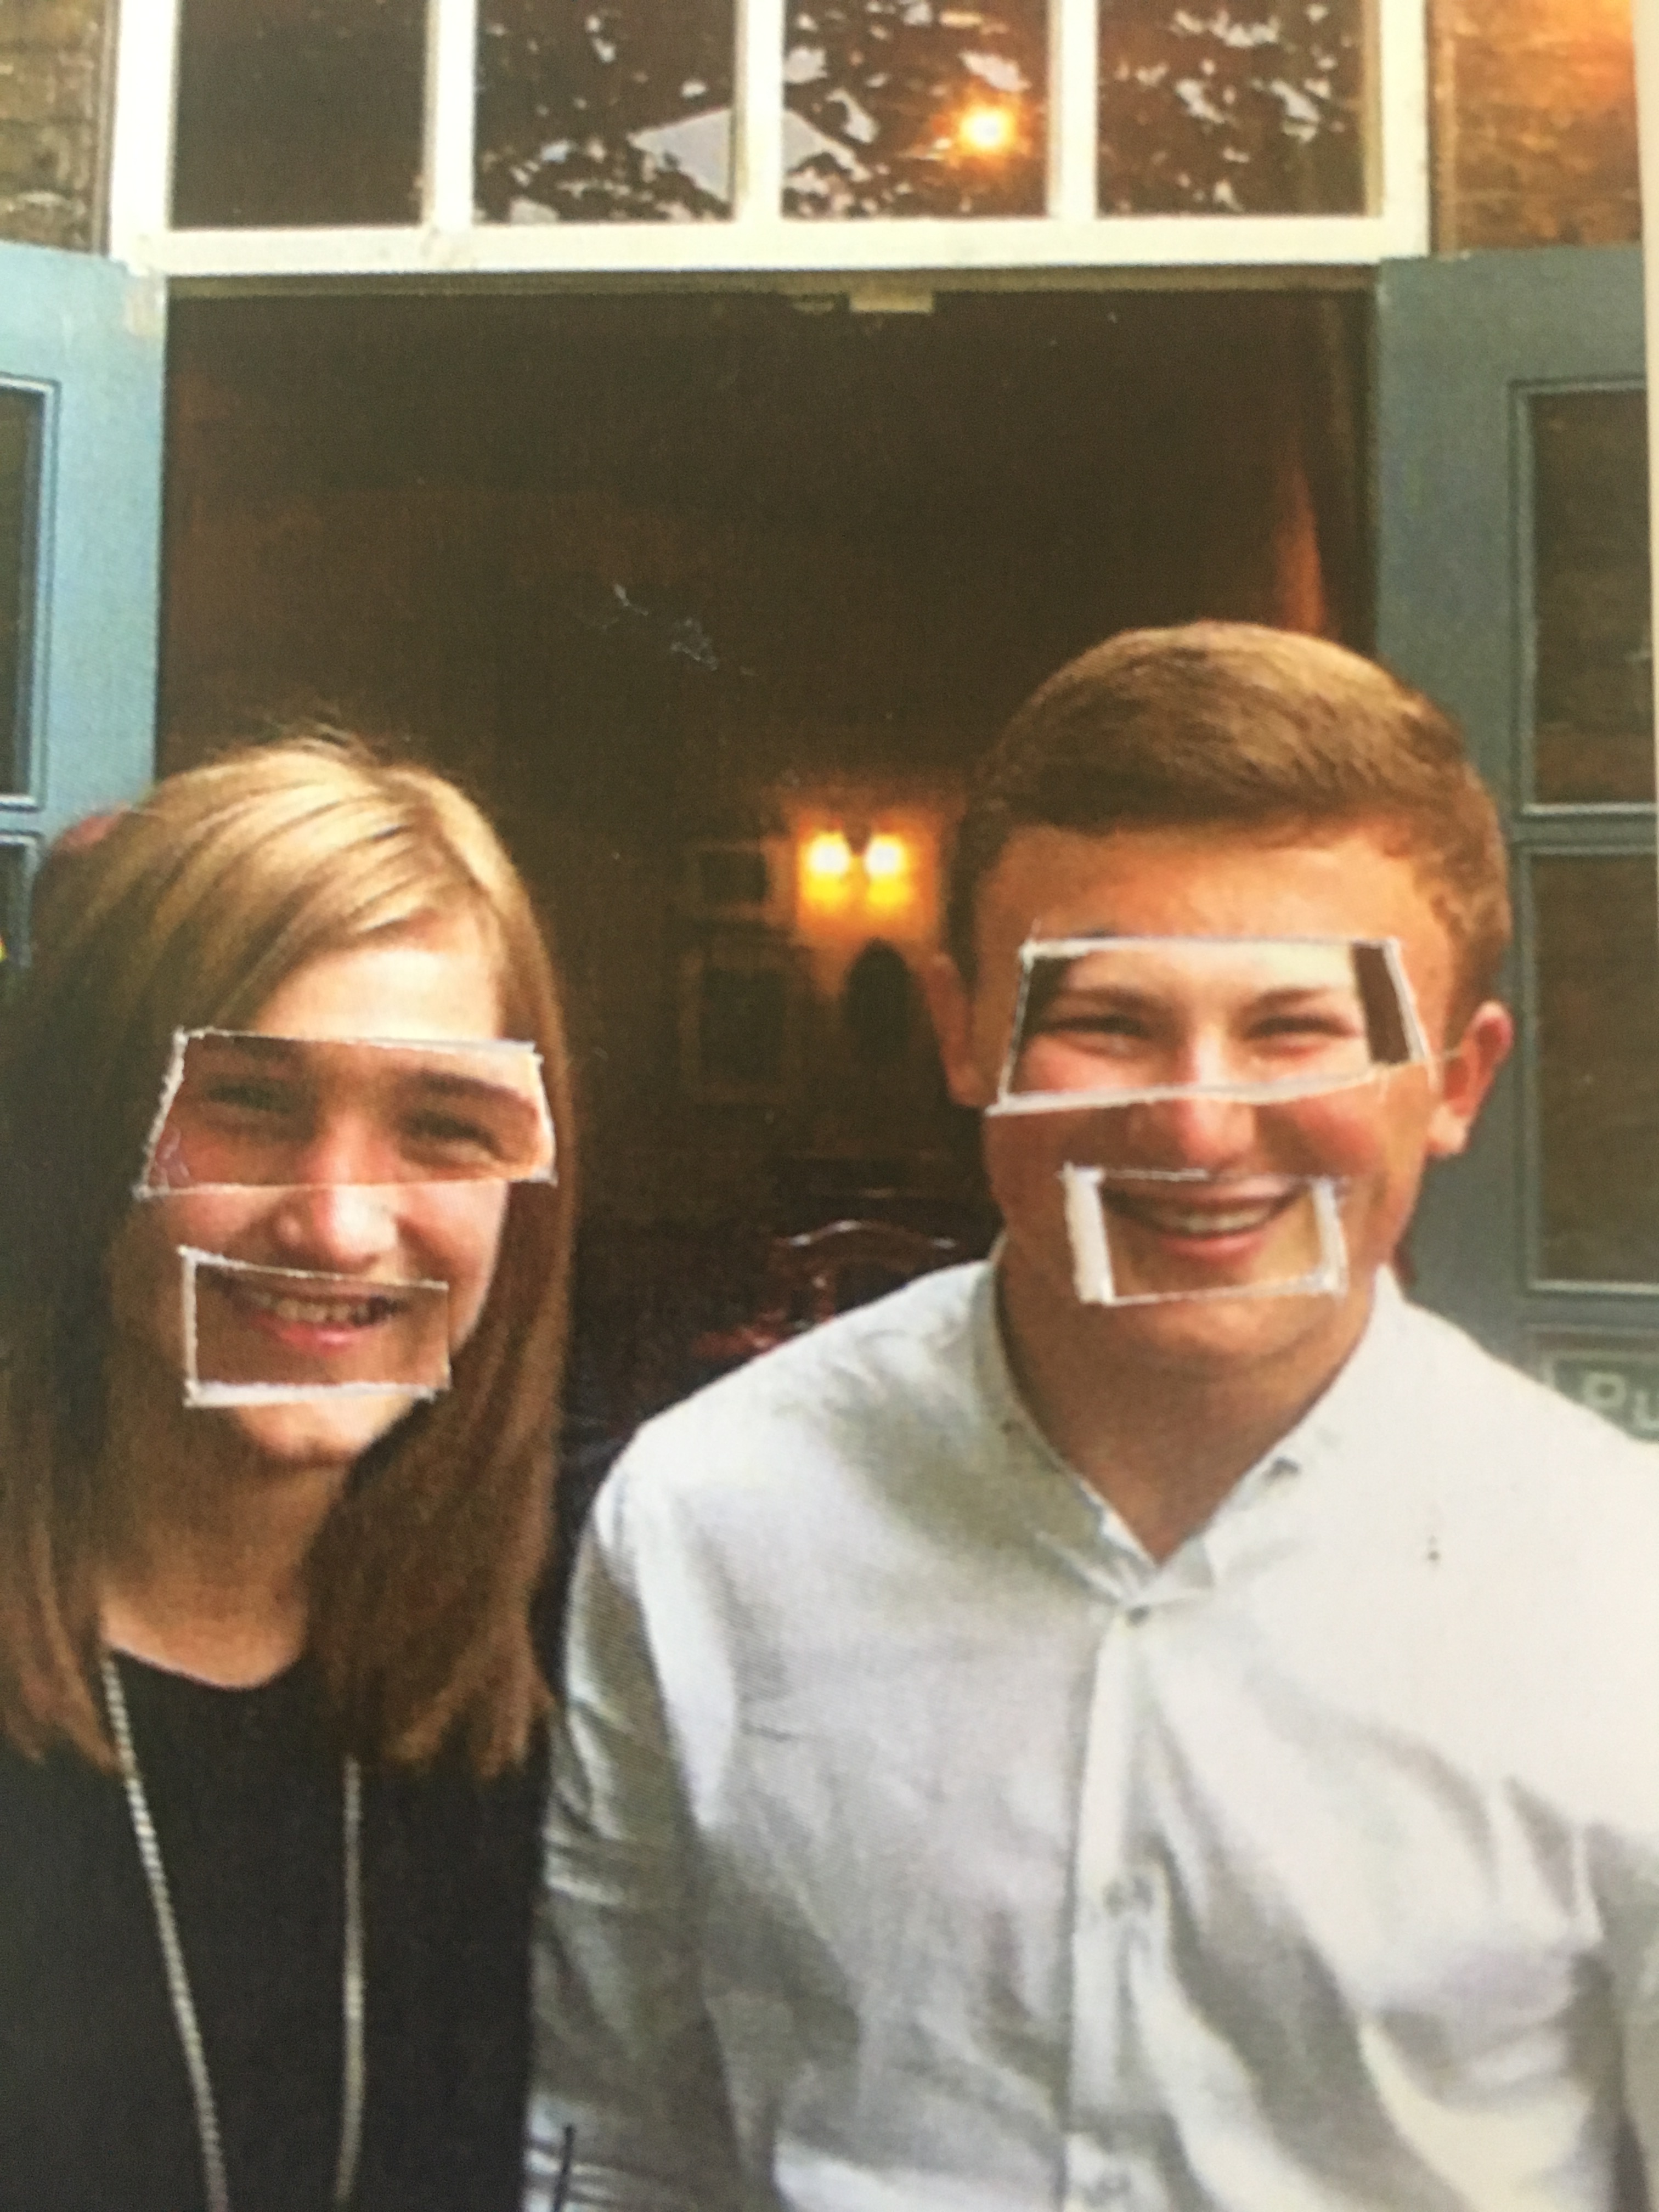
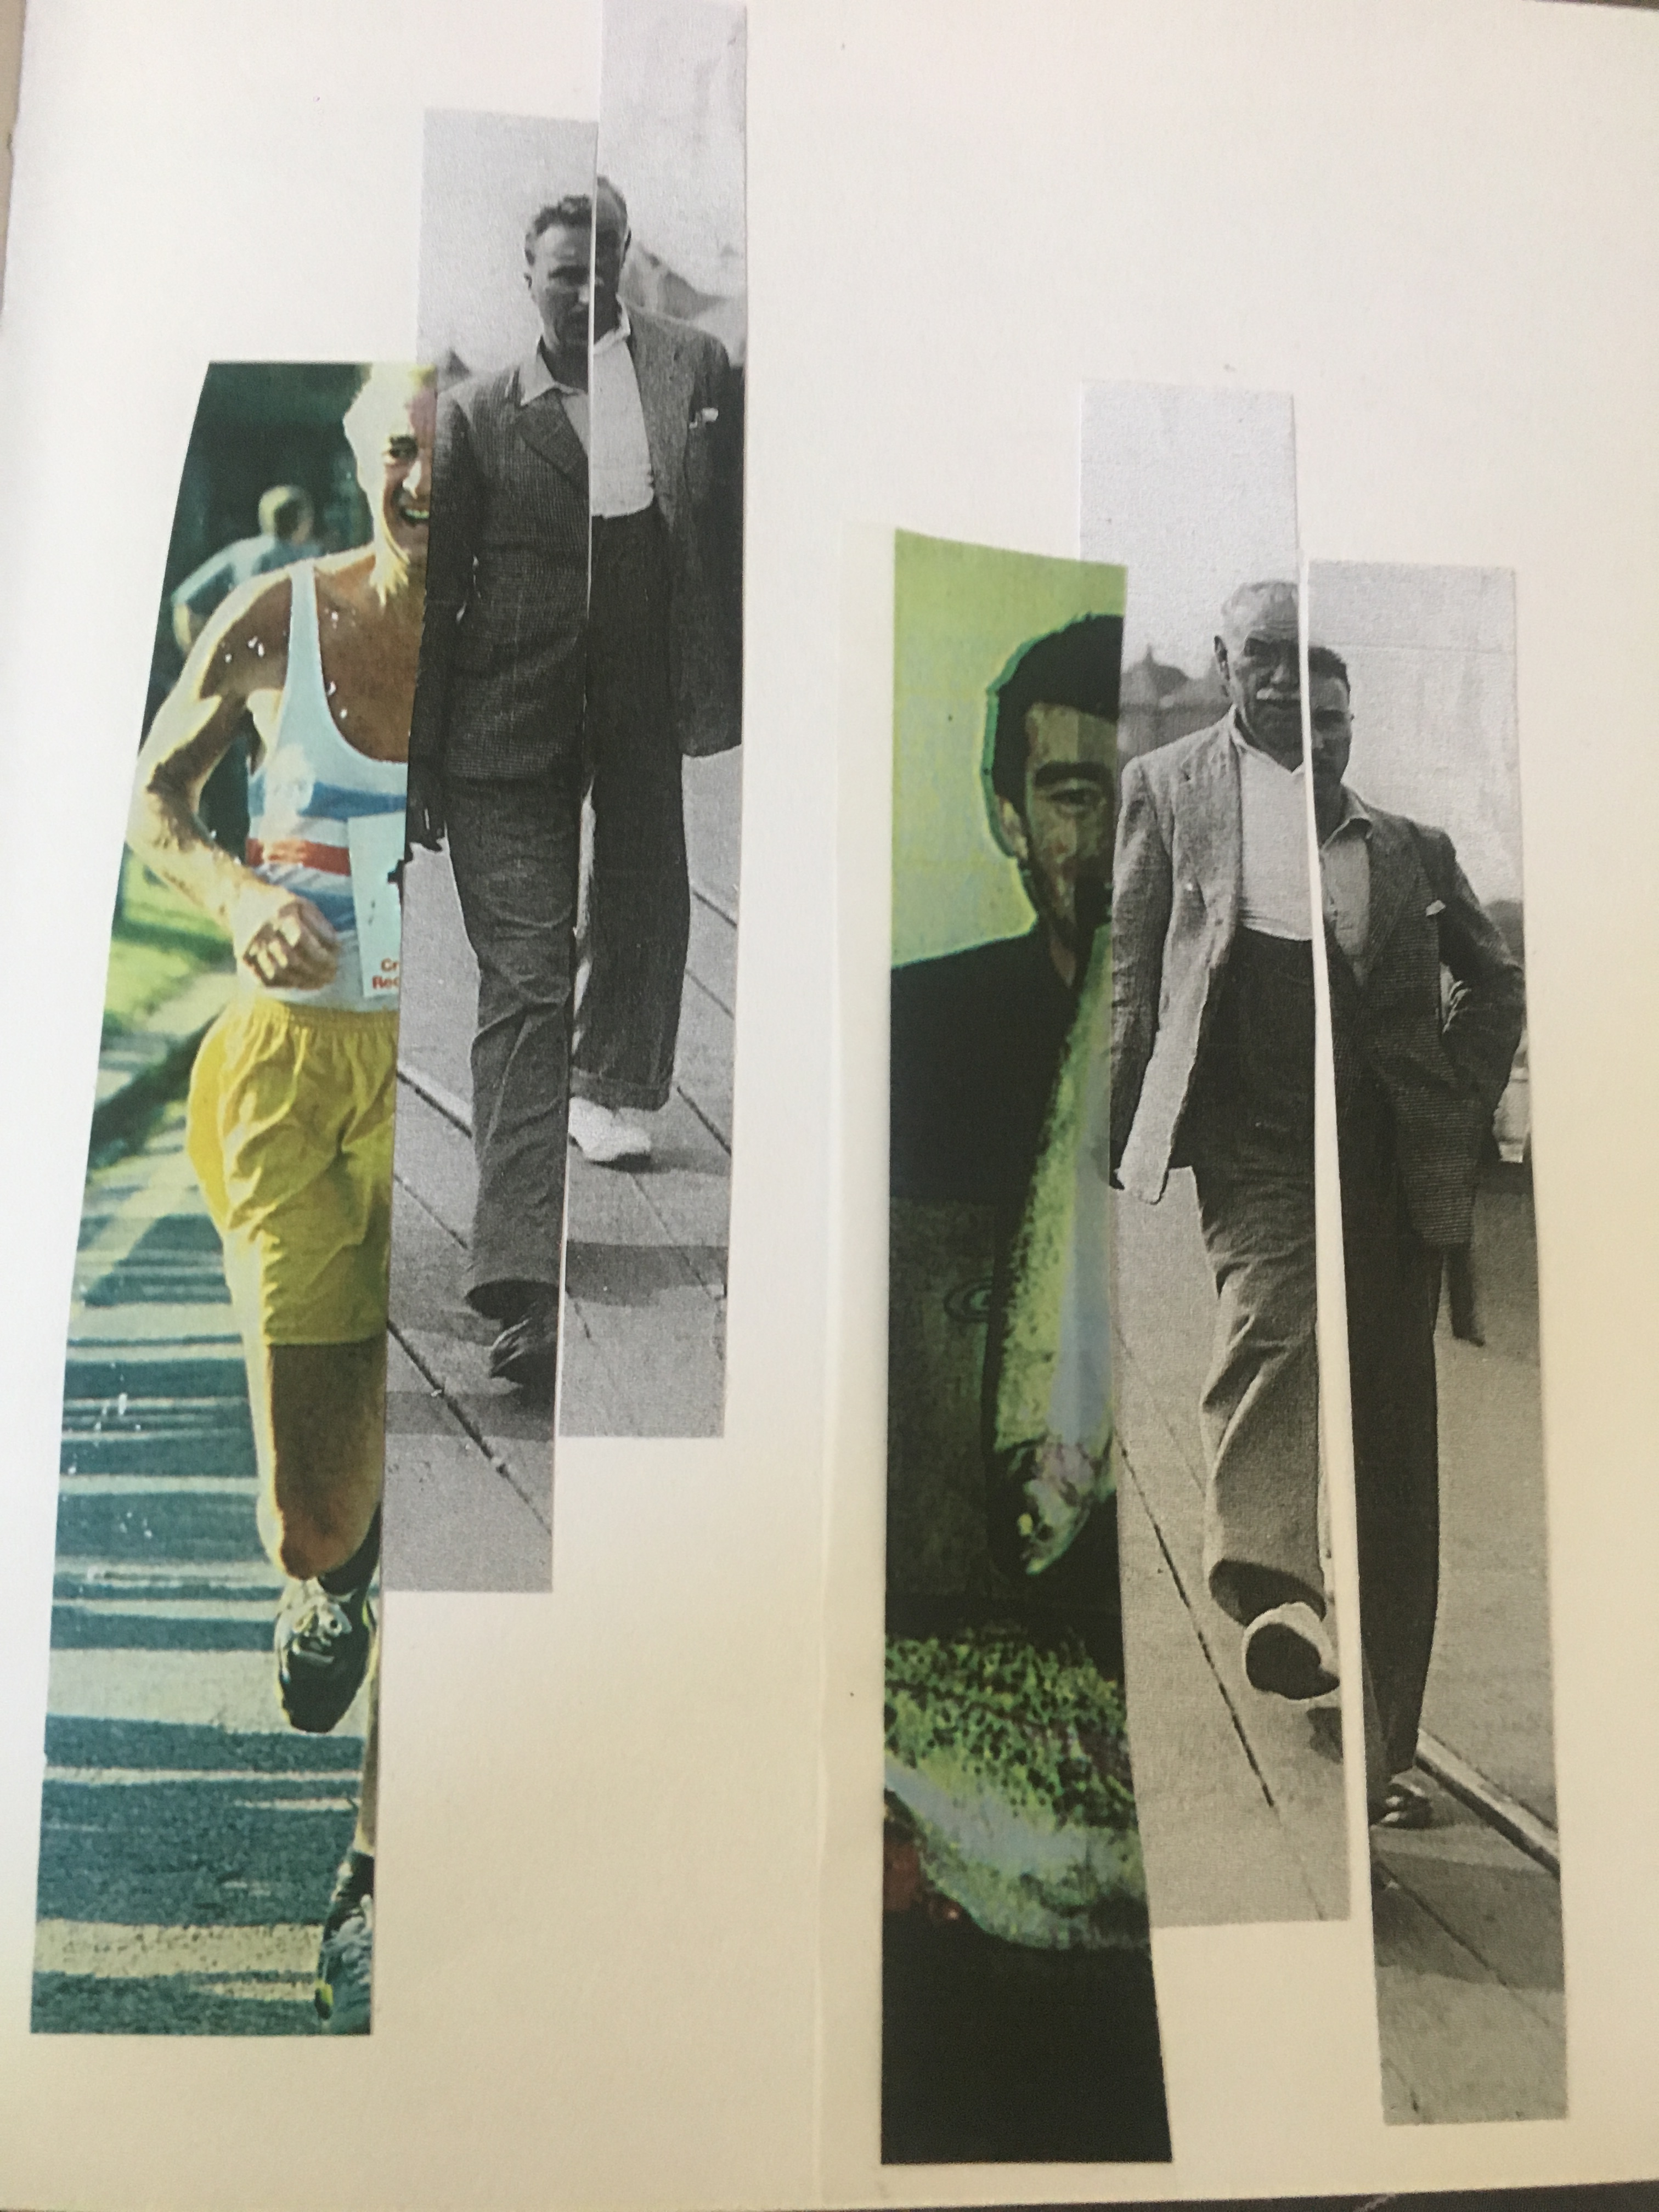
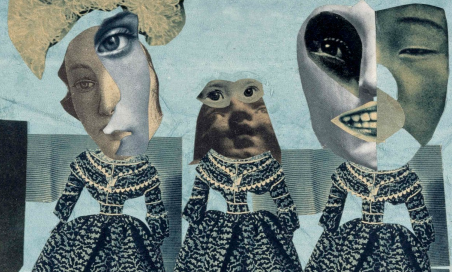
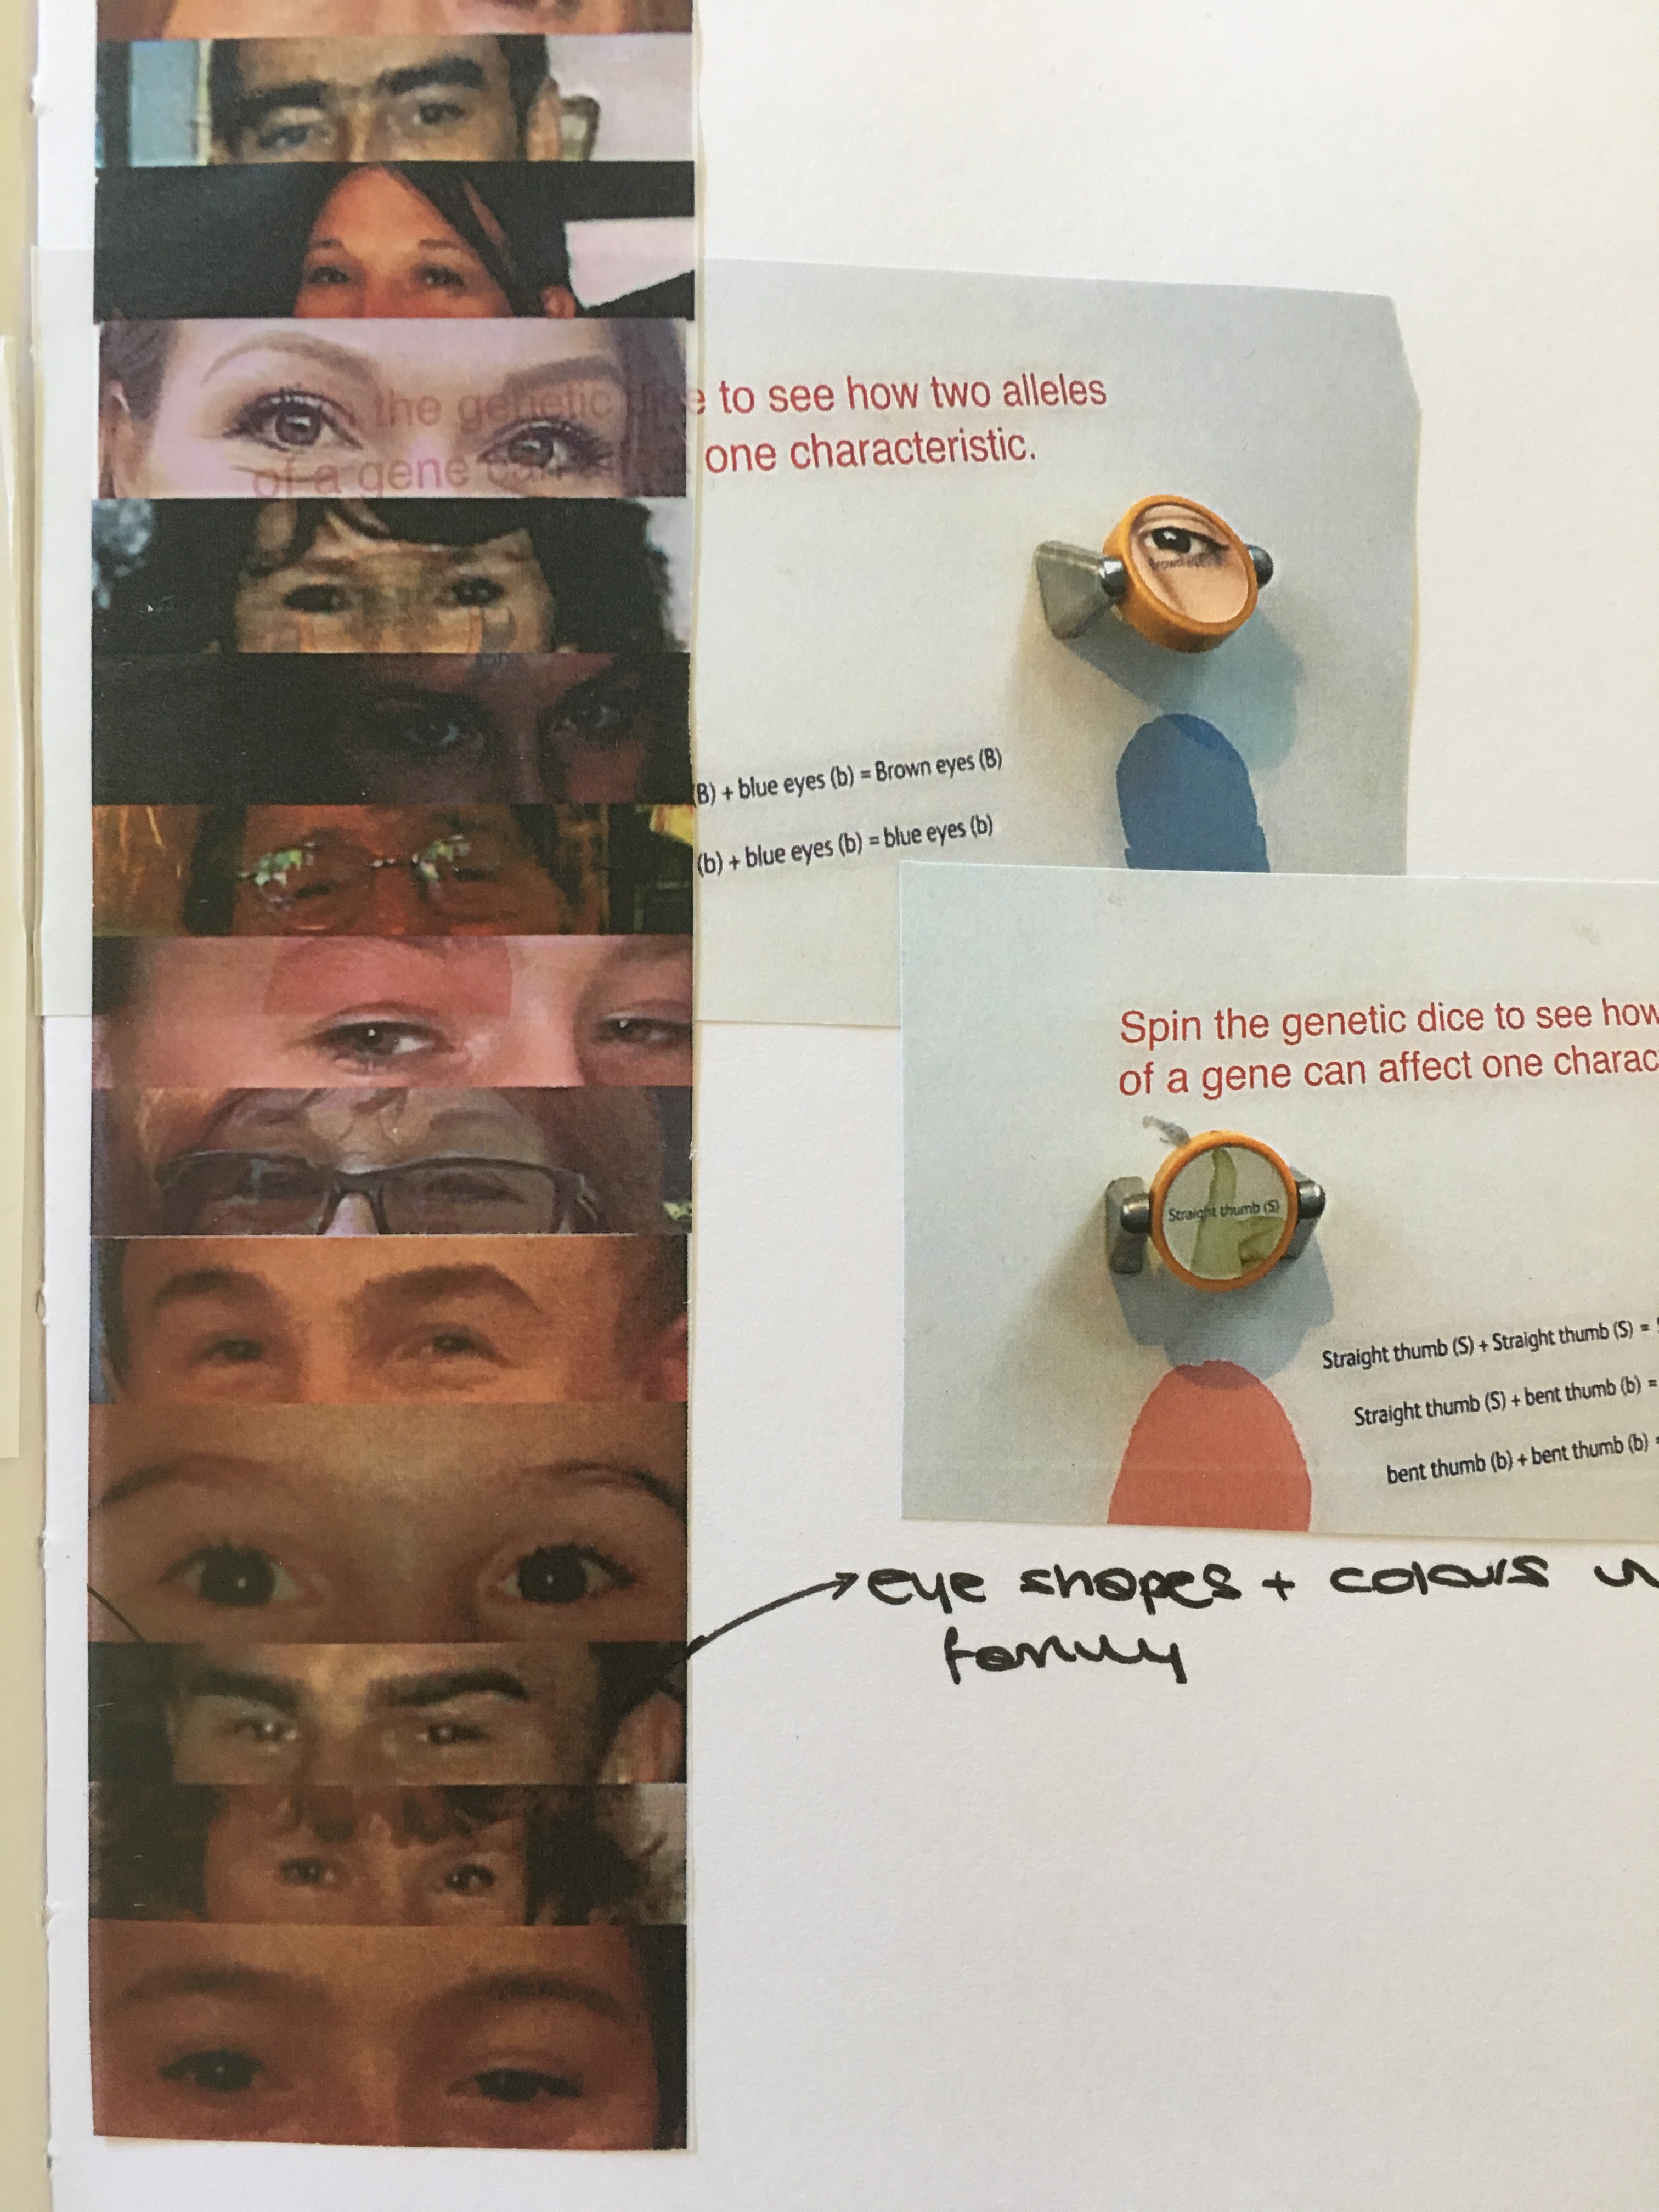
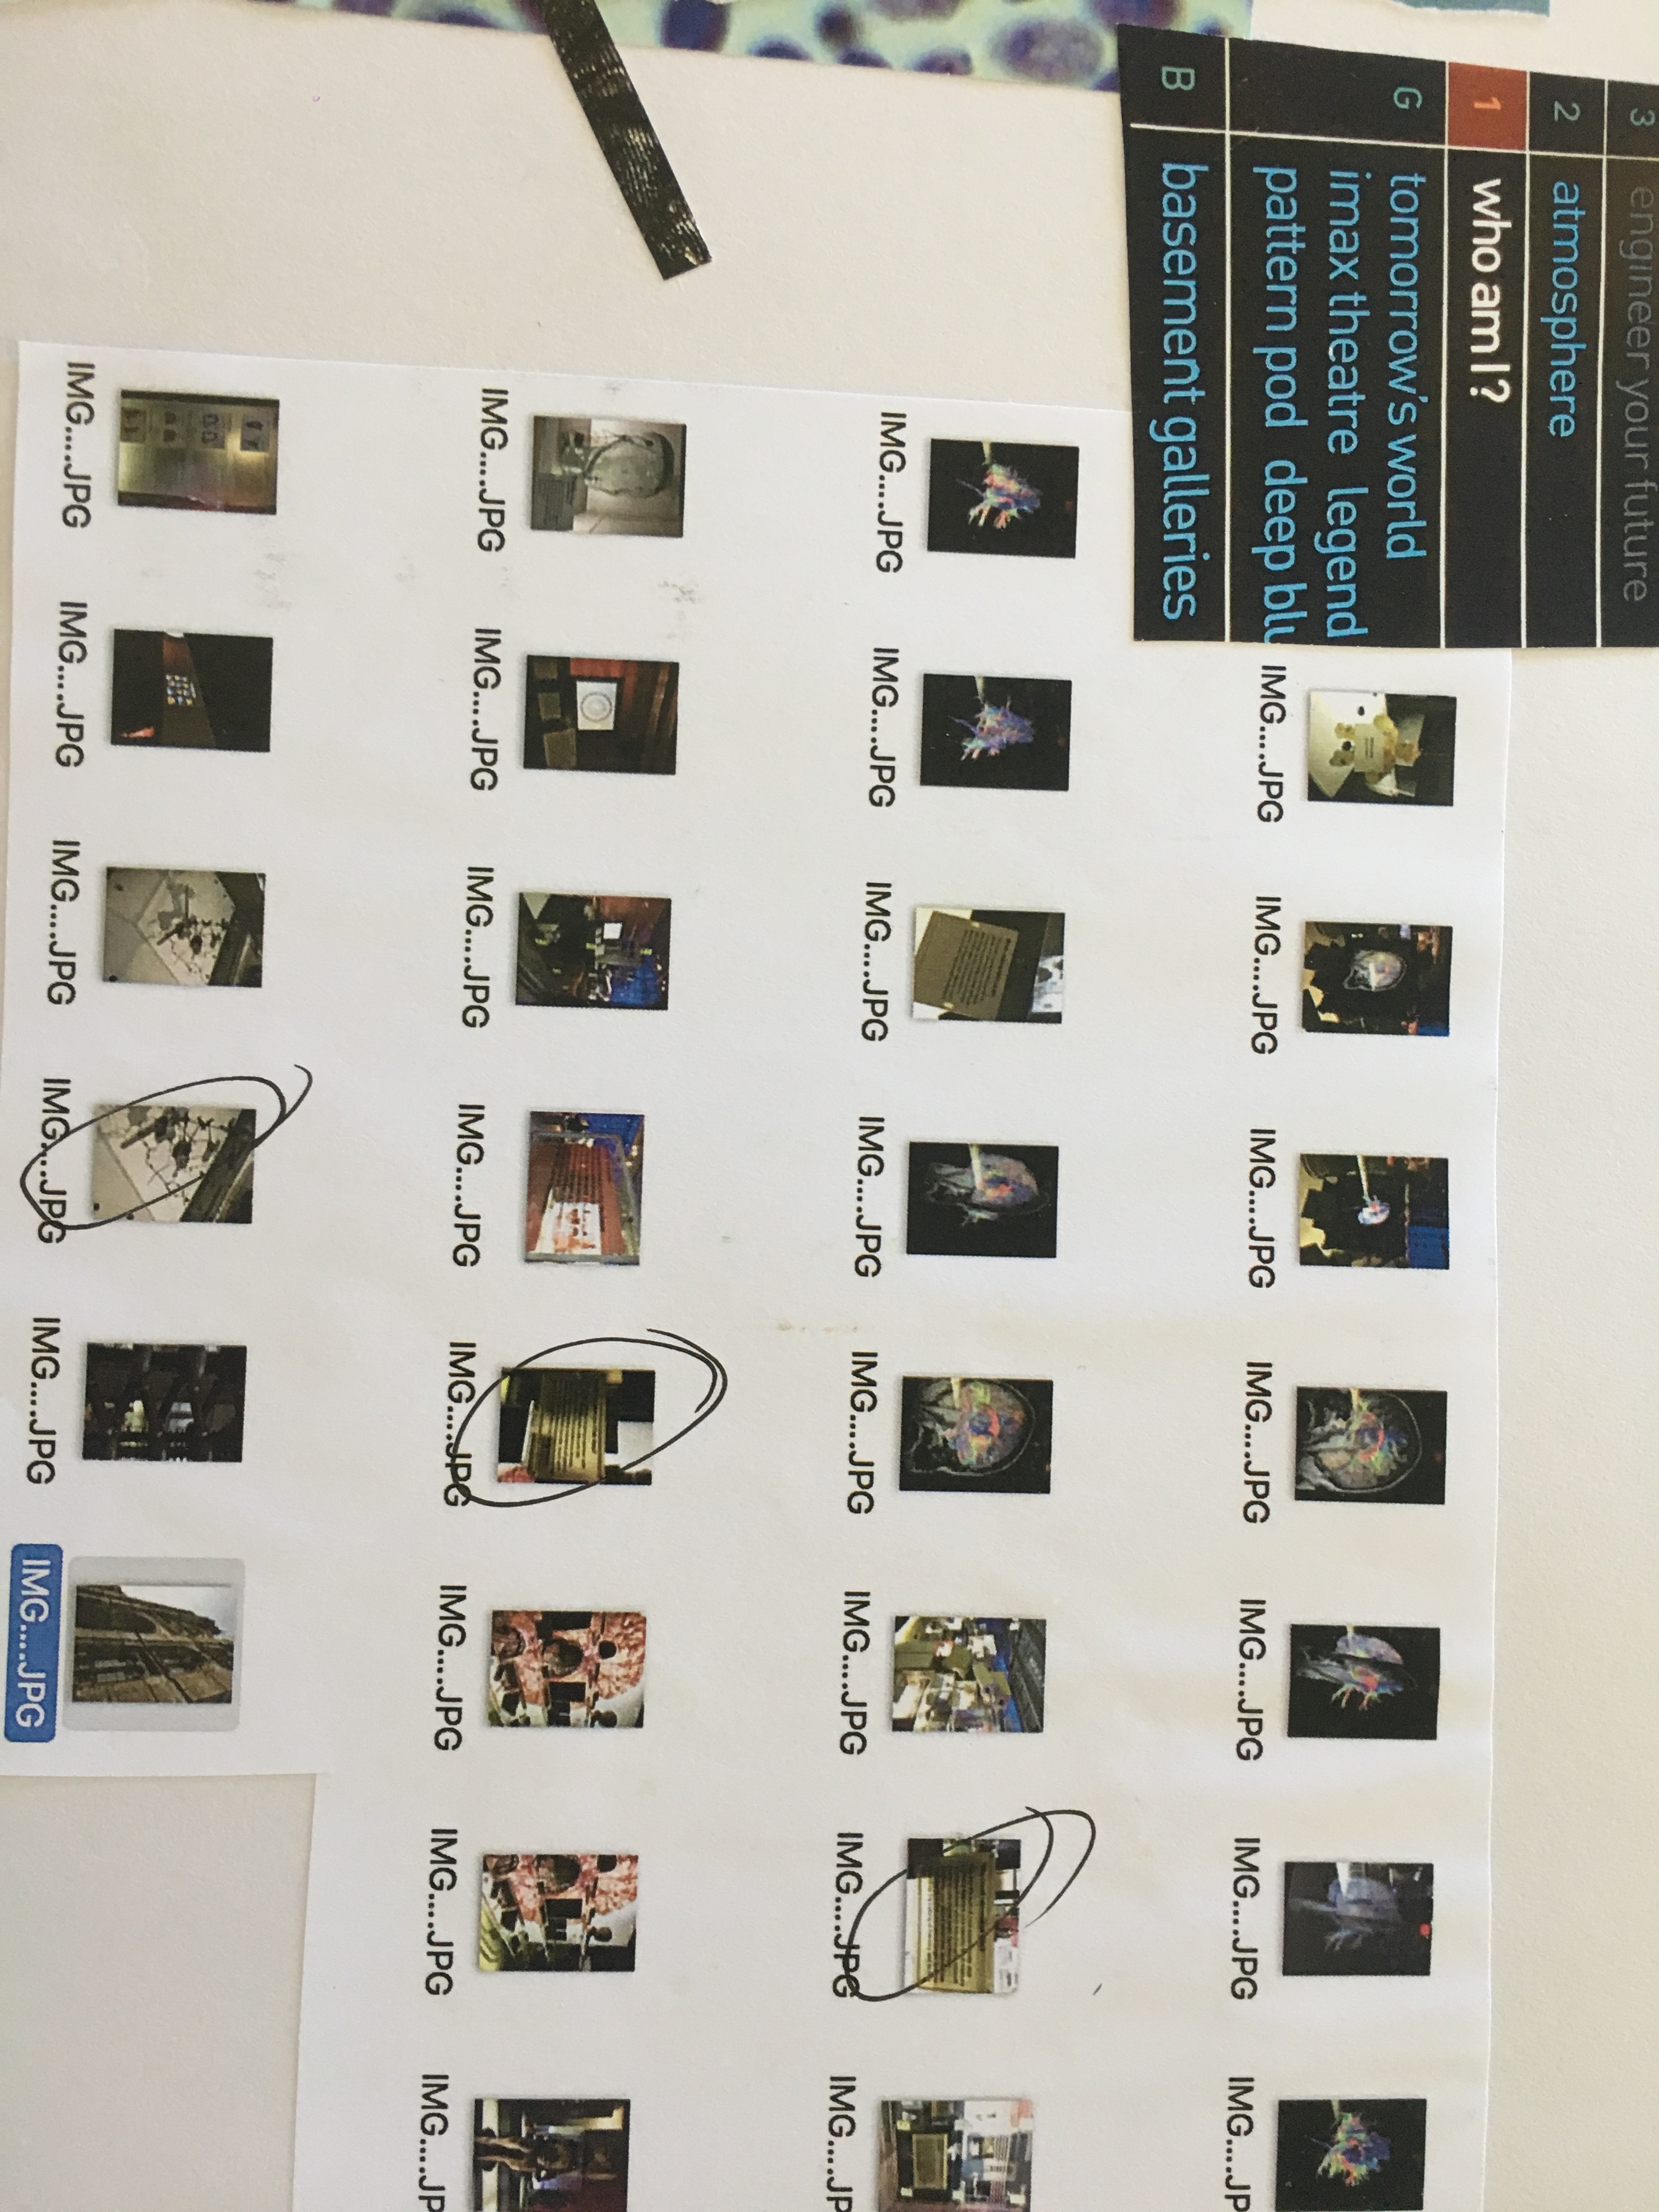
My project is about traits, characteristics and appearances/features that have been carried through generations in my family,  I have been discovering traits by analysing and collaging photographs of my family,  I have also been looking into my family tree, using my resources that my grandfather gave me, which consists of a written and photographs of my family tree with information back to 1819, having this resource  meant I could accurately investigate physical appearance traits that have been passed, and with family conversation, I could find out personality traits that still belong to my family now, that may have steamed from  my ancestry. 
2. Describe how research, analysis and evaluation helped you to feed ideas and develop concepts?

My idea was explored with background research on genetics, traits and DNA, through books, museums and online. I also have primary research regarding my family through photography, face to face conversation, background research and an ancestry family timeline. I visited museums including ‘moderns couples exhibition’ -Barbican Gallery, History and Science museum and Banksy museum – Amsterdam. As well as  secondary research, online and in the library. These resources gave me inspiration, motivation and an idea flow throughout the project, my research helped me to evolve my ideas and develop my knowledge on genes  And genetics itself, so I could understand and respond to it with ideas that were triggered by the research I was finding. Reflecting on my work weekly through my blog really created structure within my work. In the development stage time management was an issue for me, writing a blog through FMP really improved my time management, it helped me stay focused and to plan my time effectively, ensuring I was completing all  tasks on time and to analyse and follow what I was doing each week. Reflecting on my work weekly helped me to make improvements and to solve the problems I was facing, as well as keeping in sync and evolving my  project fluently.
3. What specialist skills and methods did you use to realise your project?

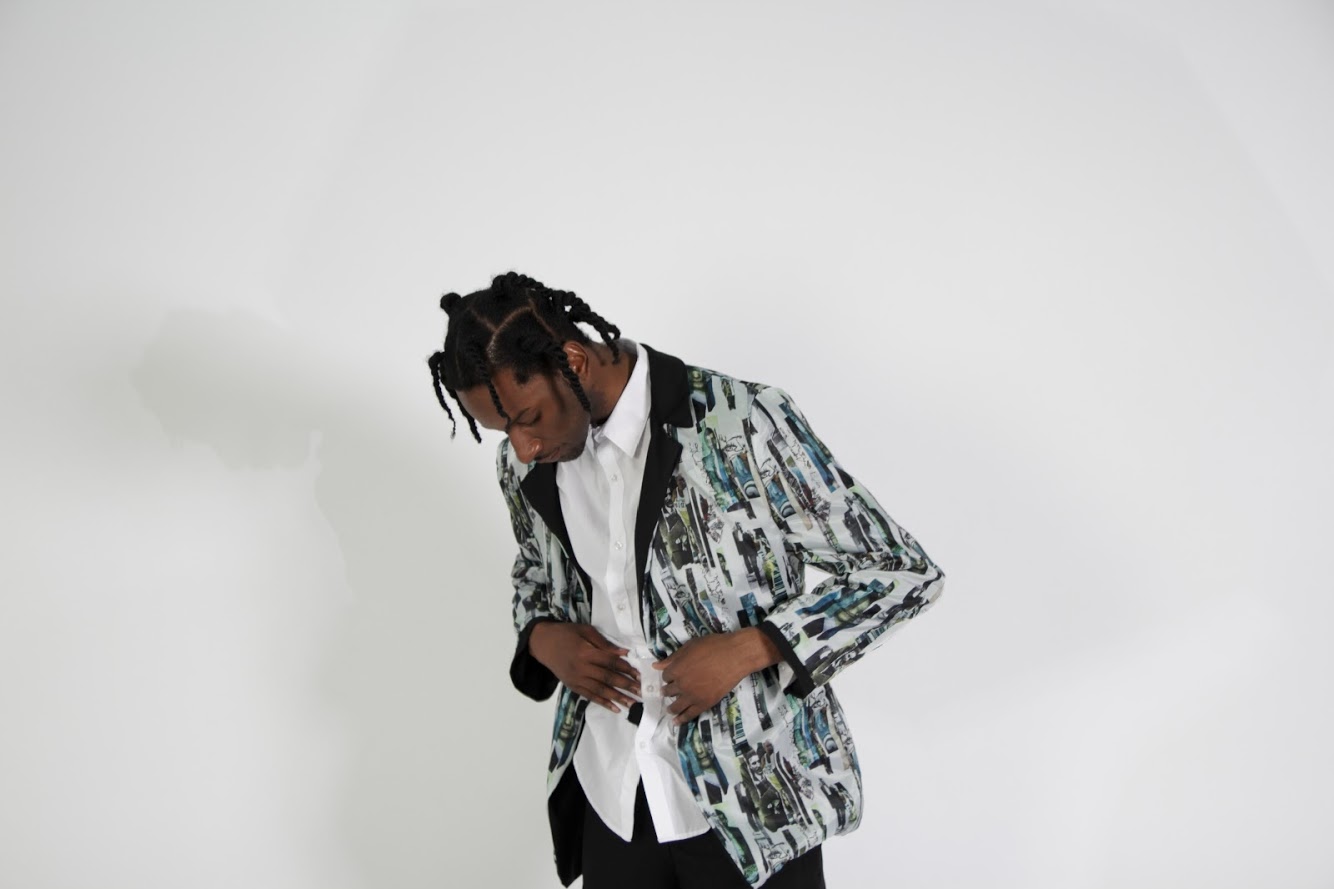
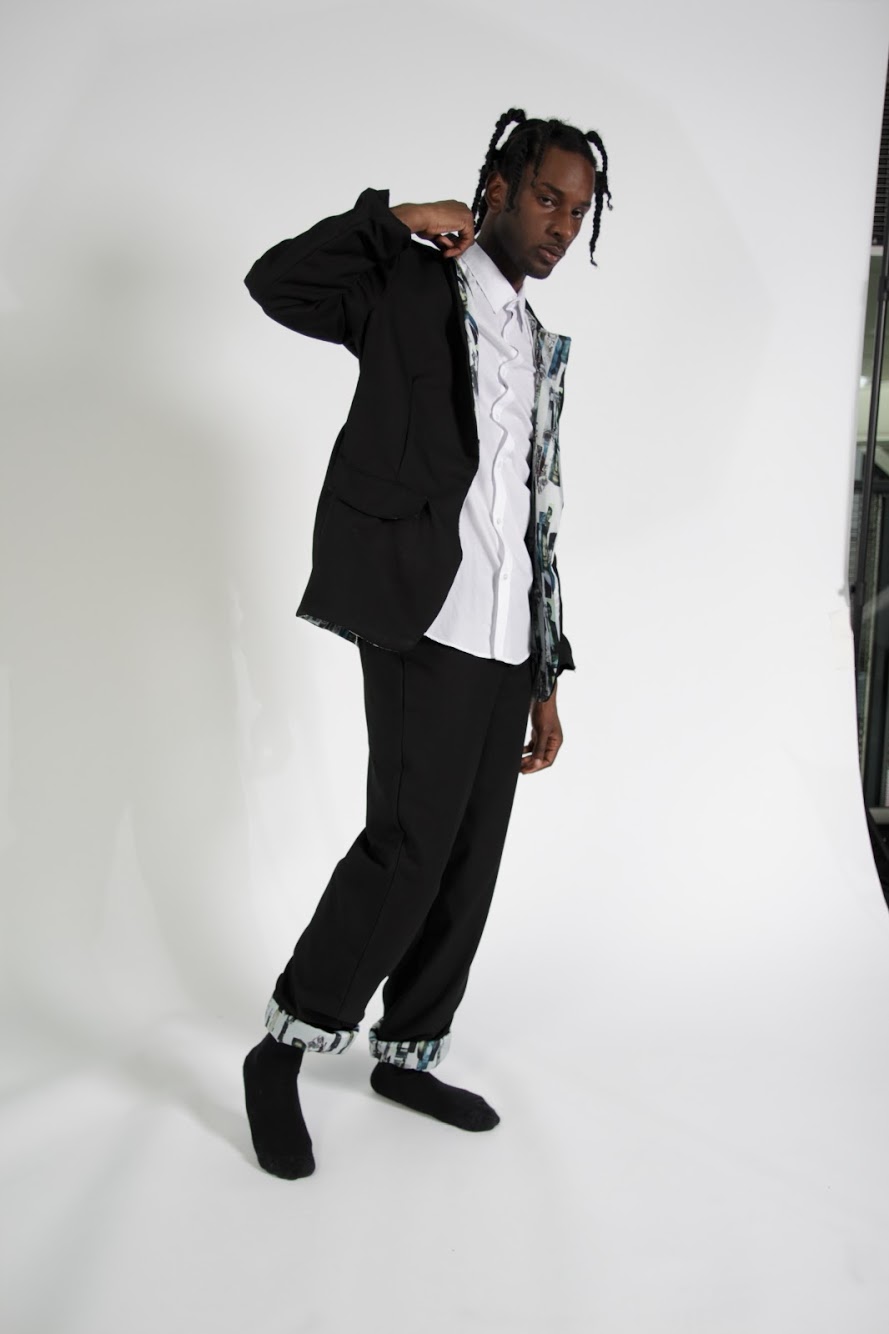
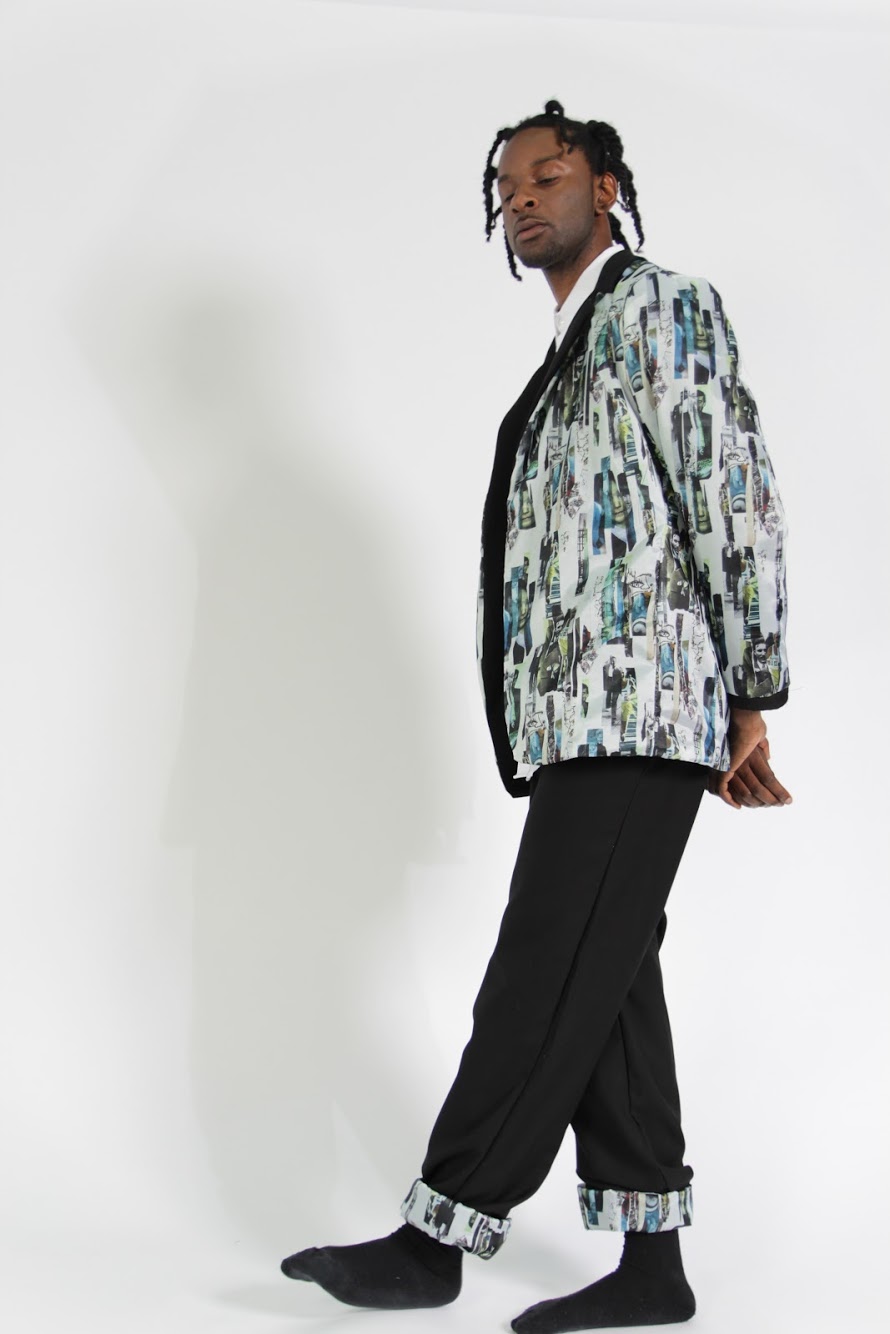
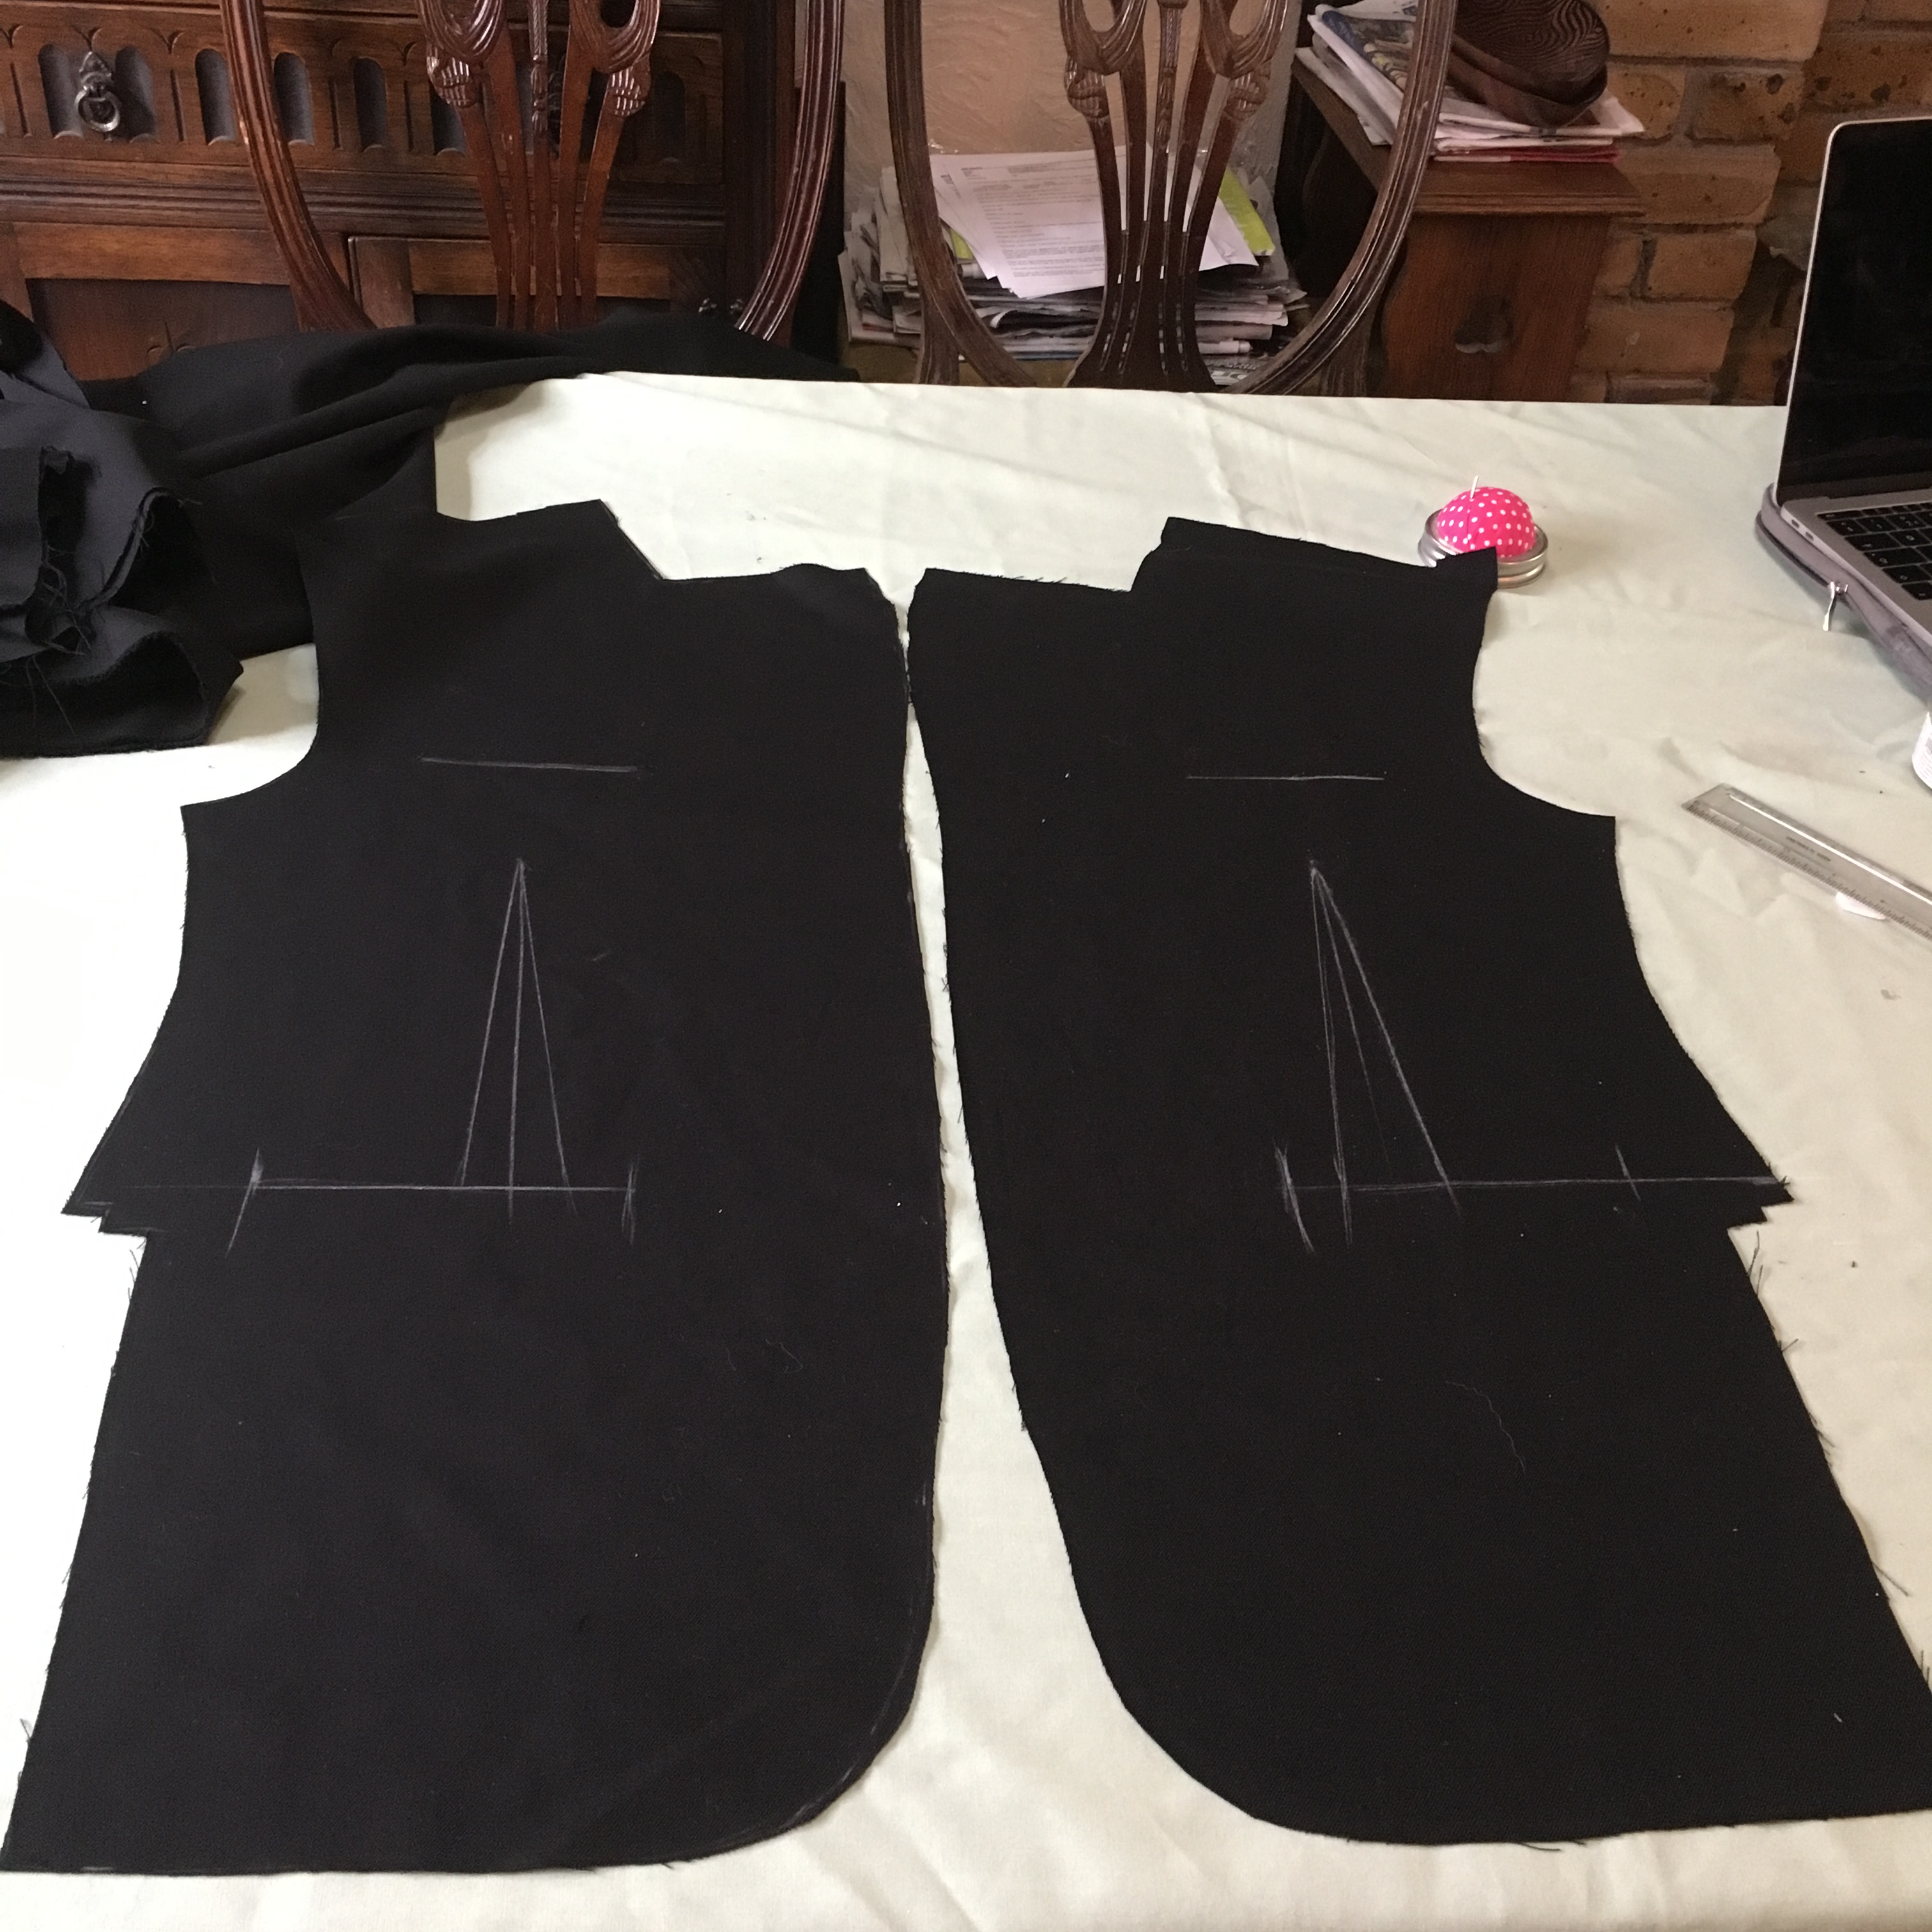
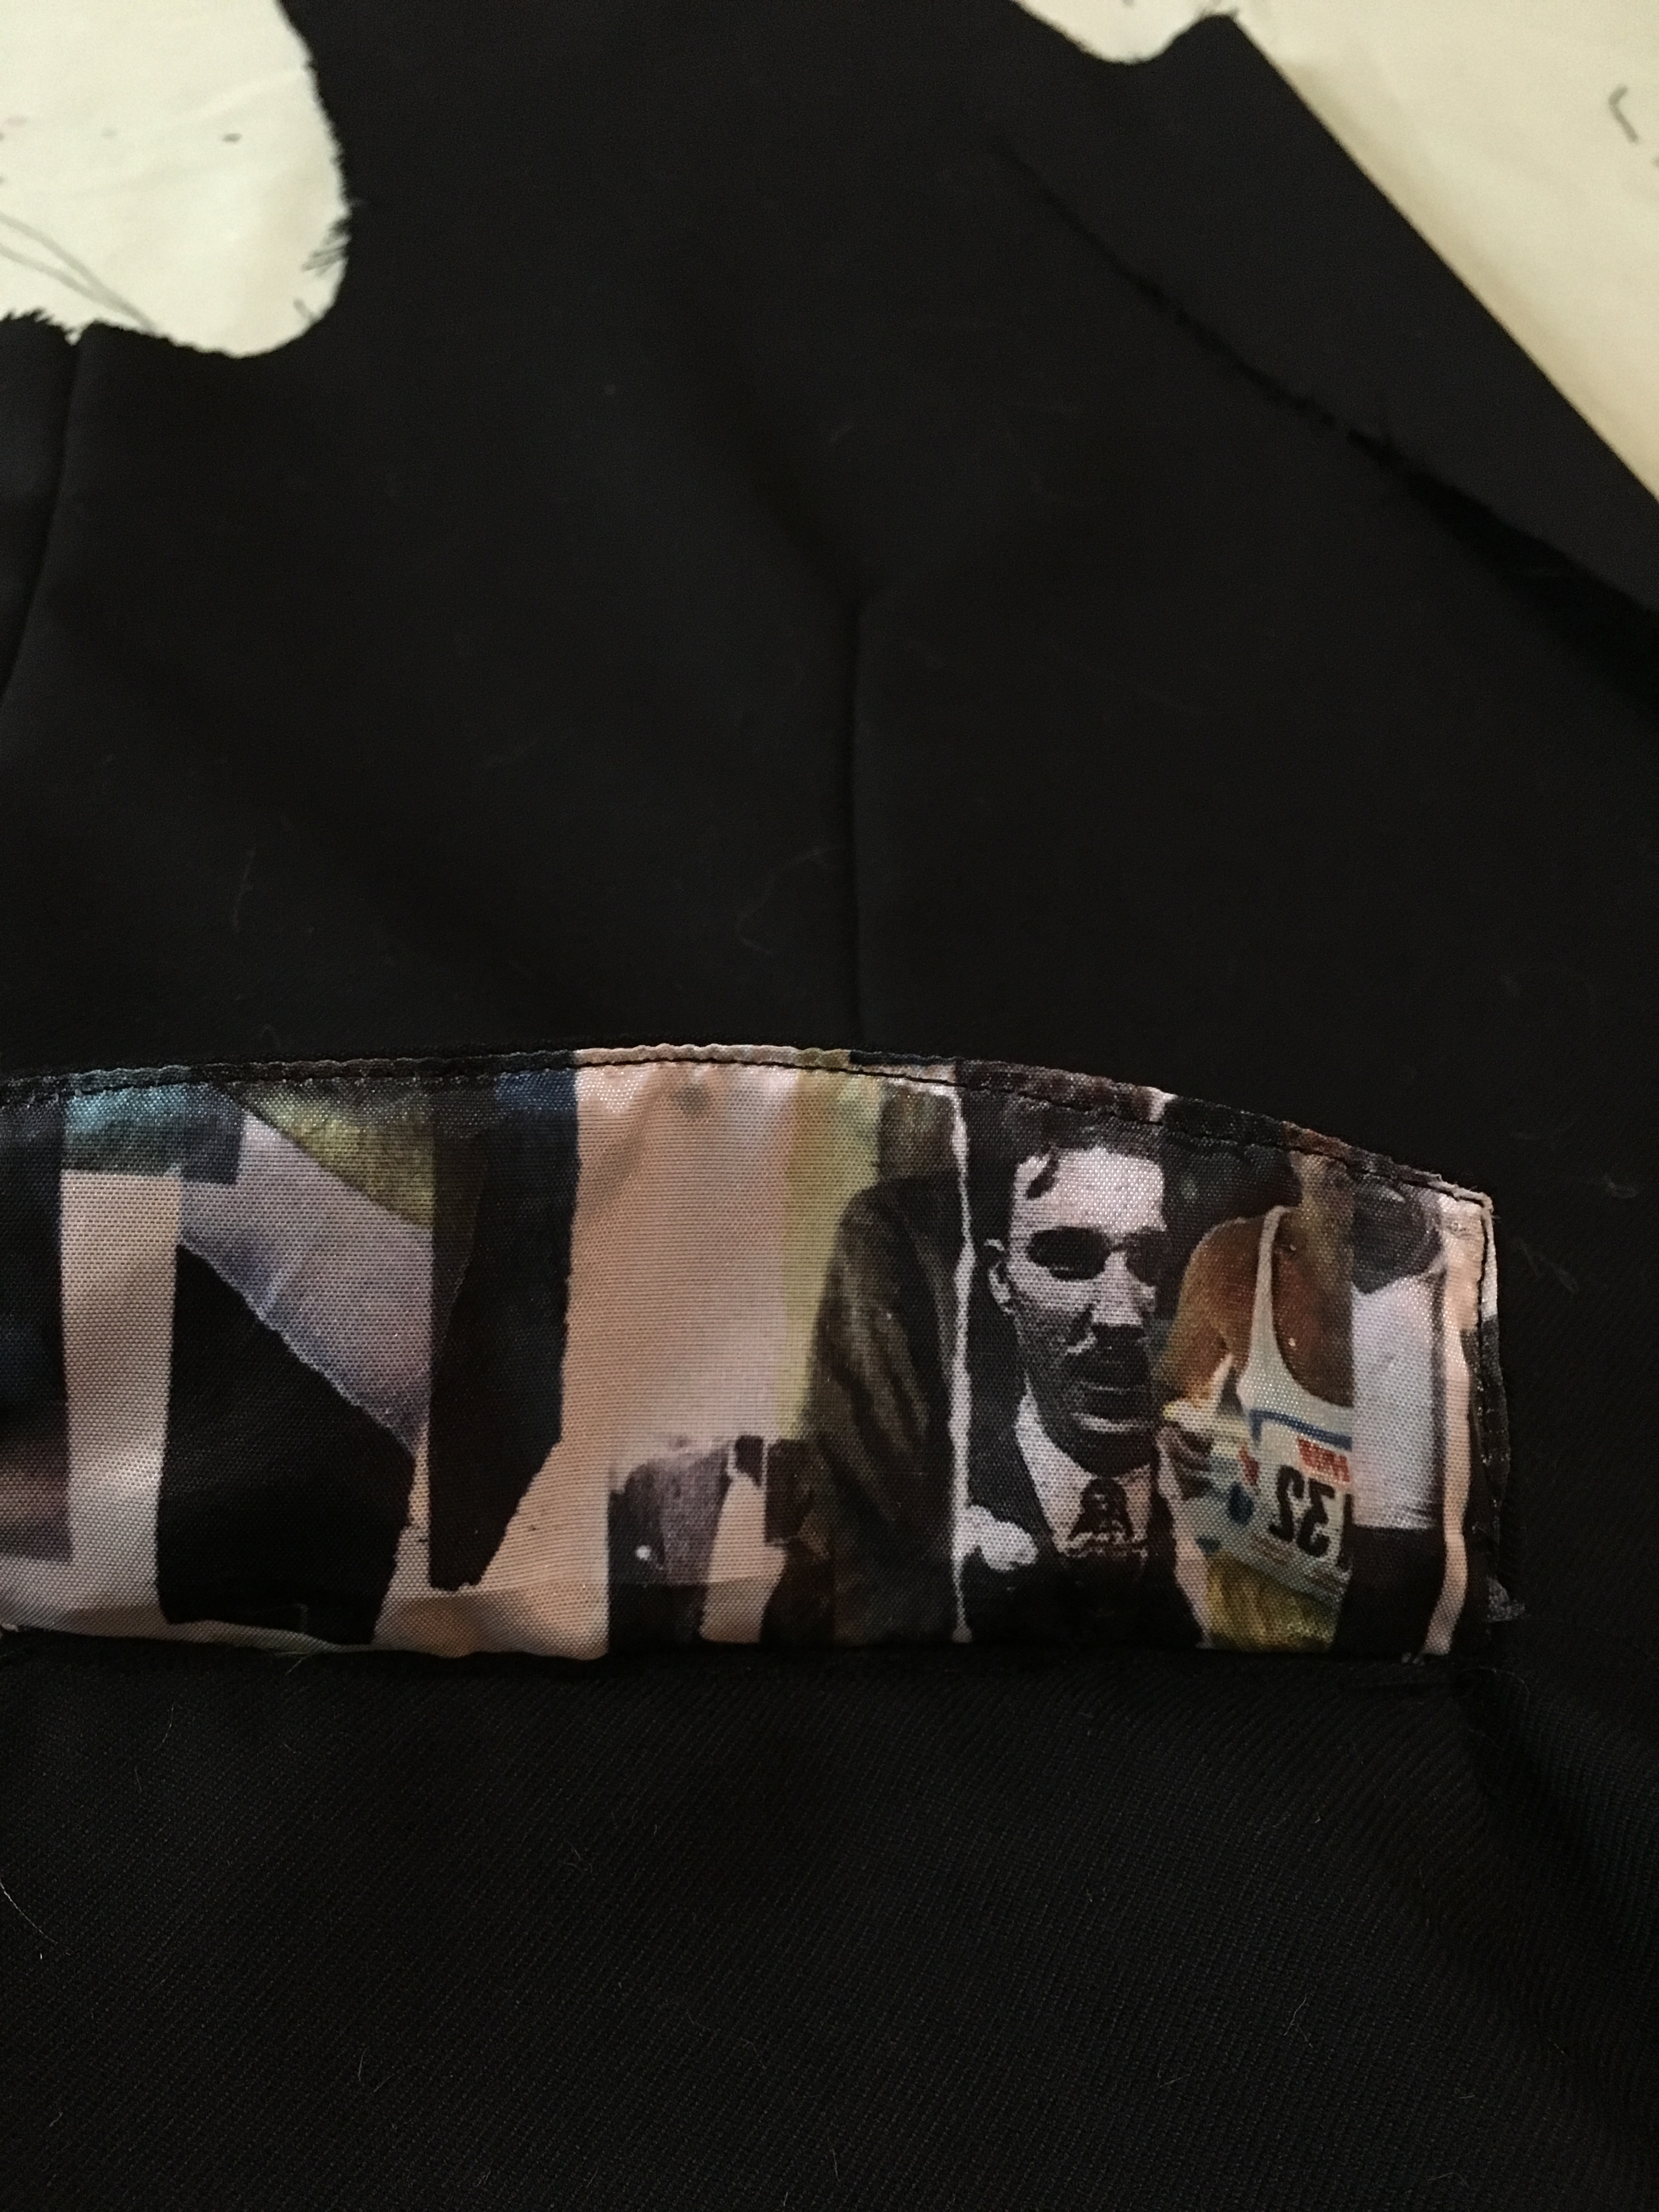
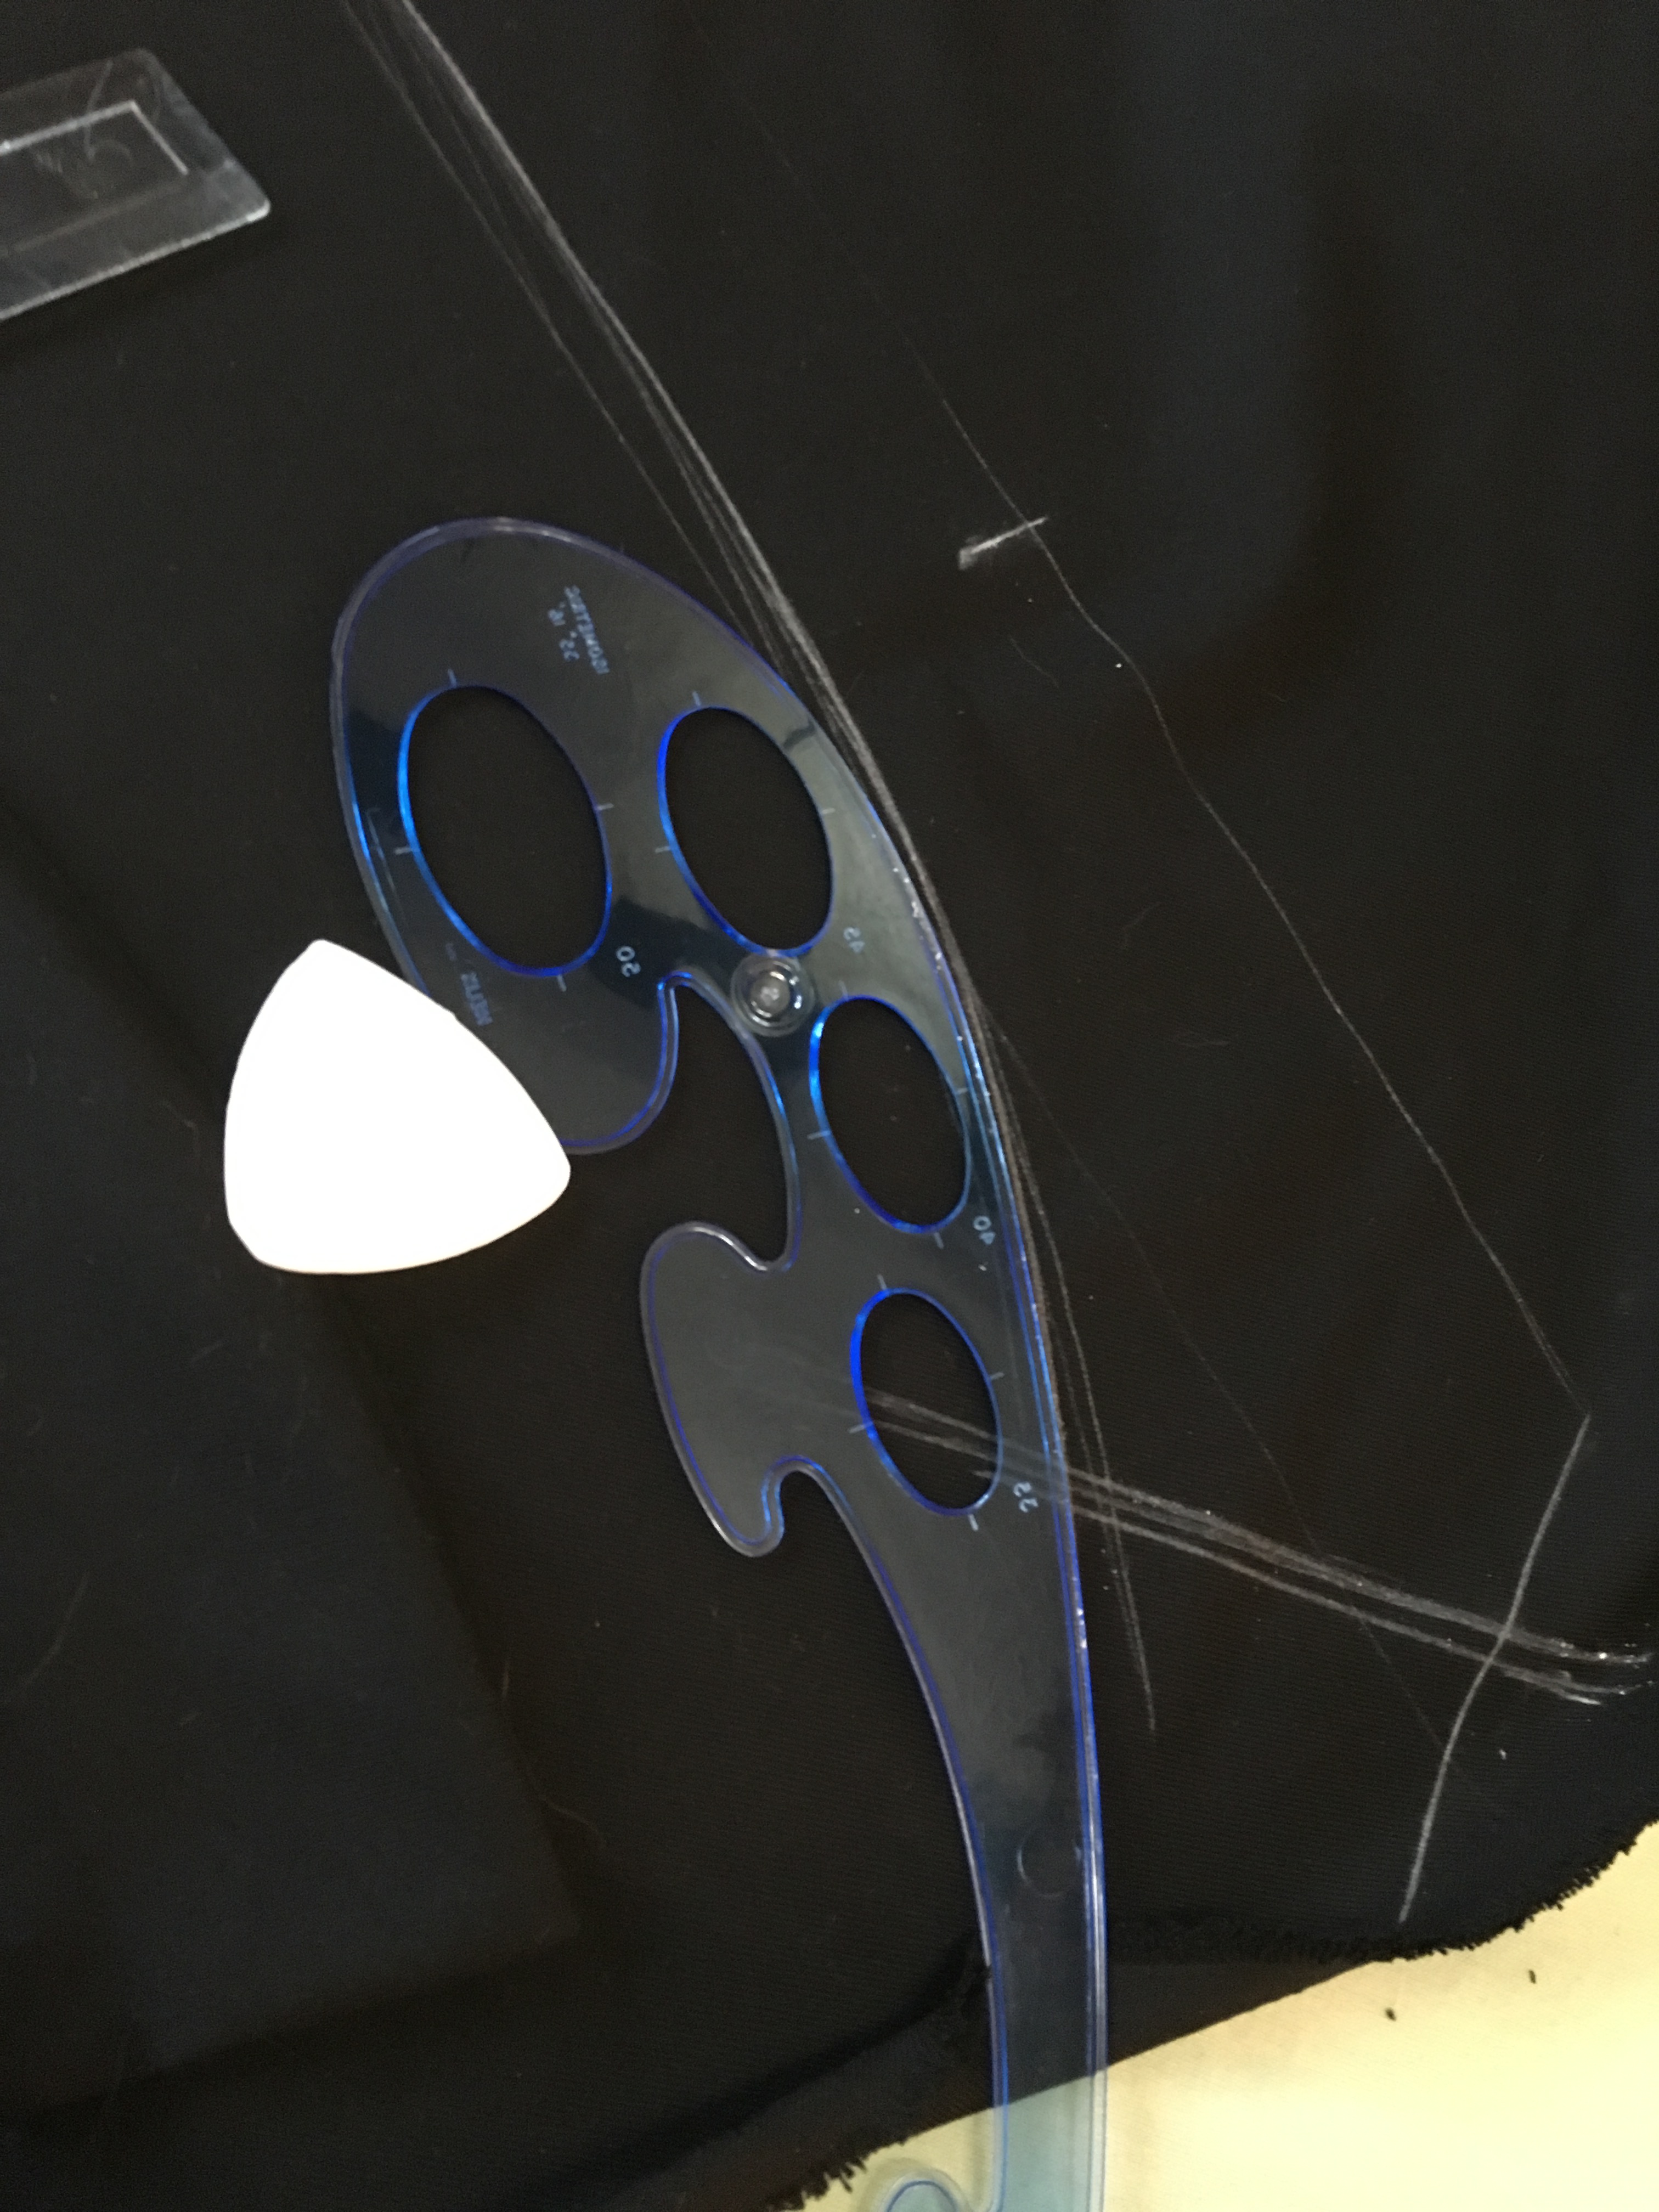
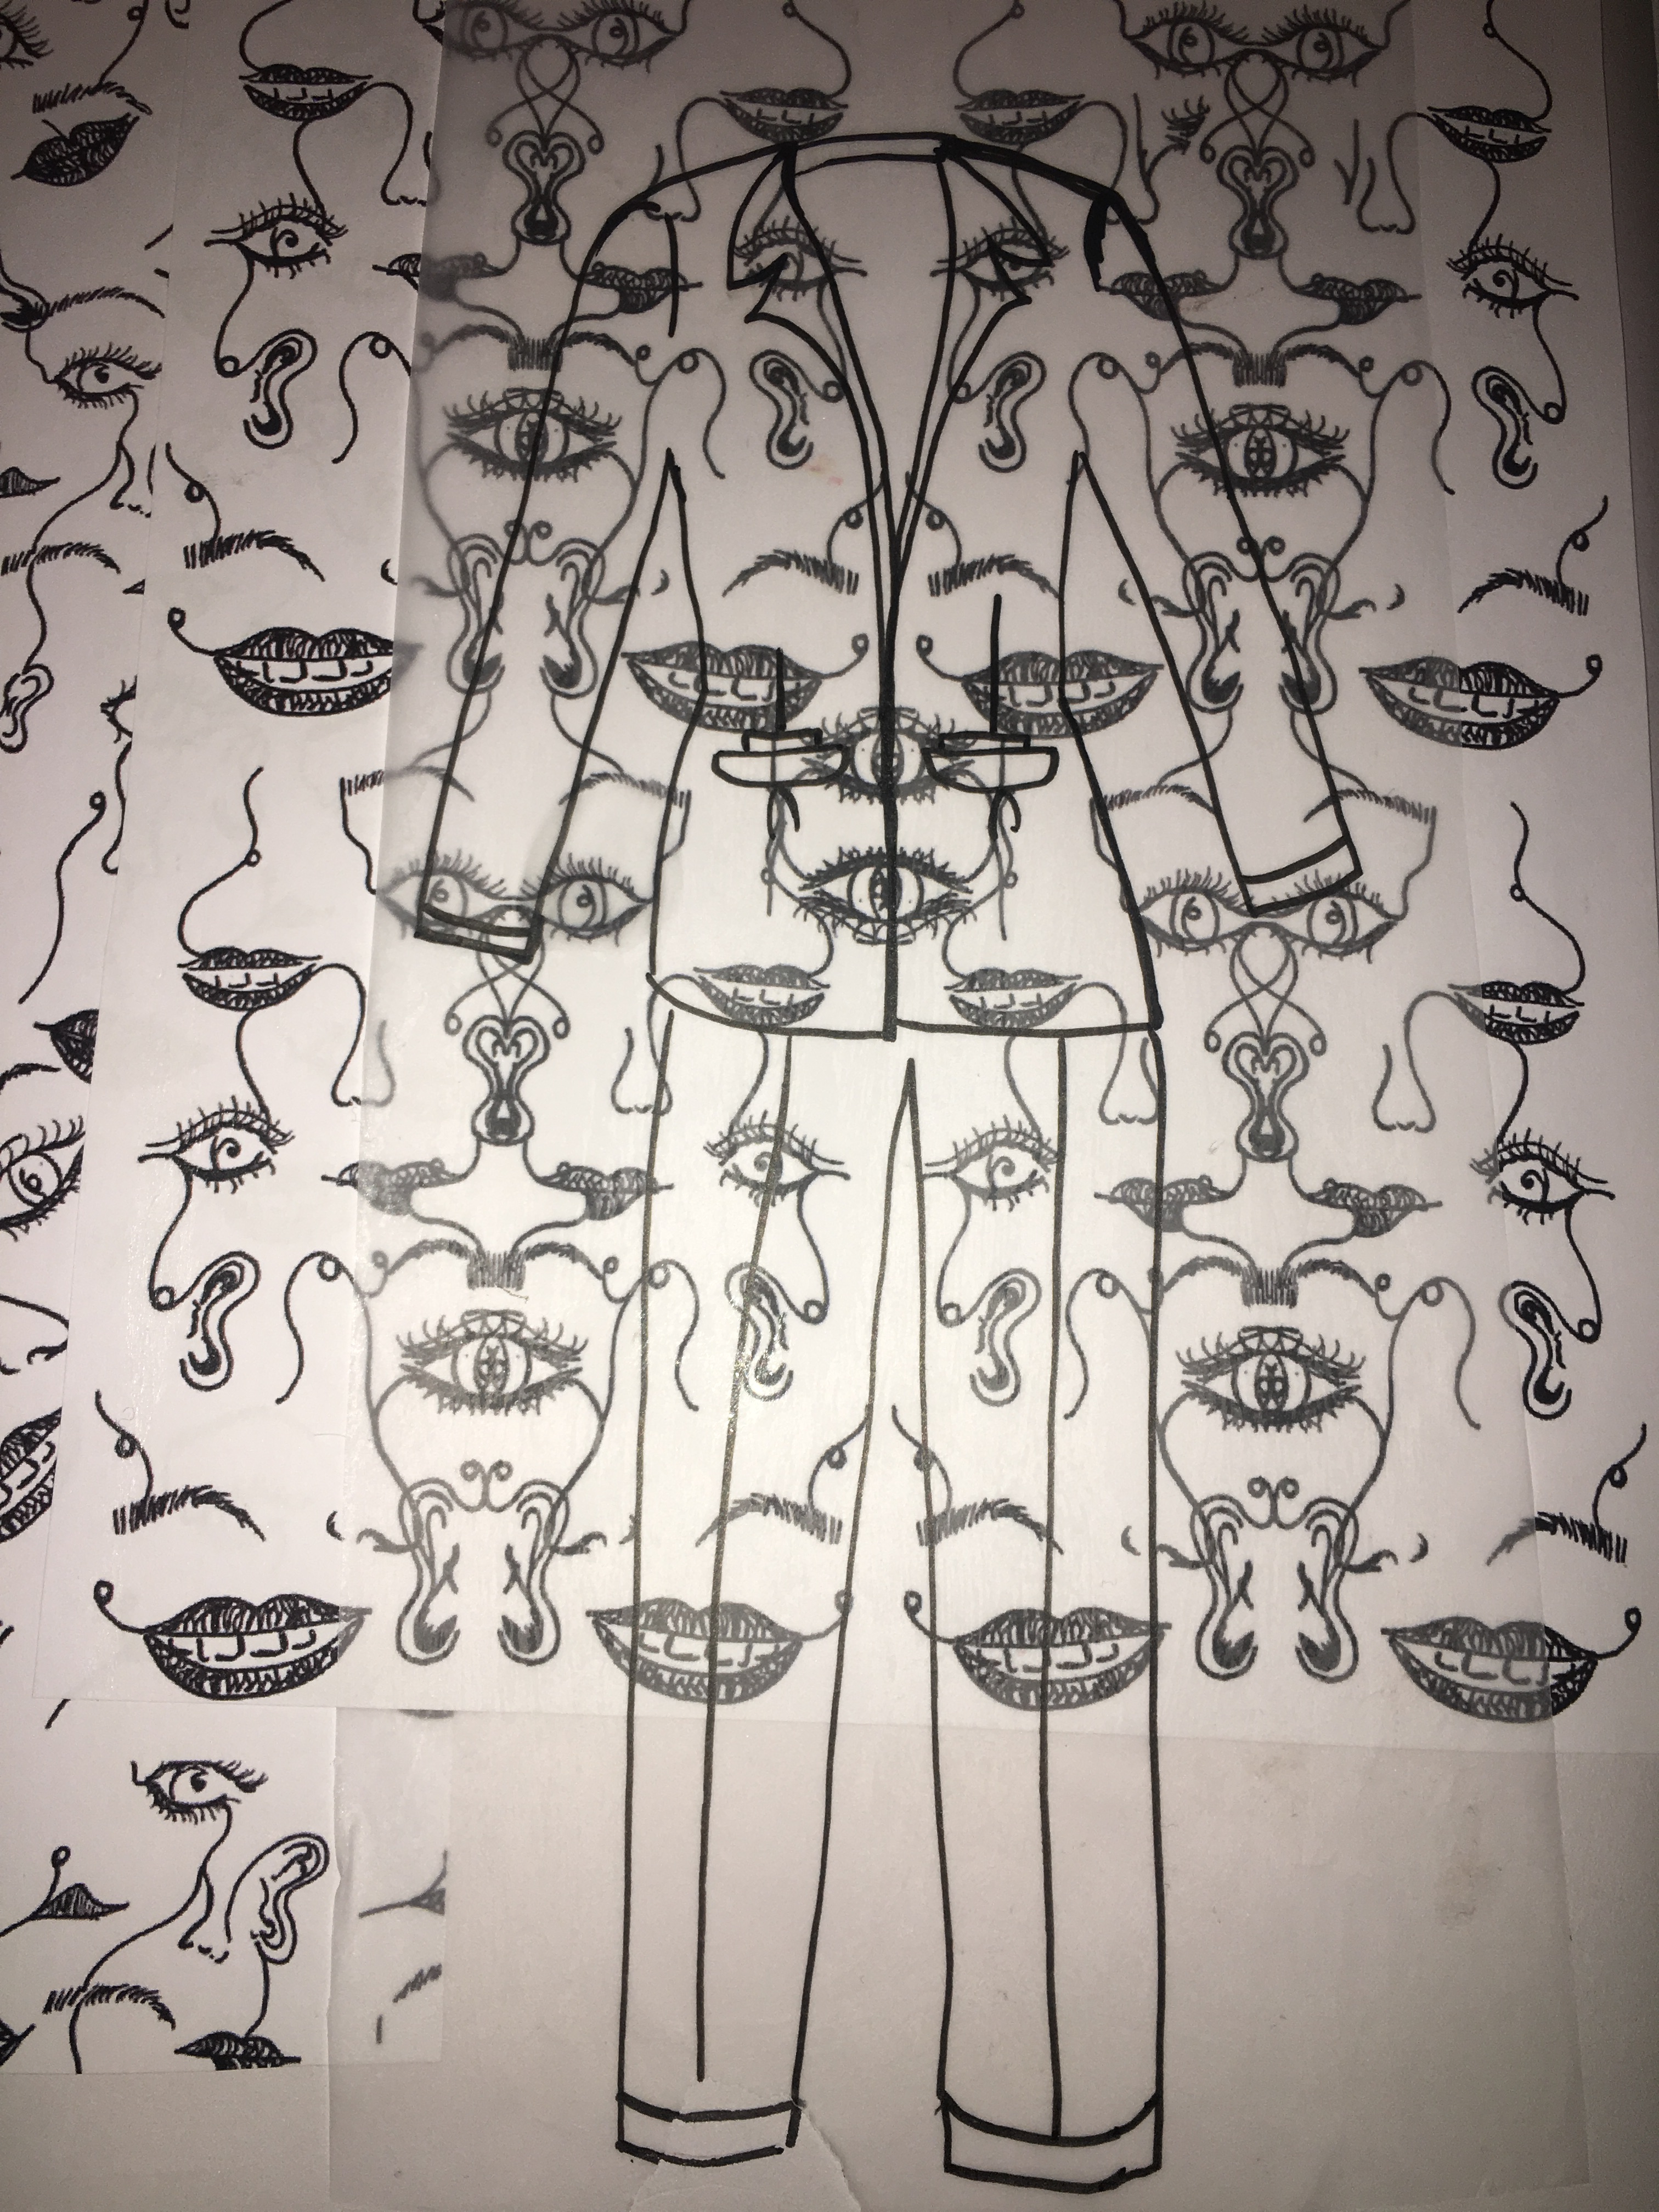
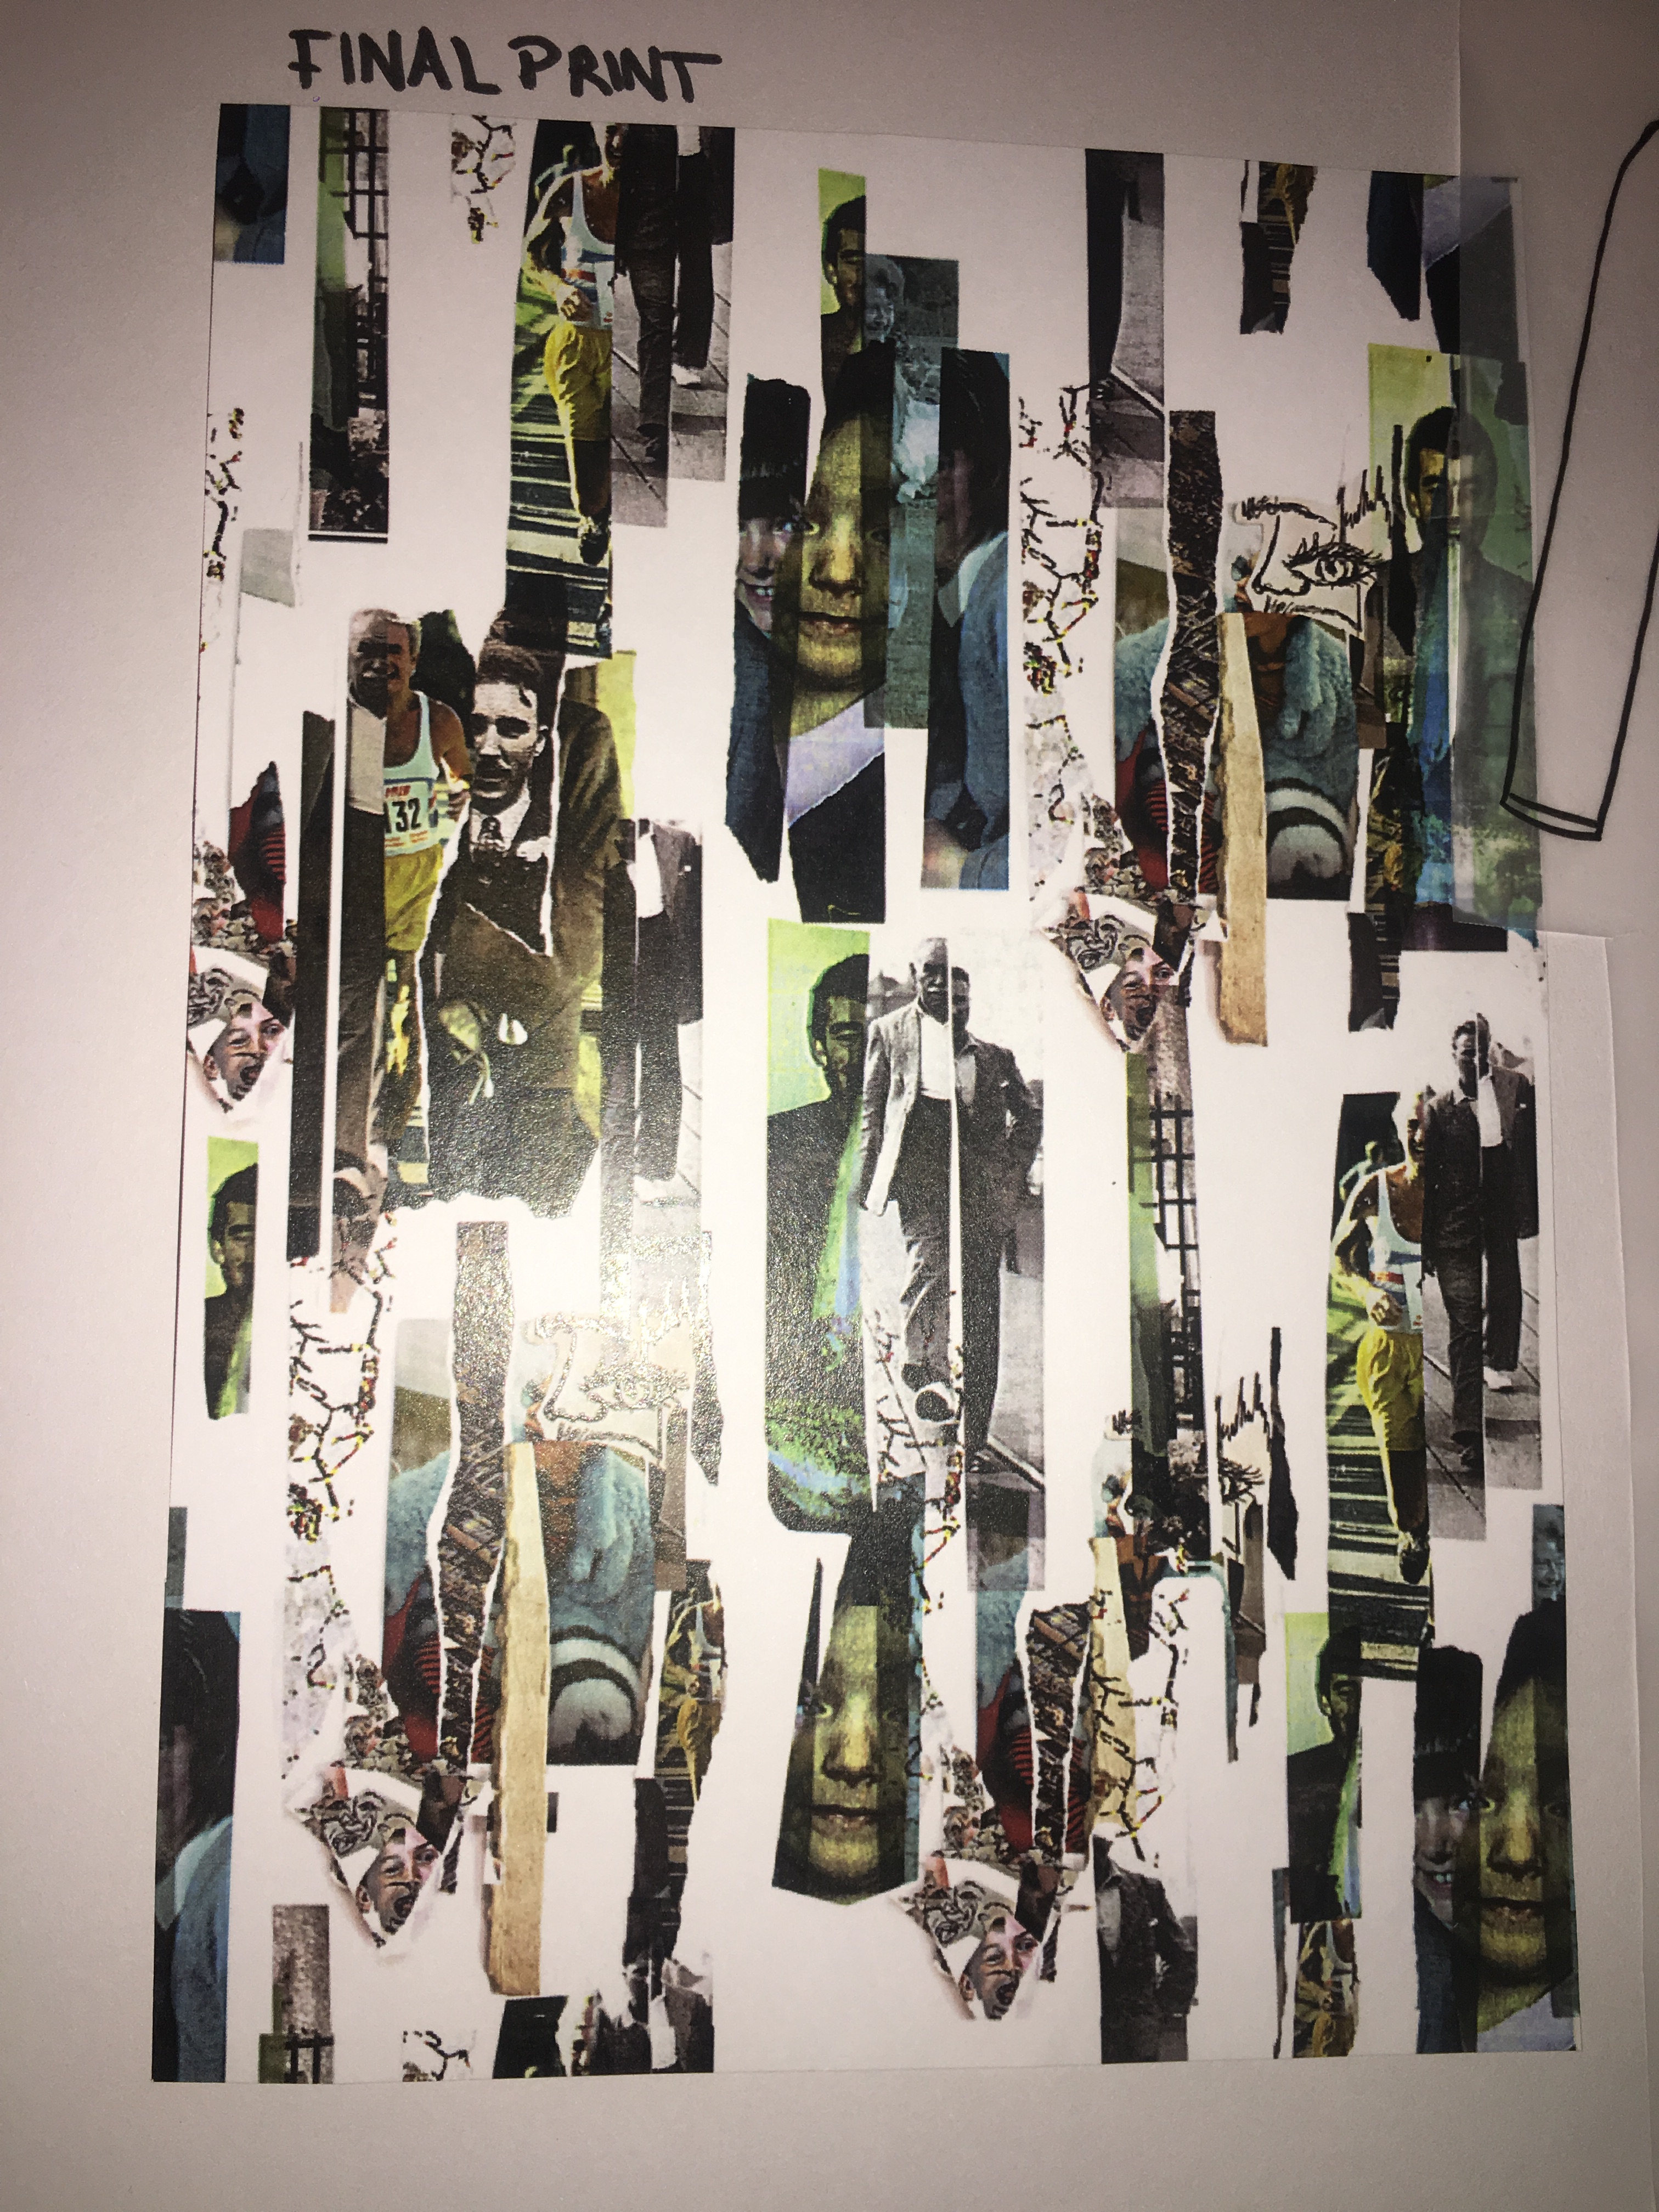
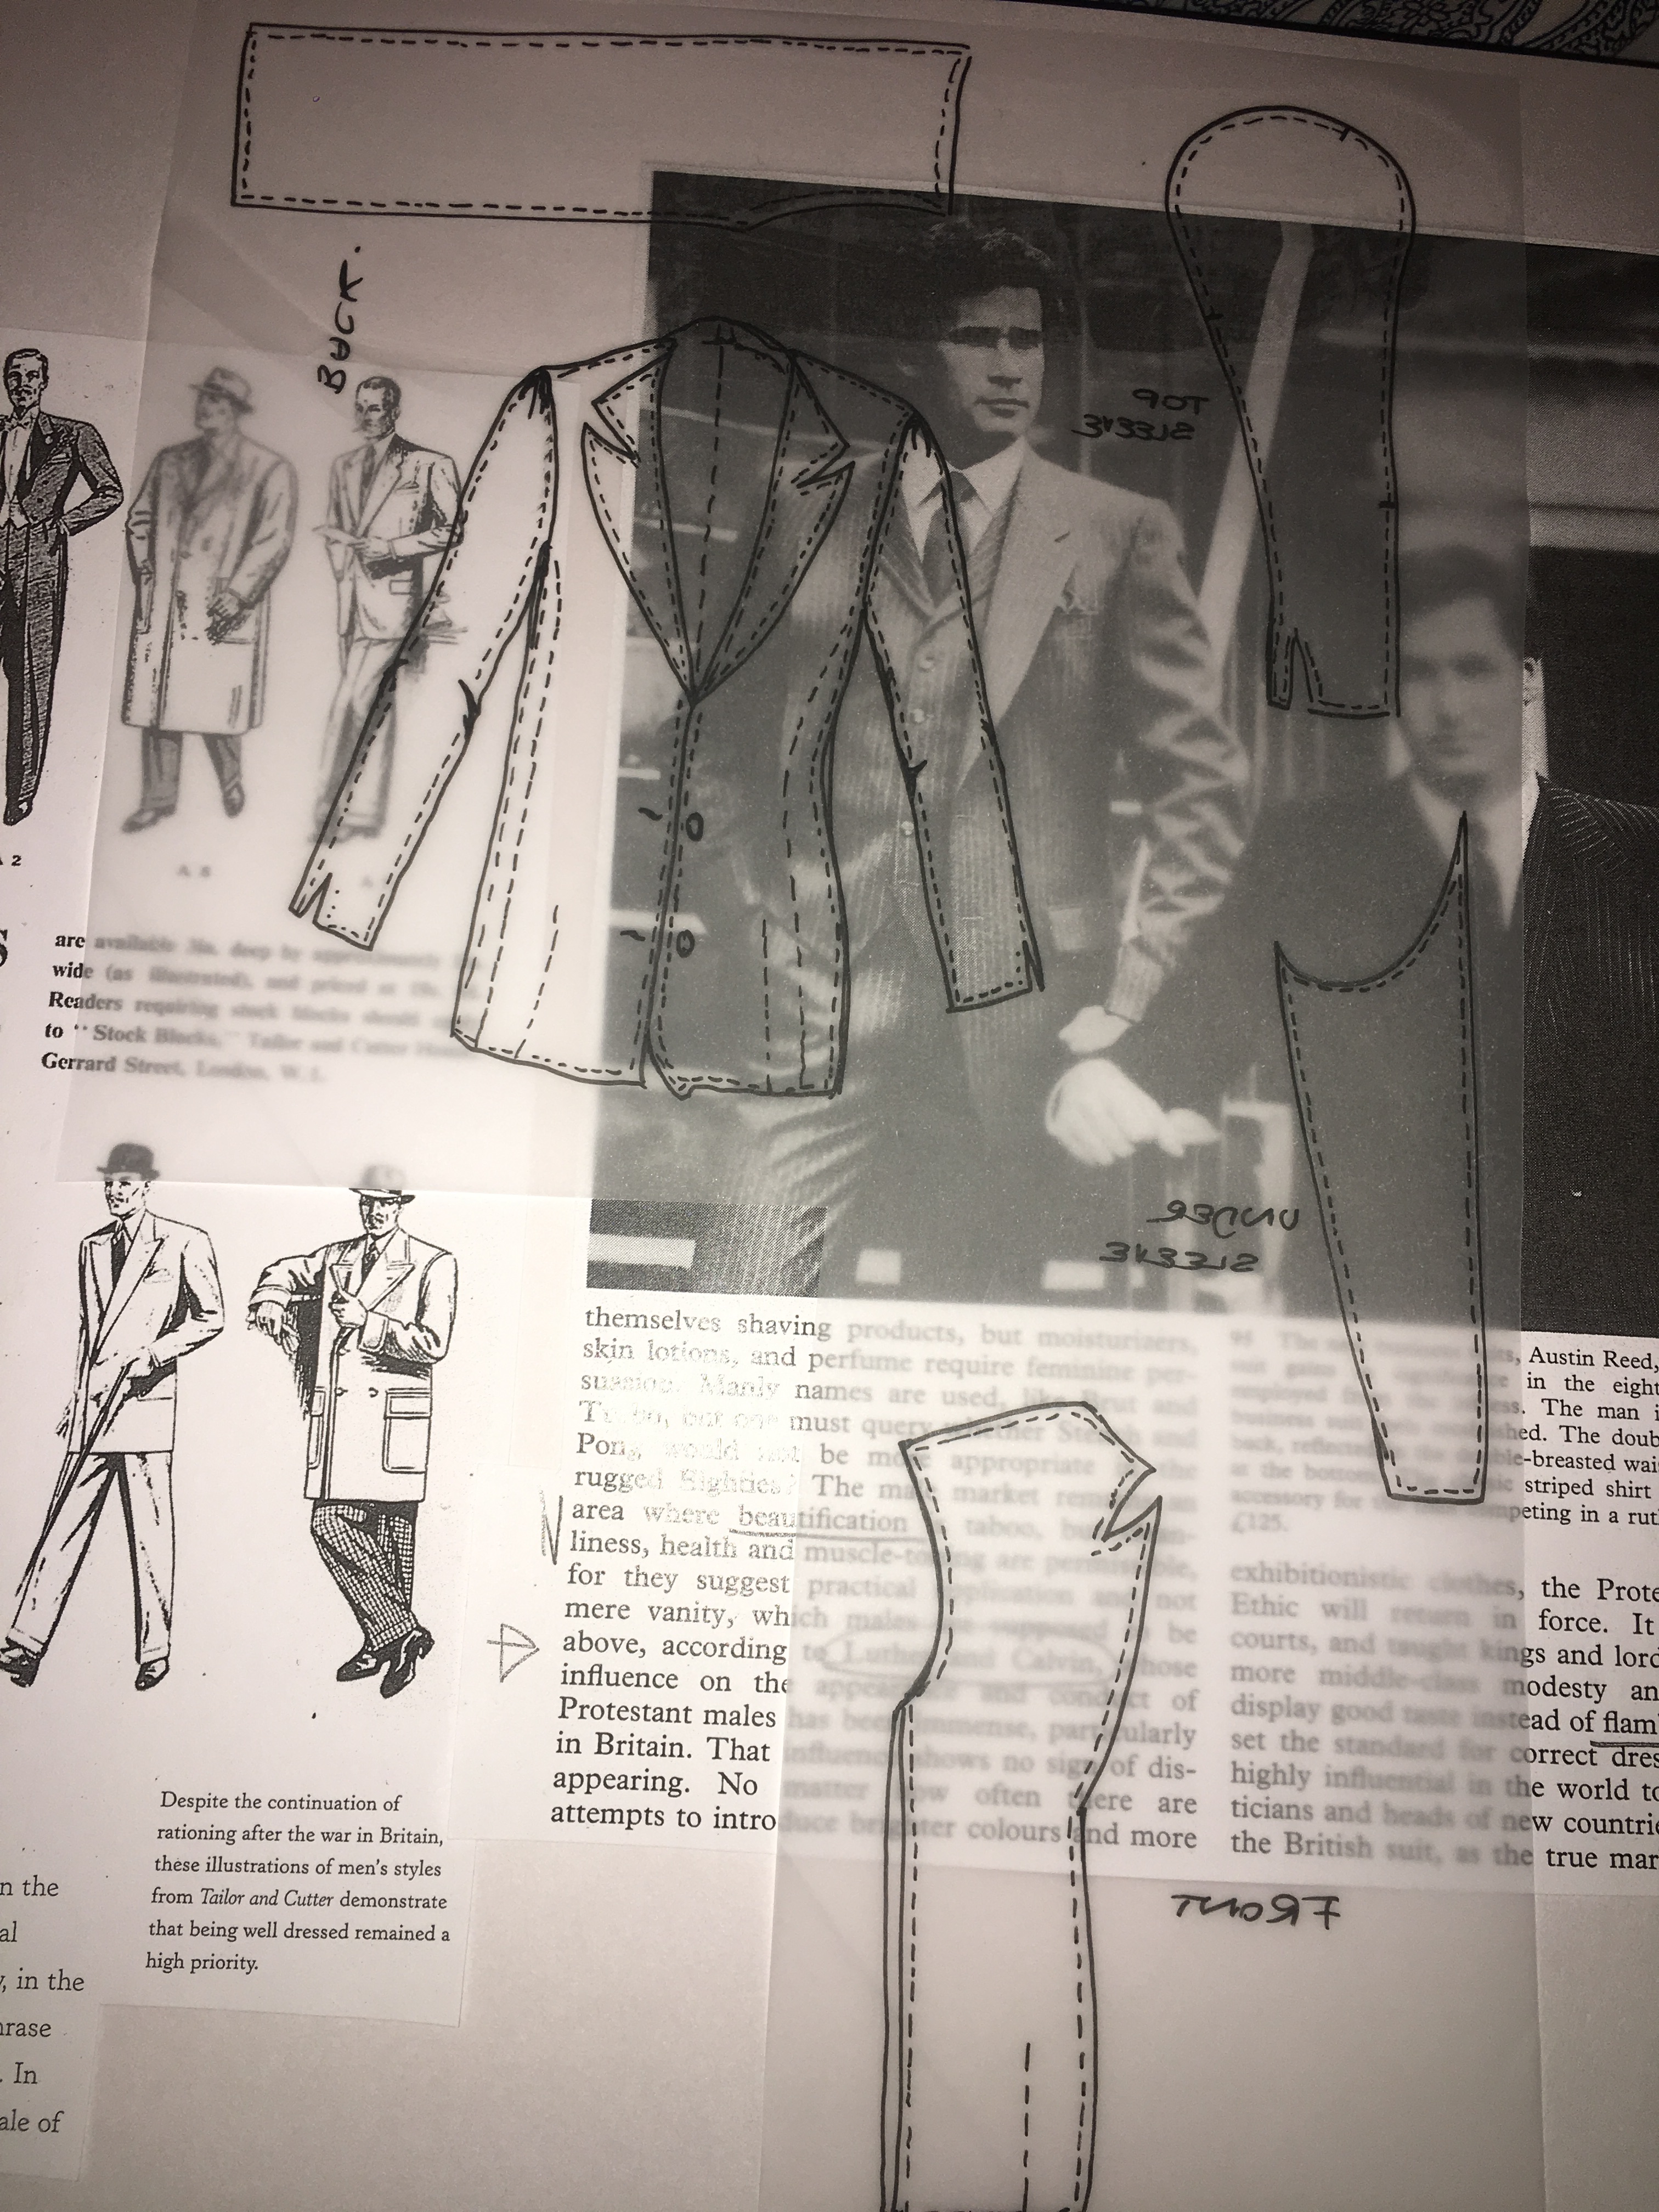
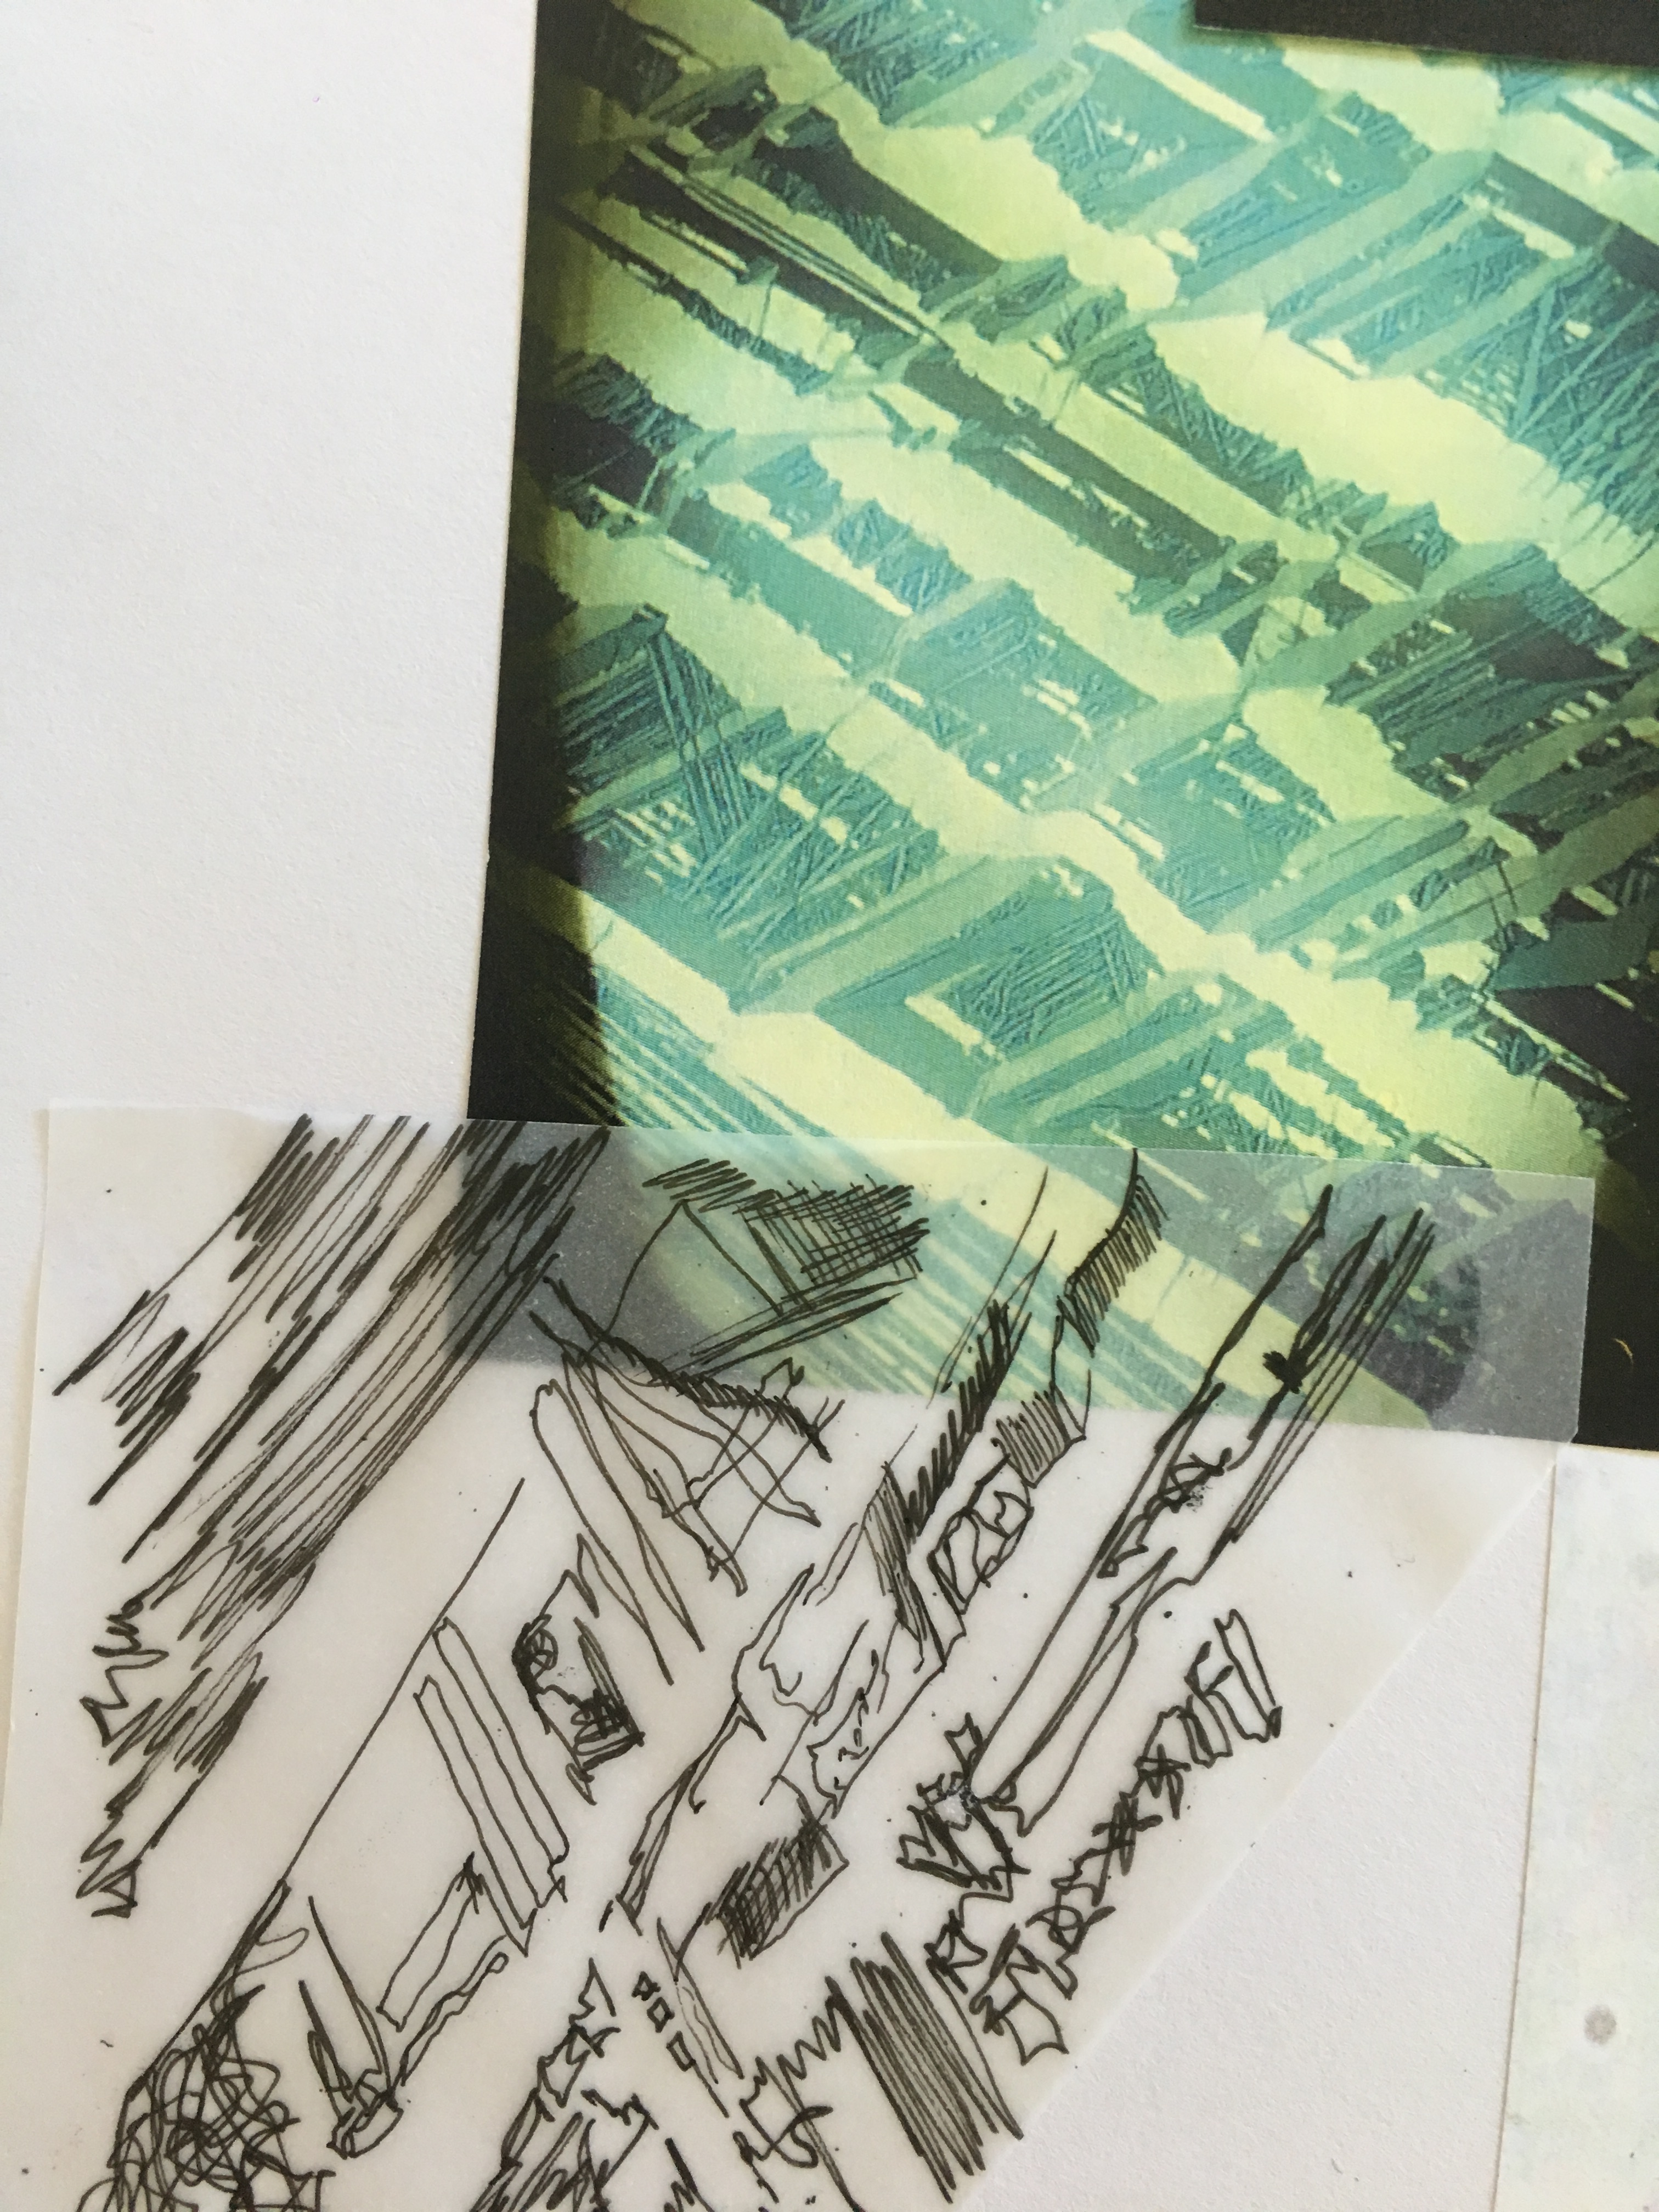
My FMP research consisted of collaging, painting with mark making techniques inspired by artists, photoshop designing, following with heat pressing samples, machine stitching, weaving and photoshop editing. My  development consisted of stand work converting my ideas from 2D to 3D. Continuous line drawing and fabric manipulation. My final garment consisted of designing a pattern on photoshop using digital techniques with  collages that I had previously put together. After I was happy with the pattern, ensuring the repeat pattern was hidden, I defined it and used the heat press to print it on my lining, toiling. The making stage consisted of  pattern cutting, tailoring skills and technical drawings. 
4. How did you integrate practical, theoretical and technical understanding to solve complex problems within your FMP? Please use examples.

When designing for my final prints, I designed a series of prints with illustrations of facial features, I was very keen on these and was about to print in on my final fabric, but after looking at the print I came to the conclusion it didn’t completely  follow my concept and development throughout, there features weren’t focused on my families features, this is when I decided to change my print, to bring more in from my research and continue to develop the ideas I had created. I came out with the  perfect print for my project with the correct colour palette. When also designing the pattern on photoshop I started with the wrong sizing, which delayed the process as I couldn’t save it onto my laptop, until I visited my tutor and it was corrected. When making my toile I made some minor sewing mistakes which meant I had to unpick and re pinned it, I also didn’t leave a seam allowance and the suit jacket came out smaller than I imagined, which meant it was beneficial making a toile due to saving costs and materials. I also changed the lapels on the suit jacket, added a collar and added pockets, therefore a few things were changed/improved from the toile and I created collar, lapel and pocket patterns  myself. When I first sewed the lining to the suit jacket I sewed the arms wrong so when I unfolded it the arm was like a loop, therefore I had to unpin and re do it. 
5. What systems/ tools did you use to plan your project and how effective were they to organise and develop your work? 

I effectively organised my project by following a planned timetable week by week, which was really beneficial for me as it helped me stay on track and helped me achieve what I needed to in a week and not to fall behind,  It kept my project moving and constant, I also had a rule where whenever I got an idea for the project, no matter how small or big, I would write it down and go back to, this helped my work link together. Having group  And one to one tutorials really helped me, as you don’t always notice improvements that need to be made or things that may be missing. note-taking was vital in tutorials as I was bundled with feedback from peers and my  Tutor which means there was improvements throughout my project. Blogs were also a great way to develop my work in a organised manor, that guided me, helped me understand every aspect of my project and to plan moving forward. 
6. What type of evaluative and reflective records did you keep? How did this help you develop your learning? Please use examples.

I have notes from all tutorials I have been in, my own notes when an idea popped into my head, the mid point assessment meant I had lots of helpful, positive criticism from my peers, I appreciate my peers looking  at my work and giving me feedback to improve on, for example when at mid point my peer asked about my customer and I had an idea but nothing in writing or in my sketchbook, just an idea in my head. Therefore I acted upon  my feedback and created a mood board for my customer and did some background research to define it and then put it on my blog. I also kept an updated blog and instagram, to indulge into my project and express myself through many  Different platforms. I also had a pinned wall on Pinterest to create a mood board and to visually see where my project is gouge. 
7. Who is your intended audience? Describe techniques and methods you used to communicate your idea to them.

My intended audience is businessmen with style,  I created the perfect customer profile, based on research on menswear summer 19. Looking into WGSN, and also looking and always being updated on instagram, with the  highest brand. Age range between 23-35, with social interests and a vibrant personality, whose slightly relaxed but works hard. If I were to try and target my audience, I would most probably do advertising in Canary Wharf, due to buildings and workplace. I would also create an online website and access their attention through social media. 
8. Overall summary: Describe the key points to take away from this experience. In what ways will your approach to creative production change in future as a result

Overall Im overjoyed by the opportunity I have been given with this project, I have learnt how to define a concept, how to develop an idea in a variety of ways with different techniques, media and using a wide range of resources.   I will be taking away photoshop skills, technical drawing, draping. I have also learnt how to solve problems I have come across and value feedback from peers and tutors. I have also learnt the basics of tailoring and really enjoyed  making menswear for the first time. In the future I will approach my next step of education with a confident, well developed fashion design mind with ideas evolving constantly and wanting to get the best out of what I’m doing, this  course has improved my time management massively as well as planning and production which is two skills I will most definitely be using in my future. 


Customer Profile


Name: James Church-Kelly

Age: 23-35

Occupation: Business man for a stock exchange company

Salary: 25,000-40,000

Address: Wembley

Relationship status: Married

Education Level: Degree in business and marketing

Personality: Loves social events, going out after work, and following current trends. Family person with motivation and knowledge, enjoys relaxed weekends and loves his job.

Style: sleek but casual, with some unique twist to his outfits, from funky socks, to accessories to spice it up.

Spending habits: loves to shop and buy from designers so that no-one else has what he wears, lives luxury and spends when he wants.

Week 8

Making Stage

I started with buying 5 metres of suit material, and 5 metres of a 100% polyster lining typed material, I cut a standard suit pattern, which consisted of 2 front panels, 2 side panels, 2 back panels, 2 under sleeve panels and 2  sleeve patterns. I laid out my suit material, and pinned all pattern pieces to the fabric effectively, to save my materials and costs. After cutting out all pieces with a 1.5 seam allowance, I carefully sewed the darts in the front panels of the suit, and marked my own pockets through the darts, the pattern didn’t have pocket marks so I referred to another suit and looked online to find out exactly where they should be placed. After this I made my own pocket patterns, to impersonate two pockets on the front panels of the garment to add detailing, I then cut these patterns out, two in suit material and two in the lining so that when you lift the pocket squares you see my patterned lining on the inside. I then pinned and sewed this to the front. A mistake I made was cutting pocket holes into the front, due to me wanting to add actual pockets but later decided not to, which made it difficult to neaten and finish off perfectly. I then sewed the front panels to the side panels, whilst neatening the inside seams with pinking sheers to reduce bulk on the outside of the garment. I then sewed the top and under sleeves together ensuring I was matching the notches, I then eased the sleeves into the arm holes, pinning whilst going, which took a while due to getting to the end and still having a large amount of sleeve, which meant I had to unpin and spread it out evenly to avoid folds and bunches in the sleeves. I also had to ensure where the sleeve and the top seam (where the front and back panel meets) was sewn carefully to ensure the seam on the outside had no extra material and where all three fabric pieces met was neat.

After completing the outer suit and being happy with the result I repeated this with the lining, but where I could cut two of all panels at the same with the suit material, due to the lining having my print on one side, I had to cut panels out separately. I created my own pattern for the collar as there wasn’t one with the block pattern I used, therefore I looked at other suit jackets and actually cut into the collar of one to see the collar piece, I then used tailoring chalk and a pattern ruler to create my own, I also made lapel patterns and changed the ones on my pattern as the lapels that came on the pattern didn’t fit with my idea and concept or my designs, so based on my design I drew and measured a new lapel and fitted it into the suit. After the lining of the suit was complete I sewed the garments right side to right side and folded it inside out, catching the collar in the middle, after looking at the suit I decided the lining needed to be taken in slighting as there was a lot of loose material, so I unpicked the where the back panels met the collar and  took it in slightly then top stitched the bottom of the suit jacket to finish it off. 

For the trousers, I cut out the front and back panels in my material and lining, I then sewed the suit material front and back together, and the lining. I left the front open where they meet which I then sewed a zip into. I then added a waistband. I wanted to add the lining to be able to turn up the bottoms to reveal my lining at the bottom of the trouser leg. I wasn’t completely happy with the outcome of the trousers, due to the zip not being perfectly neatened, therefore if I were to remake the garment I would leave myself more time to make the trousers and add a button onto the waistband. 

My favourite part to this suit was that I made it so that it could be warn reversible, with the lining being the outside or the suit material, I wanted to make it this way to ensure my lining was visible and so that it had two styles, and also to represent my family and the traits that I discovered, and the journey my family has been on so far.

Week 7

Finalising my designs, this week I have been designing, looking into menswear in the 1940s, focusing on business wear, all the way to suits that my brothers have wore, I have been looking at photographs and different styles throughout the years, like menswear has evolved, so has my family, I want to represent the journey my family has been on and how it has evolved. I wanted to incorporate styles that my family in the 1940s wore aswell as suits my brothers, uncle and cousins have worn. To me, its like representing all the men in my family, so from the 1940s I took the more lounge side to the suit, designing slightly loose fitted trousers with rolled up bottoms and a more business suit jacket, with the standard lapels and front pockets. I will add a dart in the front of the jacket to make it slightly fitted. I have also been doing stand work with fabric samples I got from rolls and rems to see what type of lapel I want on my suit and how I want it to contour the body.

Throughout this project I have throughly enjoyed using photoshop and creating prints using different techniques, repeat patterns and defining the pattern. I have been taking my favourite parts of my research and responses and developing them into prints to represent the traits within my family, I took a liking to my face features illustrations and decided to develop this, putting them into photoshop by abode scan and playing around with different techniques including mirroring, layering, the lighting and scale, but after a long thought I realised if I choose this print, it wouldn’t make complete sense to my research as this idea came later and hasn’t been developed its just illustrations I liked. So to avoid misunderstanding of my project I went back into my research and looked at my collaging, which was a big part of this project as it was a great way to compare and visually see similarities we share, I decided to combine parts of prints I have previously made, to develop them into one, following my green toned colour palette. It was hard for my to decide what print to finalise, so to help me decide I drew my final design on tracing paper and placed the prints behind them to see what it may look like. I had a lightly green toned background with my print that I worked hard to hide the repeat as make it look all one. Just like my family, we are all connected by the same genes and we share DNA. I created my final design on photoshop with my print edited into the garment to see what it would look like.

With my design in mind, I went fabric shopping in lewisham and looked at suit material, debating and deciding on what type I wanted, I chose a heavy, all black, lovely suit fabric and a light weight, 100% polyester material for the lining, which I printed on with the heat roller. This took a process of printing my pattern onto 5 metres of transfer paper, I laid this onto a flat surface, then laid out the fabric on top, which I had to iron first to get rid of the strong crease where it had been folded to avoid any mistake when printing, then placed tissue paper ontop and pinned it in place to avoid the heat roller burning my fabric. Due to my fabric being thin and may have been a mix, we had to slightly speed up the speed it goes through the roller so that it didn’t burn it.

Toile:

I cut out a standard suit block pattern for my suit, and looked at youtube videos on the basics of making a suit, I also used wikihow to get myself familiar with the basics of my making a suit, i decided to make a toile of the suit out of calico, to reduce material wastage and mistakes. So I cut all the pieces out in calico and marked the darts and notches, when all pieces were cut, I sewed the front panels to the side panels, then these to the back panels. I then sewed the under sleeves and top sleeves together and then slowly sewed this, slightly gathering, easing the sleeves into the arm holes. When the toile was finished I was pleased with the overall look, the darts in the front gave it a slight fit which I was happy with. However the overlook look for me was a little too plain, so I noted what I wanted to change, which was to add pockets on the front panels, I also found the lapels too triangular and came too far out into the garment, almost touching the sleeves which gave it a look I wasn’t going for.  The toile I made also didn’t have a collar, which I found would look unusual and not the way I wanted. Therefore I had a list of things to change when it came to making it with my materials, which made the toile beneficial to make due to me wanting to change and adjust the suit to fit my project designing. 

Week 6

This week I started with looking at the DNA of the world, looking into the haplogroups, population and cultures, I researched this due to my interest in how many different cultures there are and how combining these create uniqueness and someone who represents not just one country or culture. I created a response, and although this is a really interesting part of my research, I want to remain the focus on my family. Looking into my research so far, I have noticed the recurrence of the focus on the males in my family, I have enjoyed comparing and finding the traits that have been carried through the years from 1879-now. I value the family members I never met, and want to symbolise this through my garment.

I have decided to look into the fashion sense in the eras of the photos. I have focused on menswear, looking at the 1930s and 40s for inspiration to create a lounge, business suit. I took a strong liking to the loose fitted, rolled up bottoms and unfitted suit, but still smart and presentable. I have been designing menswear with the influence of the 40s, but with a slight influence from todays business menswear to combine the love I have for all the men in my family, to combine this and make a collaborative of styles. I found a book in the library called ‘A tailors bible’ which had front to back, how a suit is made, inside an out, it gave me a very clear idea of how to make a suit, with images all the way through showing different types and how menswear has evolved over time, which in my designs I combined with how my family has evolved over time, I wanted to carry this concept through my garment, therefore I started to design, with the menswear I was designing I wanted to portray the evolving concept, by doing this I combined styles from the 1940s all the way up until now, for me this is like adding traits of my family from the 1940s up until influence from my brothers, due to in the photos they are all in suits, which I how influential and inspiring to create my own menswear possibly for future family members.

Week 5

I started this week off with putting all the traits, shared characteristics and reoccurring appearances within my family into a mind map. which consisted of small shaped eyes, muscular body shape, petite size, attached earlobes, epilepsy and brown eyes. Autism is also a part of my family as my cousin was diagnosed with severe autism from a very young age, this was genetic mutation, in our genes which I researched in depth, to fully understand what it is and how it affects someone. I related to a story which was posted by Geogina Chadderton called ‘Family TRAITS growing up with a brother on the autism spectrum’ published on THE NIB. Which opened my eyes on how to try and understand autism and how its like to live with the condition. I created a print in response to my research based on my discoveries about autism and expressed how I felt about the subject, the print I made had many layers with a lot going on, which was made from a previous sketch that I drew when looking into the DNA formula and the microscope images and textures.

I also created a print with layering information I have gathered on this journey, including a timeline my grandad put together for me of all the men in my family, all the way up to 1819, it also had parts of my surname crest (Salthill) and DNA on a screen. I enlarged and decreased the sizing of these prints and put them on a stand, to bring my 2D designs to life and see how it would look on the body. I then traced the unique shape of the print which I had developed, and sewed onto calico to bring the shape to fabric. Another response I made which I liked was a picture of my younger self with a DNA screen over it and which photoshop I edited it to have jus the texture of the picture onto of my image.

Moving on, I repeated the collaging technique I used earlier in the project, with my siblings and mother, to see what my immediate family share. I discovered my mother has dominant genes, due to although me and my brothers have different fathers, I am always being told we look very alike, sharing the same eye shape, hair colour and type. which means my mum holds dominant genes. I then created an illustration with a print I made up of the collages I have made. I then wanted to develop this further by drawing parts of the collaged faces onto tracing paper and overlapped them to combine them, just like my mum and fathers genes were combined to create me. Moving forward I will be developing my favourite parts to the research, and responses I have done so far. I plan to print samples and test of fabric, to start getting an idea of the fabric I will be using to print.

Week 4

After looking at Hannah Hoch, I made a series of collages in response to her style, with different mediums and techniques. Collaging gave me the answers I was looking for, noticing that my great Nanny Dowry on my mums side share similar features to my sister. My great uncles children share the same eye shape with my brother Tye. Looking into my concept, I wanted to expand on my own research and go deeper regarding the research into the traits we share, which my grandad has contributed to massively as I talked him through my project and he gave me in depth information about his side and past, which I wouldn’t of seen, he also created a book for me, including photos, information and facts of my family tree, all the way up until 1879, this tree is on my fathers side as me as my grandad loves exploring our history and knowing what my past family were like, this is something we share, so when we get together, in preparation for this project we have been researching our family for months.

Having photos of my tree really helps me with my progression on this project, I used this research and started to overlay and print my family images on tracing paper to a line the features on people and see who share traits and characteristics. When overlaying pictures of my nan and her sister jean, their features matched up almost perfectly, these similarities also run through my mums genes. I also started to put photos together from my immediate family and history to recognise similarities within my family. Also I have seen a recurrence of names within my family, which I find interesting and also cherish and hope to pass onto the family further.

My two brothers and sister share the same dad, and have a surname combining my mums and their dads = Dowry-Beck. I took my dads surname Salthill, which has a special feel to it, as far as we know me and my grandad are the only people with the name Salthill, therefore, if memory of my father I will carry on this name onto my children and tell the story of my surname. Moving forward I will look into the crest of my surname and combing the meaning with my family photos by manipulation on photoshop.

Week 3

This week I have been looking at Hannah Hoch who influenced me, in particular ‘the technique of photomontage as a form of art’. creating surreal collages with photographs, I saw this as an opportunity to look further into similarities that run in my family, first looking into my fathers side, using imagery of my ancestry up to 1871, with dates and information about the history of our genes and DNA. I collaged these photograph’s with relatives all the way to my generation, responding to Hannah Hoch’s weimar period helped me identify recurring characteristics and features, by collaging photos and visually seeing similarities, which helps me to identify dominant genes and to start noticing traits in generations before me.

Also speaking to my grandparents, uncle, aunties, cousins and siblings I can see personality traits and ways we may do things the same way or even different ways and working out why and what genetics we share. I will continue to research my family, looking into my mothers side and respond to it with using resources from artists, galleries and techniques; stand work, making samples and responses using forms of DNA as inspiration. I plan to spend this week continuing to research and responding more in depth to my discoveries. I have been experimenting with different styles of collaging to test and notice different traits and comparing faces, overlapping, merging and side by side.

Picasso is another artist who influenced my experimentation as the famous ‘weeping women’ painting, looking at the geometric shapes and little parts to the piece, reminded me of a puzzle. I decided to respond to this with cutting up portrait photos of my family, and putting a face together with the features of many different people from my family and ancestry. When I last saw my tutor for a one to one update, I was told I should have more variety of scale in my book, so to improve, with this response I enlarged some of the images and decreased the size of some to make it more abstract, to make it more influenced by Picasso I then went over the collages with oil pastels and using his sharp, strong type of random yet structured drawing with the similarities that were shown linking people in my family together, I wrote down all the similarities, where they link and where they came from. This experimentation is solving my questioning and is helping me discover my genetic information which I will now use these further into my project by creating illustrations and patterns on photoshop to develop my ideas.


http://thecreativehours.com/creative-exercise-hannah-hoch-and-collage/ 

Week 2

I visited the Science museum which was beneficial to my research. ‘Who Am I?’ was a floor in the museum that related to my project as I learnt about DNA, youth development and genes. ‘You are your own family history, your ancestry lives through genes’ this inspired me to trace back into my family ancestry and to analyse what strong genes are still living through my family and what features, characteristics or appearance traits I have inherited and who from. There was an activity that included spinning a ‘genetic dice’ to see the dominance of eye colour (Blue eyes + Brown eyes = Brown eyes) brown eyes is a trait my family carry as mostly we all have brown eyes, my cousin however has blue eyes, which means she must’ve got blue eye gene from her mums side. I responded to this by putting all my family’s eyes in a contact a sheet, comparing and seeing for myself what similarities we share, from looking into all our eyes at the same time I have noticed from my grandads side we all share a small eye shape.  I will now document the initial research I have learnt about traits, and combine it with my own research.

I will also be documenting the initial research about genetic inheritance, genes and DNA. I will be looking at Gregory Mendel and how the discovery of genetics, DNA and inheritance became known. I will then be collaging pictures of members in my family to see who is similar and to identify the genes. I will also print on tracing paper to overlap photos and see what features are similar, and how this shows traits. I will respond to this research with drawings, collages, material experimentation and extraction of shapes, this will help me to have a clear understanding to the start of my project and how I choose to take it further.

I also visited the History museum a part of the museum ‘Human Biology’ taught me more in depth on how DNA affects you and what you take from each parent and how traits can crop up from my ancestry, this inspired me to look on my ancestry, using primary imagery and identifying any traits my family now may share with generations before us all. I took many photos from this museum, I put them into a contact sheet and highlighted the most influential to me, I started to create mark makings from what I saw in the museum, this can help me to create prints and designs from what I find, it is also teaching me to respond to what I like in different ways, for example I took the mark makings I drew from the DNA structure and played with it in photoshop, made a pattern and repeated it. I’m just responding to my research briefly then will further develop my favourite outcomes from all the research I will do over the project.

In the history museum there was a part about familiar faces, telling me the observable human characteristics that can be carried through genes, for example attached/detached earlobes, tongue rolling, freckles, curly/straight hair, dimples and hand clasping. I have been doing little tests with my family to investigate these areas. Moving forward and relating this research to my family I responded to my first mind map and made one suited to my family, defining the traits and characteristics we share, for example, epilepsy, brown eyes, attached earlobes, swimmers shaped body and being muscular are all things that run in my family, however only a few of us have freckles and dimples, so I can identify the dominant genes and the ones that aren’t, or that may come from another side of the family. I can see these characteristics visibly and with help from my older generations telling me information about further into my ancestry. The mind map will help me define the parts to traits I can look further into.